5-Minute Cheesecake
There is something almost magical about a dessert that feels this creamy, rich, and bakery-worthy, yet comes together in just a few minutes. This is the kind of sweet treat you make when you want something impressive without turning the kitchen upside down. The filling is smooth and fluffy, the crumb base brings that buttery little crunch, and every spoonful feels cool, velvety, and completely satisfying. Trust me, you’re going to love this.
Why This Little Dessert Feels So Special
Some recipes earn a regular spot in your kitchen because they are simple. Others stay because they taste like a reward. This one manages to do both, which is exactly why it is such a keeper.
It gives you all the cozy charm of a classic cheesecake, but skips the long bake time, the water bath, and the waiting around. Instead, you get a fast dessert with a soft, creamy center and that familiar sweet tang from cream cheese. It is the sort of recipe that saves the day when you need a last-minute dessert, a quick weekend treat, or a little something sweet after dinner.
And now that the first spoonful has you dreaming about dessert already, let’s dive into the story behind this style of cheesecake and why it has become such a favorite.
The Sweet Story Behind This Quick Cheesecake
Classic cheesecake has deep roots in European baking traditions, and over time it evolved into the rich, creamy dessert so many people know today. Baked versions became especially popular because of their dense, smooth texture and luxurious feel.
This speedy version takes all of that comfort and turns it into something much more weeknight-friendly. It leans into the no-bake style, which became popular for home cooks who wanted the same indulgent flavor without the fuss. That is what makes it so appealing. You still get the creamy filling and buttery base, but in a way that fits real life, especially on busy days when you want dessert now, not hours from now.
And once you see how practical it is, the appeal only grows stronger.
Why You Will Keep Coming Back to This Recipe
This cheesecake is not just delicious, it is reliable in all the best ways. Let me tell you, it’s worth every bite.
Versatile: You can serve it in small jars, ramekins, glasses, or one shared dish. It works for casual evenings, quick family desserts, and even simple dinner parties.
Budget-Friendly: The ingredient list is short and familiar, which means you do not need anything fancy to make something that tastes special.
Quick and Easy: From mixing the filling to pressing in the crust, the whole process is refreshingly straightforward. This one’s a total game-changer when time is tight.
Customizable: A little lemon, extra vanilla, or a fruit topping can change the mood of the dessert without changing the ease of the recipe.
Crowd-Pleasing: Creamy cheesecake flavor is one of those classic comforts that almost everyone gets excited about.
Make-Ahead Friendly: You can prepare it ahead and chill it until you are ready to serve, which makes entertaining feel much easier.
Great for Leftovers: Any extra portions keep well in the fridge, so tomorrow’s dessert is already handled.
Now let’s step into the smart little details that make a quick recipe taste polished and homemade.
My Best Insider Secrets for a Creamy Finish
A recipe this simple really shines when you know a few small tricks. These are the details that help the texture stay silky and the flavor feel balanced.
- Use softened cream cheese so it blends smoothly and does not leave little lumps in the filling.
- Whip the heavy cream until it forms soft peaks, which gives the dessert a light, airy texture instead of a dense one.
- Mix the powdered sugar into the cream cheese before folding in the whipped cream, so everything stays evenly sweet.
- Press the crumb mixture firmly into the bottom of each serving dish, which helps create a neat base that holds together.
- Chill the cheesecake for at least a short time before serving if you can, because even a brief rest helps the texture settle beautifully.
With those little pro moves in your back pocket, the rest feels easy. And now let’s talk about the tools that make the whole process even smoother.
Simple Kitchen Tools That Make It Easy
You do not need a long list of equipment here, which is part of the charm. A few basics are all it takes.
Mixing bowl: You will need one large bowl for the filling and one smaller bowl for the crumb base.
Hand mixer or whisk: A hand mixer makes the filling extra smooth and fluffy, though a sturdy whisk can work if you are determined.
Spatula: This helps fold the whipped cream into the cream cheese mixture gently, so you keep that light texture.
Measuring cups and spoons: Since the recipe is quick, accurate measuring helps everything come together without guesswork.
Small serving glasses or ramekins: These are perfect for layering the crumb base and creamy filling into easy, pretty portions.
And now for the part every good dessert story builds toward, the ingredients.
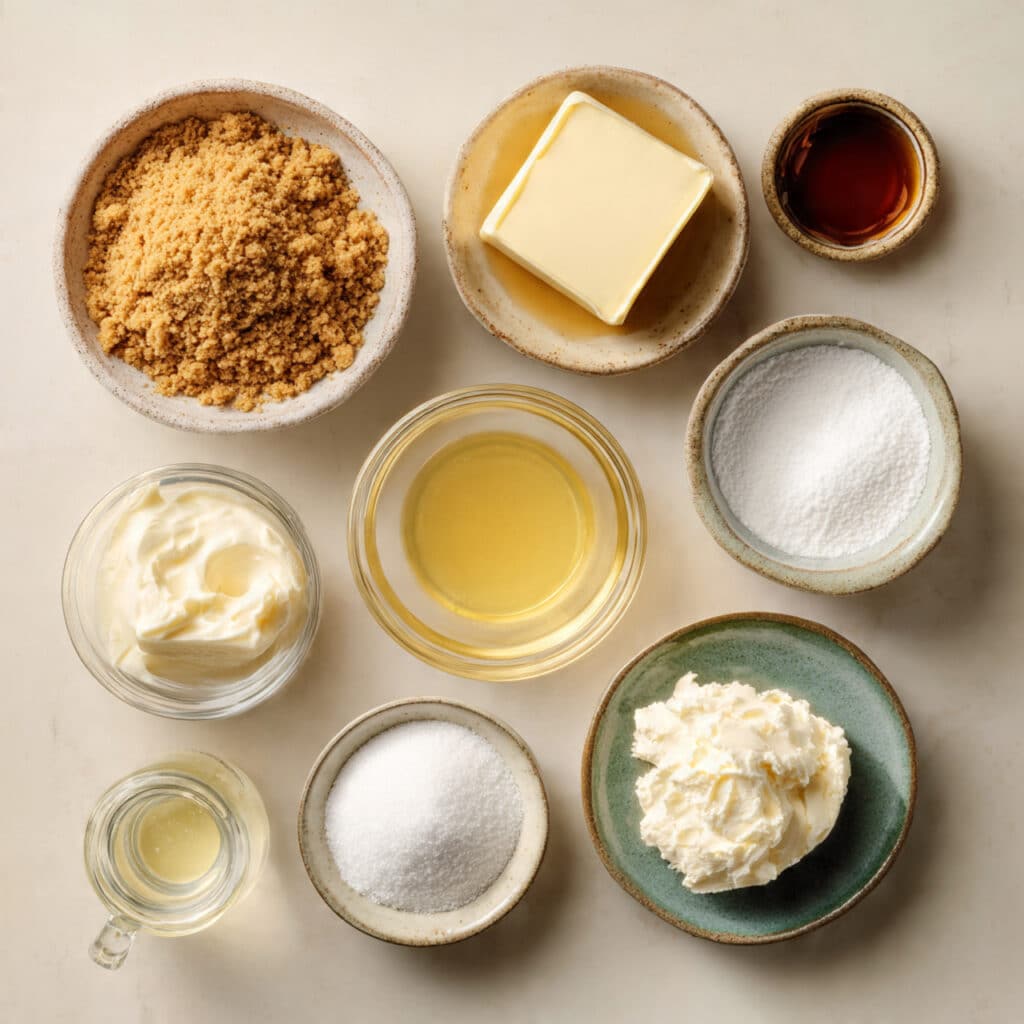
Everything You Need to Build This Creamy Dessert
Each ingredient plays a simple but important role here. Together, they create that rich, balanced bite with creamy filling and buttery crunch.
- Graham cracker crumbs: 1 cup, these create the sweet, toasty base that gives the dessert its classic cheesecake feel.
- Unsalted butter: 4 tablespoons, melted, this binds the crumbs together and adds rich flavor to the crust.
- Cream cheese: 8 ounces, softened, this is the heart of the recipe and gives the filling its signature tangy, velvety body.
- Powdered sugar: 1/3 cup, this sweetens the filling smoothly without any graininess.
- Vanilla extract: 1 teaspoon, this rounds out the flavor and adds warmth to the creamy mixture.
- Heavy cream: 1/2 cup, cold, whipped to soft peaks, this lightens the filling so it feels airy and spoonable.
- Lemon juice: 1 teaspoon, this brightens the flavor and gives the cheesecake a fresh little lift.
Once you know the core ingredients, it is easy to see where you can make little swaps and still keep the dessert delicious.
Easy Swaps That Still Taste Wonderful
Sometimes you work with what is already in the kitchen, and that is completely fine. These substitutions keep the recipe flexible.
Graham cracker crumbs: Crushed digestive biscuits or vanilla cookies.
Unsalted butter: Salted butter, just skip adding any extra salt elsewhere.
Cream cheese: Mascarpone for a softer, slightly richer finish.
Powdered sugar: Finely blended sugar, though powdered sugar gives the smoothest result.
Vanilla extract: Vanilla bean paste for a deeper vanilla flavor.
Heavy cream: Whipping cream, as long as it can hold soft peaks.
Lemon juice: Fresh lime juice for a slightly brighter citrus note.
Now let’s give a little spotlight to the ingredients doing the heaviest lifting in flavor and texture.
The Ingredients That Truly Make It Shine
A few ingredients carry this dessert from simple to unforgettable.
Cream cheese: This is what gives the filling its classic cheesecake personality. It is rich, slightly tangy, and wonderfully smooth, which makes every bite feel full and satisfying.
Heavy cream: This softens the density of the cream cheese and turns the filling fluffy and delicate. It is the reason the texture feels light on the spoon even though the flavor stays rich.
And now let’s dive into the fun part, actually making it.
Let’s Put It All Together
This process is fast, friendly, and wonderfully satisfying. You are basically building layers of comfort, one easy step at a time.
- Preheat Your Equipment: No oven is needed for this recipe, but get your serving glasses, ramekins, or dessert cups ready on the counter so assembly is quick and tidy.
- Combine Ingredients: In a small bowl, stir the graham cracker crumbs and melted butter until the mixture looks like damp sand. In a separate bowl, beat the softened cream cheese, powdered sugar, vanilla extract, and lemon juice until smooth. In another bowl, whip the cold heavy cream to soft peaks, then gently fold it into the cream cheese mixture until light and creamy.
- Prepare Your Cooking Vessel: Spoon the crumb mixture evenly into 4 small serving glasses or ramekins. Press it down lightly with the back of a spoon so the base holds together.
- Assemble the Dish: Divide the cheesecake filling evenly over the crumb base. Smooth the tops with a spoon or spatula for a neat finish.
- Cook to Perfection: Since this is a no-bake dessert, the finishing step is chilling rather than baking. Refrigerate for 5 to 10 minutes if you want a slightly firmer texture, or serve right away for a softer, mousse-like feel.
- Finishing Touches: Wipe the rims of the serving dishes if needed and add a tiny extra sprinkle of graham crumbs on top only right before serving if you like a little visual contrast.
- Serve and Enjoy: Serve chilled with small spoons and enjoy every creamy, buttery bite while the filling is cool and silky.
Once it is assembled, the texture story really starts to shine.
What Makes the Texture and Flavor So Good
This dessert is all about contrast in the nicest way. The base is buttery and lightly crumbly, which gives just enough structure under the soft filling. Then you get that creamy top layer, cool, fluffy, and smooth with a gentle tang from the cream cheese and lemon juice.
The vanilla adds warmth, the sugar keeps everything sweet but not heavy, and the whipped cream brings a soft cloud-like finish. It is rich without feeling too dense, which is exactly what makes it so easy to go back for another bite.
If you want to make it even better, a few extra tricks can help.
Helpful Tricks for the Best Results Every Time
A few thoughtful touches can make this quick dessert feel even more polished.
- Let the cream cheese soften properly before mixing, because cold cream cheese can make the filling lumpy.
- Chill the mixing bowl for the heavy cream if your kitchen is warm, which helps it whip faster and hold better.
- Taste the filling before assembling, then adjust the lemon or vanilla slightly to suit your preference.
- Use clear serving glasses if you want to show off those lovely layers.
Just as helpful is knowing what not to do, because even easy desserts have a few little pitfalls.
Common Cheesecake Slip-Ups and How to Avoid Them
This recipe is simple, but a few mistakes can affect the final texture. The good news is that they are easy to avoid.
- Do not use hot melted butter straight from the microwave, because it can make the crumb mixture greasy. Let it cool slightly first.
- Do not overwhip the cream, because it can turn grainy and make folding harder. Stop at soft peaks.
- Do not skip softening the cream cheese, or the filling may stay uneven instead of silky.
- Do not press the crust too hard, because it can become too compact instead of pleasantly crumbly.
Now that the technique is covered, here are the practical details you might want to save.
A Quick Look at the Nutrition Facts
These numbers are approximate, but they give a helpful idea of what to expect per serving.
Servings: 4
Calories per serving: 320
Note: These are approximate values.
And of course, time matters with a recipe like this.
The Timing You Need to Know
One of the best things about this dessert is right there in the name. It is fast, simple, and refreshingly low effort.
Prep Time: 5 minutes
Cook Time: 0 minutes
Total Time: 5 minutes
And because quick desserts are even better when they fit your schedule, let’s talk storage and planning ahead.
Make-Ahead and Storage Tips That Actually Help
This cheesecake is a great little make-ahead option. You can prepare the cups several hours in advance, cover them, and refrigerate until serving time. The crust softens slightly as it sits, which many people actually love because it blends beautifully with the creamy filling.
For storage, keep leftovers covered in the refrigerator for up to 3 days. The texture stays best when chilled. Freezing is possible, though the filling may lose a little of its lightness once thawed. If you do freeze it, wrap each portion well and thaw overnight in the fridge.
For reheating, none is needed. This dessert is meant to be served cold, straight from the fridge, which makes it even easier.
And once it is ready, serving it can be half the fun.
The Best Ways to Serve It
This cheesecake is lovely on its own, but it also pairs beautifully with simple extras. A few fresh berries on the side add brightness, and a warm coffee next to it makes the whole moment feel a little more special.
You can also serve it in tiny glasses for a dinner party feel, or in slightly larger ramekins when you want a more generous dessert. It works after a cozy pasta dinner, a relaxed family meal, or even as an afternoon sweet treat when you need a little pause in the day.
If you somehow have leftovers, they can still be exciting the next day.
Smart and Delicious Ways to Reinvent Leftovers
A leftover cheesecake cup can easily become something new. Spoon it into a small parfait glass with fruit for a layered dessert, or use it as a filling for crushed cookie parfaits.
You can also spread the creamy filling over toast or pancakes for an indulgent breakfast-style treat. It sounds a little extra, but let me tell you, it is absolutely delicious.
And while we are here, a few more little tips can make the experience even better.
Extra Tips for Flavor, Freshness, and Ease
Keep the heavy cream cold until the last minute so it whips well. Use fresh lemon juice if possible, because it gives the filling a brighter and more natural flavor. If you want a sweeter dessert, add an extra tablespoon of powdered sugar, but start small so the cheesecake keeps its balanced tang.
For easy cleanup, build the dessert right in the serving cups instead of transferring it later. That saves time and keeps the layers looking neat.
And if you want it to look as good as it tastes, a little presentation goes a long way.
How to Make It Look Truly Impressive
Presentation is easy here because the layers do the work for you. Serve the cheesecake in clear glasses so the crumb base and creamy top are visible. Smooth the top carefully with the back of a spoon for a clean finish.
A tiny dusting of graham crumbs right before serving can add a nice bakery-style touch. Keep it simple and neat, because the soft ivory filling and golden crumb layer already look beautiful together.
Once you have mastered the classic version, there are plenty of fun twists to try.
Fun Variations Worth Trying
You can take this quick dessert in a lot of directions without making it any harder.
- Berry Version: Fold a spoonful of berry puree into the filling for a fruity swirl and a pretty blush of color.
- Chocolate Twist: Add a little cocoa powder to the crumb base or fold melted cooled chocolate into the filling for a richer dessert.
- Citrus Bright: Increase the lemon juice slightly and add a bit of lemon zest for a fresher, zingier finish.
- Cookie Crust Swap: Use crushed vanilla cookies or chocolate cookies instead of graham crackers for a different flavor base.
- Mini Jar Dessert: Build the layers in small jars with lids so they are easy to transport and perfect for gatherings.
And before we wrap up, here are answers to the questions people often ask.
FAQ’s
1. Can I make this cheesecake ahead of time?
Yes, absolutely. It holds well in the fridge for several hours, and the flavor gets even better as it chills.
2. Does it really only take 5 minutes?
Yes, the hands-on time is about 5 minutes. A short chill is optional, but the actual prep is very quick.
3. Can I use whipped topping instead of heavy cream?
You can, though the flavor and texture will be a little different. Freshly whipped heavy cream gives the most natural, creamy result.
4. What if I do not have graham crackers?
Crushed digestive biscuits or vanilla cookies work very well as a substitute.
5. Can I make it in one big dish instead of individual cups?
Yes, that works perfectly. Just layer the crust and filling in a small serving dish and scoop it out to serve.
6. How do I know the filling is mixed enough?
It should look smooth, pale, and fluffy with no visible lumps from the cream cheese.
7. Can I freeze it?
Yes, though the texture may become slightly less airy after thawing. It is still very tasty.
8. Is lemon juice necessary?
No, but it really helps brighten the flavor and balance the richness of the cream cheese.
9. Can I add fruit on top?
Yes, fresh berries are especially good here and pair beautifully with the creamy filling.
10. How long will leftovers last?
Stored covered in the refrigerator, they are best enjoyed within 3 days.
Conclusion
This 5-Minute Cheesecake is the kind of dessert that makes life feel easier and sweeter at the same time. It is creamy, quick, and deeply satisfying without asking much from you in return. Whether you serve it for guests or keep it all to yourself for a quiet treat, it delivers that classic cheesecake comfort in the simplest way. Trust me, once you make it, you will want to keep this one close by.
Print
5-Minute Cheesecake
Description
A quick and creamy no-bake cheesecake with a buttery graham cracker base and a light, smooth filling that comes together in minutes.
Ingredients
- 1 cup graham cracker crumbs
- 4 tablespoons unsalted butter, melted
- 8 ounces cream cheese, softened
- 1/3 cup powdered sugar
- 1 teaspoon vanilla extract
- 1/2 cup heavy cream, cold
- 1 teaspoon lemon juice
Instructions
- In a small bowl, mix the graham cracker crumbs and melted butter until evenly combined.
- Divide the crumb mixture among 4 small serving glasses or ramekins and press it down lightly to form the base.
- In a medium bowl, beat the softened cream cheese, powdered sugar, vanilla extract, and lemon juice until smooth.
- In a separate bowl, whip the cold heavy cream to soft peaks.
- Gently fold the whipped cream into the cream cheese mixture until light and creamy.
- Spoon the filling evenly over the crumb base and smooth the tops.
- Serve right away for a soft texture, or chill for 5 to 10 minutes for a slightly firmer finish.
Notes
- Make sure the cream cheese is softened well for the smoothest filling.
- Do not overwhip the heavy cream, stop when soft peaks form.
- You can make these a few hours ahead and keep them chilled until serving.
- Fresh berries can be added at serving time if desired.