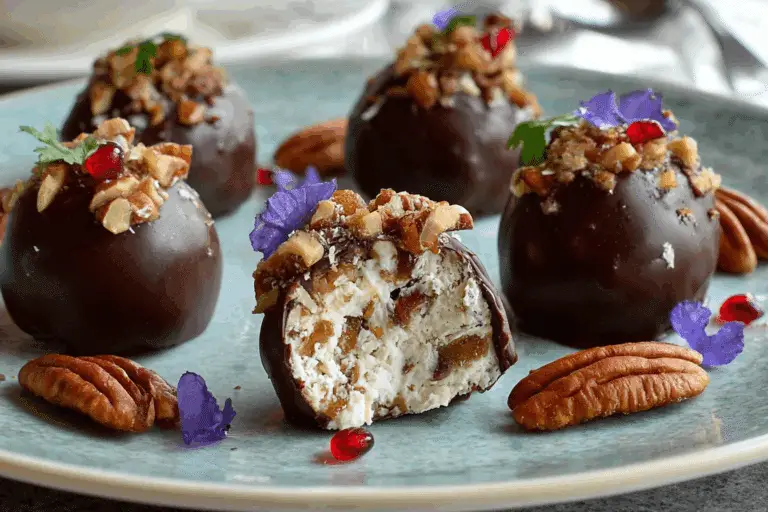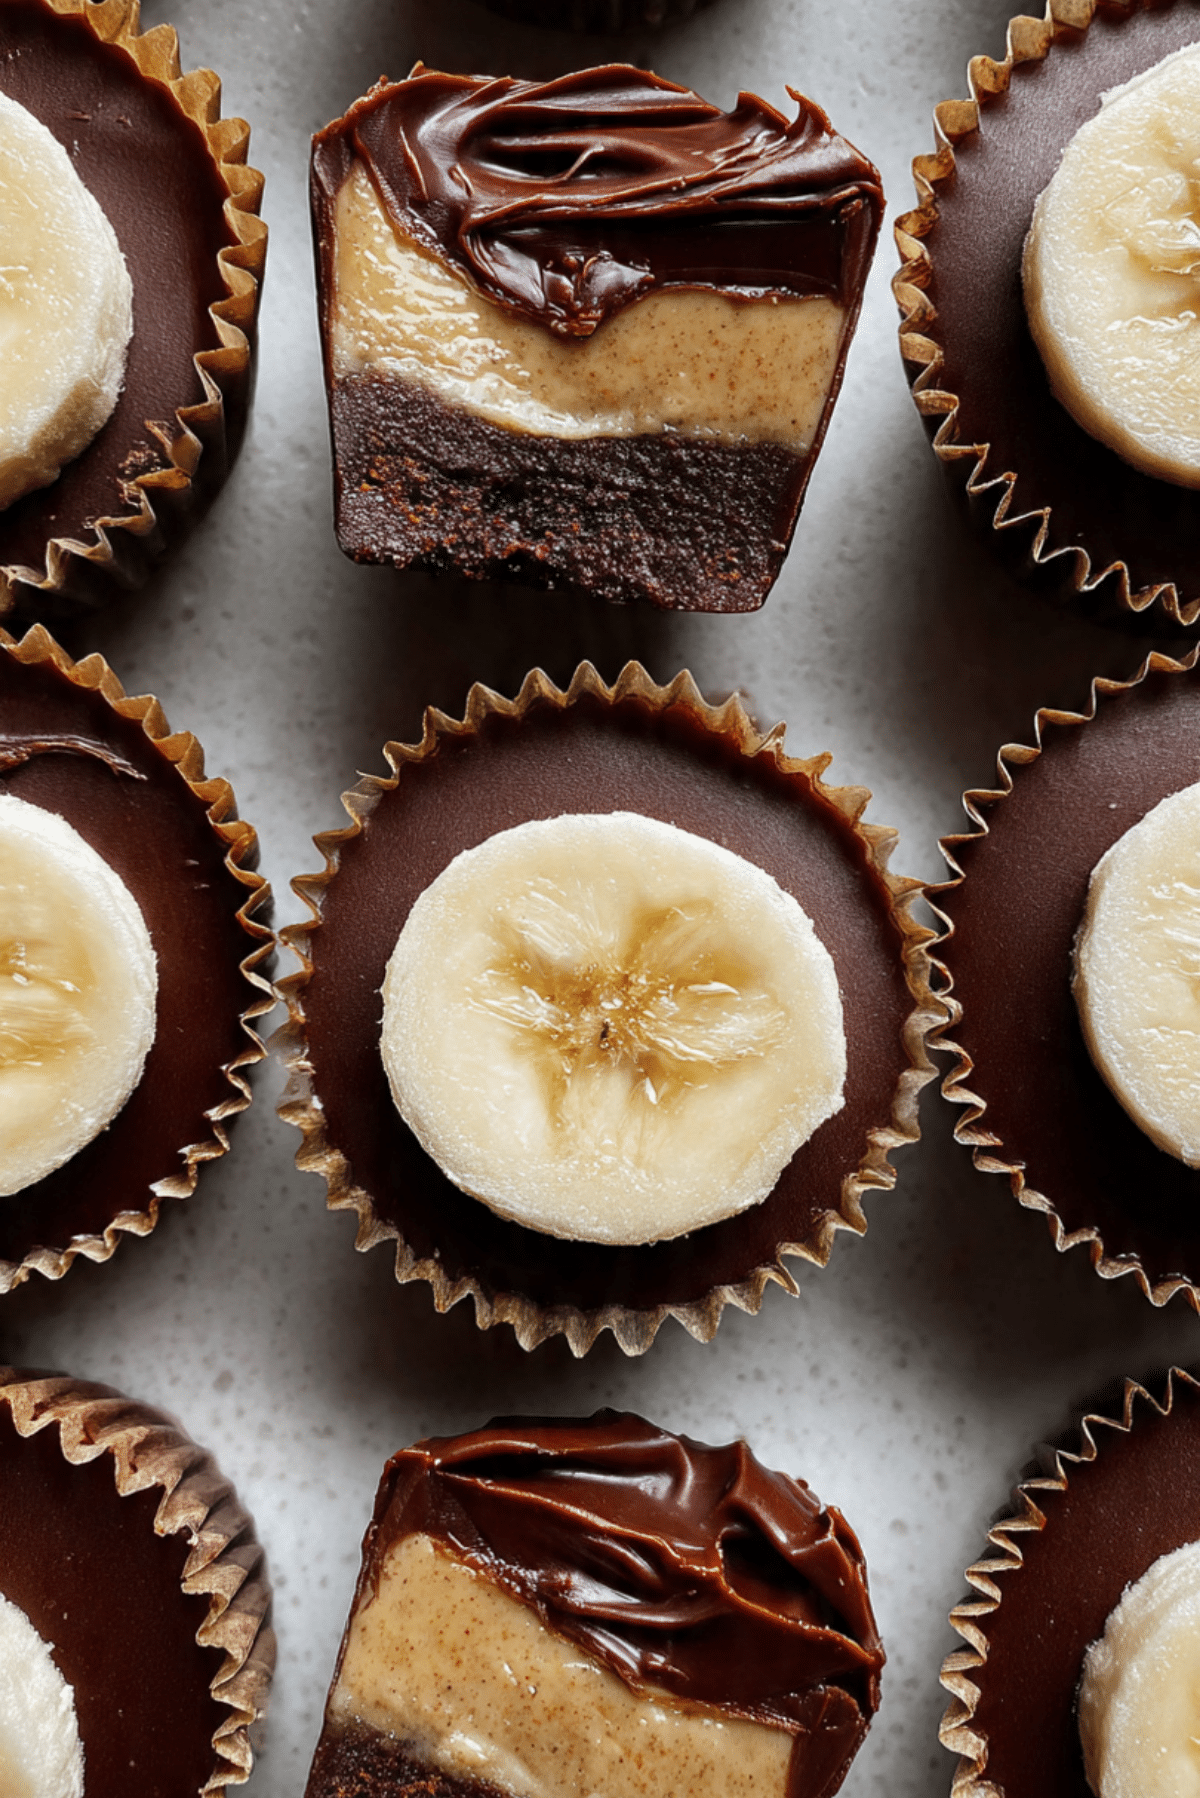
Banana Peanut Cups
Imagine biting into a rich, velvety cup layered with creamy peanut butter, a surprise banana center, and a luscious chocolate top that melts just slightly in your fingers. These banana peanut cups are pure indulgence with a playful twist, combining familiar flavors in a way that feels nostalgic and new all at once. Whether you’re satisfying a sweet tooth or impressing a crowd, these treats deliver.
Behind the Recipe
The inspiration for these came from a half-forgotten craving during a lazy Sunday. I wanted something sweet, something chocolatey, and definitely something with peanut butter. I had some ripe bananas on the counter and remembered how well they go with both peanut butter and chocolate. That’s how these little cups came to life—simple ingredients, no oven required, and the kind of treat you can pop in your mouth for an instant smile.
Recipe Origin or Trivia
This recipe is a riff on the classic peanut butter cup, a treat that first hit the scene in the 1920s. Chocolate and peanut butter have long been a power duo in American sweets. But bananas? That’s a softer, sweeter addition that takes this candy-inspired dessert in a whole new direction. Think of it as the love child of a chocolate banana split and a Reese’s cup—just a little less messy and a lot more portable.
Why You’ll Love Banana Peanut Cups
If you love flavor combos that are creamy, nutty, sweet, and rich, you’re in for a treat. These little cups are loaded with charm and crave-worthy textures.
Versatile: Great for parties, snacks, or a quick dessert fix.
Budget-Friendly: Uses ingredients you probably already have at home.
Quick and Easy: No baking required and minimal mess.
Customizable: You can play with fillings, toppings, or nut butters.
Crowd-Pleasing: Kids love them. Adults ask for the recipe.
Make-Ahead Friendly: They store beautifully in the fridge or freezer.
Great for Leftovers: They don’t last long, but they keep well for days.
Chef’s Pro Tips for Perfect Results
These treats may be easy, but here’s how to make them irresistibly good every time.
- Use ripe bananas: For natural sweetness and a creamy texture.
- Chill between layers: This helps each layer set cleanly and keeps them from blending.
- Use smooth peanut butter: It creates a more uniform base and better bite.
- Melt chocolate slowly: Use low heat or a double boiler to prevent seizing.
- Mini liners work best: They’re the perfect size for snacking and sharing.
Kitchen Tools You’ll Need
Just a few basics and you’re all set to create magic in a cup.
Mini muffin tin: Helps shape perfect bite-sized treats.
Paper liners: For easy release and clean presentation.
Microwave-safe bowls: To melt the peanut butter and chocolate.
Spoon or scoop: For neatly layering the ingredients.
Freezer or fridge: To chill the cups between steps.
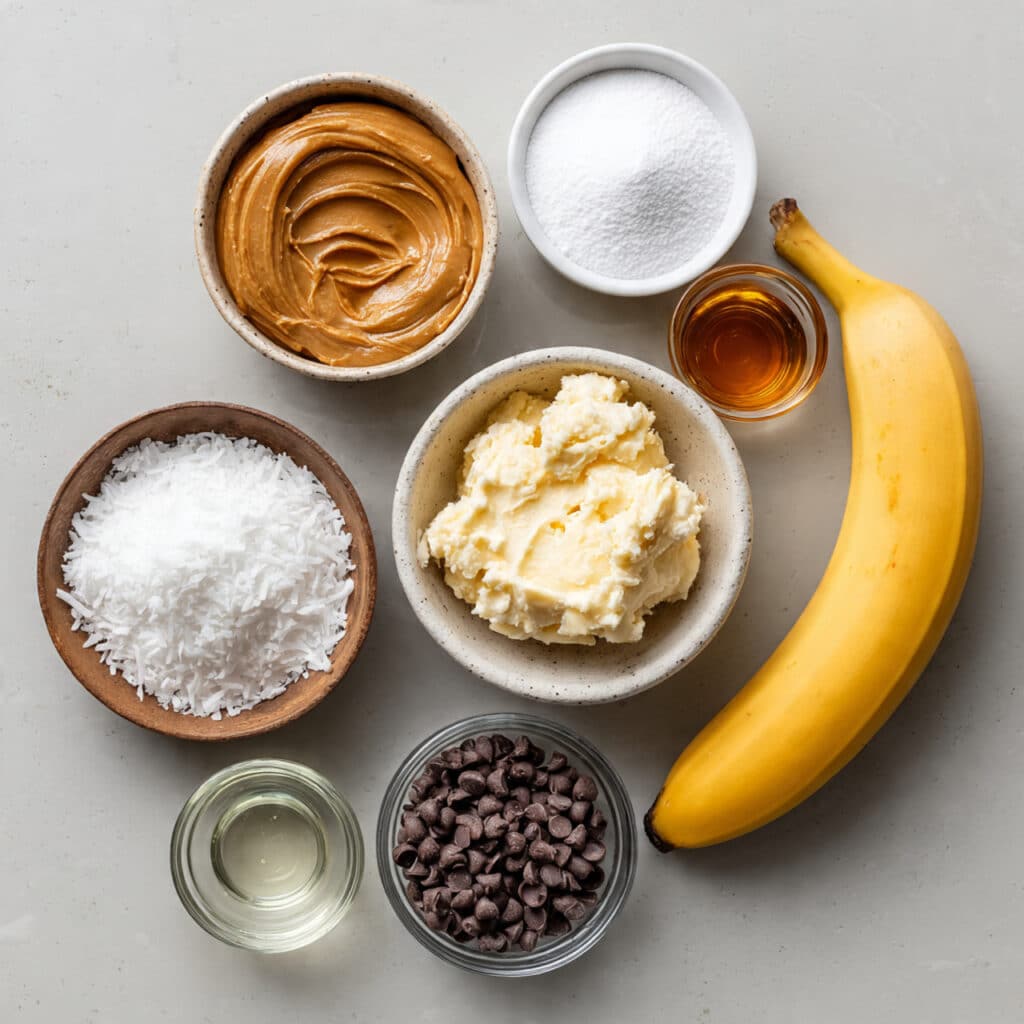
Ingredients in Banana Peanut Cups
These layers come together with pantry staples and a touch of fresh fruit for that extra wow.
- Peanut Butter: ¾ cup. Smooth and creamy, it forms the base and brings the nutty backbone.
- Powdered Sugar: ¼ cup. Sweetens and thickens the peanut butter layer.
- Ripe Banana: 1 medium, mashed. The naturally sweet, creamy center.
- Semisweet Chocolate Chips: 1 cup. Melted and poured on top for that rich chocolate finish.
- Coconut Oil (optional): 1 tablespoon. Helps the chocolate set with a glossy finish.
- Vanilla Extract: ½ teaspoon. Adds warmth and depth to the banana layer.
- Salt: A pinch. Balances the sweetness and enhances flavor.
Ingredient Substitutions
Want to switch it up a bit? No problem. Try these easy swaps.
Peanut Butter: Use almond butter, cashew butter, or sunflower seed butter.
Chocolate Chips: Dark chocolate or milk chocolate both work beautifully.
Powdered Sugar: Maple syrup or honey for a refined sugar-free version.
Coconut Oil: Skip it, or use butter if not dairy-free.
Banana: Mashed avocado or pumpkin puree for a different vibe.
Ingredient Spotlight
Banana: Adds natural sweetness and a soft texture that balances the richness of the peanut butter and chocolate. The flavor gets even better after chilling.
Peanut Butter: Creamy and salty, it’s the base that ties all the flavors together and gives that satisfying, rich bite.
Instructions for Making Banana Peanut Cups
Making these is as fun as eating them. Layer by layer, you’ll see something magical come together.
-
Preheat Your Equipment:
No oven needed, but prepare your mini muffin tin with paper liners and clear space in your fridge or freezer. -
Combine Ingredients:
In a bowl, mix peanut butter, powdered sugar, and a pinch of salt until smooth. In a separate bowl, mash banana with vanilla extract. -
Prepare Your Cooking Vessel:
Spoon about 1 teaspoon of the peanut butter mixture into the bottom of each liner and flatten slightly. Chill for 10 minutes. -
Assemble the Dish:
Add a small spoonful of mashed banana on top of the chilled peanut base. Chill again for another 10 minutes. -
Cook to Perfection:
Melt chocolate chips and coconut oil (if using) together until smooth. Spoon over the banana layer to cover. Tap the tin to level the tops. -
Finishing Touches:
Chill the entire tray for 30 minutes or until fully set. -
Serve and Enjoy:
Peel away the liners and serve chilled or slightly softened at room temperature.
Texture & Flavor Secrets
You’ve got creamy peanut butter, sweet banana, and rich chocolate—all in one bite. The peanut layer is dense and nutty. The banana center is soft and naturally sweet. The chocolate top adds a firm snap and melt-in-your-mouth finish. Together, they create a satisfying contrast of textures and flavors that’s downright addictive.
Cooking Tips & Tricks
- Chill each layer before adding the next for clean lines.
- Use silicone liners for easy removal and no sticking.
- Sprinkle sea salt on top of the chocolate layer for a fancy touch.
- Try freezing for a firmer, ice-cream-bar-like texture.
What to Avoid
Keep these no-nos in mind for cup-making success.
- Using under-ripe bananas: They’re too firm and not sweet enough.
- Skipping the chill time: Layers will blur and get messy.
- Overfilling the liners: Makes them hard to eat in one bite.
- Burning the chocolate: Always melt slowly to avoid seizing.
Nutrition Facts
Servings: 12 cups
Calories per serving: 180
Note: These are approximate values.
Preparation Time
Prep Time: 15 minutes
Cook Time: 0 minutes
Total Time: 45 minutes (including chill time)
Make-Ahead and Storage Tips
These banana peanut cups are perfect for making ahead. Store them in the fridge in an airtight container for up to 5 days. For longer storage, freeze them—just let them sit at room temperature for a few minutes before eating. They hold their shape well and taste just as amazing chilled or slightly thawed.
How to Serve Banana Peanut Cups
Serve them straight from the fridge for a firmer bite, or let them soften slightly for a meltier experience. Add them to dessert platters, lunch boxes, or wrap them up as gifts. They’re also great with a hot cup of coffee or a tall glass of cold milk.
Creative Leftover Transformations
If you’ve got a few left and want to play around:
- Chop and mix into ice cream or frozen yogurt.
- Crumble over pancakes or waffles.
- Blend into a milkshake for a decadent twist.
Additional Tips
- Line your muffin tin first to save time.
- Stir a dash of cinnamon into the banana for warmth.
- Make a double batch—these go fast!
Make It a Showstopper
Presentation counts. Arrange them in a rustic basket with parchment paper, or stack them on a cake stand. Add a drizzle of melted chocolate or a sprinkle of chopped peanuts on top before chilling for extra flair.
Variations to Try
- Nut-Free Version: Use sunflower seed butter or oat butter.
- Chocolate Banana Swirl: Add cocoa powder to the banana layer.
- Chunky Style: Mix chopped peanuts or chocolate chips into the peanut base.
- Fruit Fusion: Swap banana for raspberry or strawberry puree.
- Spicy Kick: Add a pinch of cayenne to the chocolate layer.
FAQ’s
Q1: Can I use chunky peanut butter?
A1: Yes, it adds extra texture, but smooth gives cleaner layers.
Q2: Do these have to be refrigerated?
A2: Yes, especially because of the fresh banana layer.
Q3: Can I use silicone molds instead of paper liners?
A3: Absolutely, and they make removal even easier.
Q4: How long do they last in the fridge?
A4: Up to 5 days in an airtight container.
Q5: Can I freeze them?
A5: Yes, for up to 2 months. Just thaw slightly before eating.
Q6: What if I don’t have coconut oil?
A6: Just melt the chocolate slowly without it, or use butter.
Q7: Can I make them in a regular muffin tin?
A7: Yes, just adjust layer amounts and chill time accordingly.
Q8: Can I use honey instead of sugar?
A8: Yes, but mix it well to avoid a runny peanut base.
Q9: What’s the best way to mash the banana?
A9: Use a fork or potato masher for a creamy consistency.
Q10: Can kids help make this recipe?
A10: Definitely! It’s a fun, safe, no-bake project for little hands.
Conclusion
Banana peanut cups are one of those treats that hit all the right notes—sweet, salty, creamy, crunchy, and chocolatey. They’re easy to make, wildly delicious, and fun to eat. Whether you’re making them for yourself, your kids, or your guests, these little cups bring big joy. Trust me, they won’t last long once they hit the table.
Print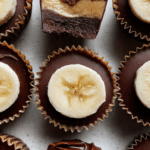
Banana Peanut Cups
Description
Creamy banana peanut cups topped with rich chocolate, made with simple ingredients and no baking required. A fun and flavorful no-bake treat that’s as easy to make as it is to eat.
Ingredients
- ¾ cup smooth peanut butter
- ¼ cup powdered sugar
- 1 ripe banana, mashed
- 1 cup semisweet chocolate chips
- 1 tablespoon coconut oil (optional)
- ½ teaspoon vanilla extract
- Pinch of salt
Instructions
- Line a mini muffin tin with paper liners and clear space in the fridge or freezer.
- In a bowl, mix peanut butter, powdered sugar, and salt until smooth.
- In a separate bowl, mash the banana and mix with vanilla extract.
- Spoon 1 teaspoon of peanut butter mixture into each liner and press down. Chill for 10 minutes.
- Add a small spoonful of banana mixture on top. Chill again for 10 minutes.
- Melt chocolate chips with coconut oil (if using) until smooth. Spoon over each cup to cover completely.
- Tap tin gently to level chocolate, then chill for 30 minutes or until fully set.
- Peel off liners and serve chilled or slightly softened.
Notes
- Use ripe bananas for best flavor and texture.
- Chill between each layer for clean, distinct layers.
- Add a pinch of sea salt on top for extra flair.
- Store in fridge or freezer depending on desired texture.