Cheese Danish Delight Recipe
Imagine biting into a buttery, flaky pastry with a rich, velvety cheese filling that melts in your mouth—this is what awaits you with the Cheese Danish Delight. From the golden crust to the slightly tangy cream cheese center, every bite is a blend of comfort and indulgence. Whether served warm for brunch or as a sweet afternoon treat with coffee, this homemade danish will steal the spotlight. Let me tell you, it’s worth every bite.
Behind the Recipe
I’ve always had a soft spot for pastries, especially ones that balance richness with a delicate flake. This Cheese Danish Delight was born from Sunday mornings spent in the kitchen, channeling my inner baker. The aroma of puff pastry browning in the oven, mingled with the scent of vanilla and cream cheese, became a family favorite ritual. It’s that kind of nostalgic, cozy recipe you’ll want to revisit again and again.
Recipe Origin or Trivia
Cheese Danishes trace their origins to Austrian bakers who brought their pastry expertise to Denmark in the 19th century. While they’re often associated with Denmark, the layered dough and sweet cheese filling are a nod to Viennese baking traditions. In the U.S., they’ve become a staple in bakeries and brunch menus, evolving into endless variations. This version stays close to the classic while making it totally doable at home.
Why You’ll Love Cheese Danish Delight Recipe
Before we roll up our sleeves, here’s why this pastry is bound to win you over:
Versatile: Serve as a breakfast treat, dessert, or anytime indulgence.
Budget-Friendly: Uses simple, everyday ingredients with luxurious results.
Quick and Easy: Especially if you use store-bought puff pastry.
Customizable: Add fruit toppings or different fillings to make it yours.
Crowd-Pleasing: Always a hit at brunch tables and potlucks.
Make-Ahead Friendly: Prep the filling and dough in advance.
Great for Leftovers: Reheats beautifully in the oven or toaster oven.
Chef’s Pro Tips for Perfect Results
Want that bakery-style danish at home? These tips will help:
- Let your cream cheese come to room temperature for a smoother filling.
- Score a smaller rectangle inside the pastry to create a perfect border.
- Chill your assembled pastries before baking for a flakier crust.
- Brush edges with egg wash for a deep golden shine.
- Use parchment paper to prevent sticking and easier cleanup.
Kitchen Tools You’ll Need
To bring your cheese danish to life, you’ll need just a few essentials:
Mixing Bowl: For whipping up the creamy filling.
Electric Mixer: Makes the filling silky smooth in seconds.
Rolling Pin: Helps flatten and shape the puff pastry if needed.
Baking Sheet: A sturdy tray for even baking.
Parchment Paper: Keeps the bottoms crisp and cleanup easy.
Pastry Brush: For applying that beautiful egg wash.
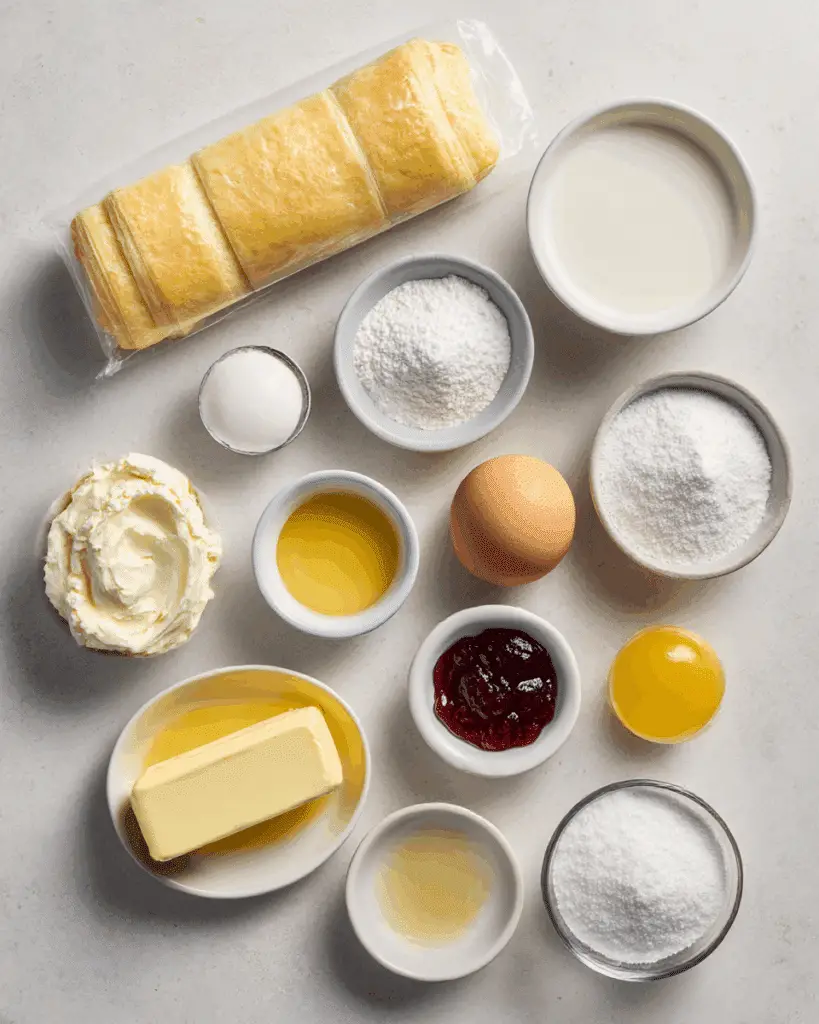
Ingredients in Cheese Danish Delight Recipe
Each component plays a key role in creating that signature danish experience.
- Puff Pastry Sheets: 2 sheets (thawed). Provide the flaky, buttery layers essential for the danish base.
- Cream Cheese: 225g (1 block, softened). Forms the luscious, tangy filling.
- Granulated Sugar: 80g. Adds sweetness to balance the tang of the cheese.
- Vanilla Extract: 1 tsp. Enhances the overall flavor with warm, aromatic notes.
- Lemon Juice: 1 tbsp. Brightens and lifts the cream cheese filling.
- Egg Yolk: 1 (for filling). Adds richness and stability to the cheese mixture.
- Egg: 1 (for egg wash). Gives the pastry a shiny, golden finish.
- Powdered Sugar: Optional, for dusting. Adds a sweet finishing touch.
Ingredient Substitutions
Need a swap? Here are some tried-and-true alternatives:
Puff Pastry Sheets: Crescent dough can work in a pinch, but texture will differ.
Cream Cheese: Mascarpone offers a richer, more delicate flavor.
Granulated Sugar: Use honey or maple syrup for a natural sweetener.
Vanilla Extract: Almond extract gives a different but delicious twist.
Lemon Juice: Try orange zest for a sweeter citrus note.
Ingredient Spotlight
Cream Cheese: This silky, slightly tangy cheese makes the filling decadent without overpowering the delicate pastry.
Puff Pastry: Layers upon layers of buttery goodness that bake into a crisp, airy shell—key to that bakery-fresh bite.
Instructions for Making Cheese Danish Delight Recipe
Now let’s roll, fill, and bake this sweet little masterpiece together:
-
Preheat Your Equipment:
Preheat your oven to 400°F (200°C). Line a baking sheet with parchment paper. -
Combine Ingredients:
In a mixing bowl, beat the cream cheese, sugar, vanilla extract, lemon juice, and egg yolk until smooth and creamy. -
Prepare Your Cooking Vessel:
Lay out the puff pastry sheets on a lightly floured surface. Cut each sheet into 4 rectangles. Transfer to the lined baking sheet. -
Assemble the Dish:
Score a smaller rectangle inside each pastry (without cutting through) to create a border. Fill the center with 1–2 tablespoons of cheese mixture. Beat the remaining egg and brush edges of each pastry. -
Cook to Perfection:
Bake for 15–18 minutes, or until the pastries are puffed and golden brown. -
Finishing Touches:
Let cool for 5–10 minutes, then dust with powdered sugar if desired. -
Serve and Enjoy:
Best served slightly warm. Pair with coffee or tea for a cozy treat.
Texture & Flavor Secrets
The contrast here is key: crisp, buttery layers of puff pastry give way to a creamy, tangy center. The lemon brightens, the vanilla rounds out the richness, and the sugar adds just the right hint of indulgence. It’s flaky, creamy, and perfectly balanced.
Cooking Tips & Tricks
Let’s make it foolproof:
- Chill the filled danishes for 10 minutes before baking to maintain shape.
- Don’t overfill—too much can cause leaking.
- Use a pastry ring or spoon to re-indent the filling area before baking if needed.
- Sprinkle with crushed nuts or fruit preserves before baking for variety.
What to Avoid
Avoid these common baking blunders:
- Overbaking: Leads to dry, overly crisp pastries.
- Underbaking: Results in soggy bottoms.
- Overworking the pastry: Causes it to lose its flakiness.
- Filling while frozen: Always thaw puff pastry completely before shaping.
Nutrition Facts
Servings: 8
Calories per serving: 310
Note: These are approximate values.
Preparation Time
Prep Time: 20 minutes
Cook Time: 18 minutes
Total Time: 38 minutes
Make-Ahead and Storage Tips
You can prep the filling and cut the pastry the day before. Store filled but unbaked danishes in the fridge, covered with plastic wrap. Once baked, they’re best eaten within 1–2 days. To reheat, pop them in a 300°F oven for 5–7 minutes. You can also freeze baked danishes and reheat as needed.
How to Serve Cheese Danish Delight Recipe
Serve them warm with a fresh dusting of powdered sugar and maybe a dollop of fruit preserves. They pair beautifully with coffee, tea, or even a fresh fruit salad for brunch.
Creative Leftover Transformations
Turn extra danishes into delightful new treats:
- Cube and layer with fruit and yogurt for a dessert parfait.
- Crumble into a trifle with whipped cream and berries.
- Toast and top with cinnamon-sugar for a twist on cinnamon toast.
Additional Tips
Keep these final touches in mind:
- Add a dollop of jam or compote before baking for added flavor.
- Store in an airtight container to maintain crispness.
- Use full-fat cream cheese for best texture and richness.
Make It a Showstopper
Want bakery vibes? Try this:
- Score decorative patterns around the edge.
- Use a piping bag for perfect filling placement.
- Garnish with fresh berries and mint before serving for a gourmet finish.
Variations to Try
Feel like experimenting? Try these:
- Berry Swirl: Add a spoonful of raspberry or blueberry jam on top of the filling.
- Cinnamon Sugar: Sprinkle cinnamon-sugar over the egg wash for a sweet crust.
- Nut Lover’s: Top with slivered almonds or crushed pistachios.
- Citrus Burst: Add orange zest to the cheese filling.
- Savory Twist: Skip the sugar and add herbs and garlic to the cheese for a savory version.
FAQ’s
Q1. Can I use homemade puff pastry?
A1. Absolutely! It’ll take longer, but the flavor and flakiness are unbeatable.
Q2. Can I freeze Cheese Danishes?
A2. Yes, bake them first, then cool and freeze. Reheat in the oven before serving.
Q3. How long do these last?
A3. Best eaten within 2 days, but can be stored in the fridge up to 4 days.
Q4. Can I make them ahead of time?
A4. Yes, assemble and refrigerate overnight, then bake fresh in the morning.
Q5. Why is my pastry not rising?
A5. It may have thawed too much or been rolled too thin. Keep it cold before baking.
Q6. Can I add fruit on top?
A6. Definitely—blueberries, strawberries, or peach slices are great options.
Q7. What type of cream cheese should I use?
A7. Full-fat blocks work best. Avoid whipped or spreadable versions.
Q8. Can I skip the egg wash?
A8. You can, but the pastries won’t have the same golden sheen.
Q9. How do I make them extra flaky?
A9. Chill the assembled danishes before baking and avoid overhandling the pastry.
Q10. Can I double the recipe?
A10. Yes! Just use two baking sheets and rotate them halfway through baking.
Conclusion
Cheese Danish Delight is one of those magical recipes that looks fancy, tastes divine, and yet is surprisingly easy to make. From flaky pastry to creamy filling, it hits all the right notes. Trust me, you’re going to love this—your only regret will be not making a double batch.
Print
Cheese Danish Delight Recipe
- Total Time: 38 minutes
- Yield: 8 danishes
- Diet: Vegetarian
Description
A flaky, buttery puff pastry filled with smooth, sweetened cream cheese and baked to golden perfection—this Cheese Danish Delight is the ultimate homemade pastry treat.
Ingredients
- Puff Pastry Sheets: 2 sheets (thawed) – Provide the flaky, buttery layers essential for the danish base.
- Cream Cheese: 225g (1 block, softened) – Forms the luscious, tangy filling.
- Granulated Sugar: 80g – Adds sweetness to balance the tang of the cheese.
- Vanilla Extract: 1 tsp – Enhances the overall flavor with warm, aromatic notes.
- Lemon Juice: 1 tbsp – Brightens and lifts the cream cheese filling.
- Egg Yolk: 1 – Adds richness and stability to the cheese mixture.
- Egg: 1 – Gives the pastry a shiny, golden finish.
- Powdered Sugar: Optional, for dusting – Adds a sweet finishing touch.
Instructions
- Preheat Your Equipment: Preheat your oven to 400°F (200°C). Line a baking sheet with parchment paper.
- Combine Ingredients: In a mixing bowl, beat the cream cheese, sugar, vanilla extract, lemon juice, and egg yolk until smooth and creamy.
- Prepare Your Cooking Vessel: Lay out the puff pastry sheets on a lightly floured surface. Cut each sheet into 4 rectangles. Transfer to the lined baking sheet.
- Assemble the Dish: Score a smaller rectangle inside each pastry (without cutting through) to create a border. Fill the center with 1–2 tablespoons of cheese mixture. Beat the remaining egg and brush edges of each pastry.
- Cook to Perfection: Bake for 15–18 minutes, or until the pastries are puffed and golden brown.
- Finishing Touches: Let cool for 5–10 minutes, then dust with powdered sugar if desired.
- Serve and Enjoy: Best served slightly warm. Pair with coffee or tea for a cozy treat.
Notes
- Chill before baking: Helps keep the pastry shape and maximizes flakiness.
- Don’t overfill: Prevents leaking during baking.
- Try fruit toppings: Add jam or fresh berries for extra flavor.
- Store airtight: Keeps pastries crisp and fresh longer.
- Prep Time: 20 minutes
- Cook Time: 18 minutes
- Category: Pastry
- Method: Baking
- Cuisine: Danish
Nutrition
- Serving Size: 1 danish
- Calories: 310
- Sugar: 9g
- Sodium: 210mg
- Fat: 20g
- Saturated Fat: 12g
- Unsaturated Fat: 8g
- Trans Fat: 0g
- Carbohydrates: 28g
- Fiber: 1g
- Protein: 4g
- Cholesterol: 45mg