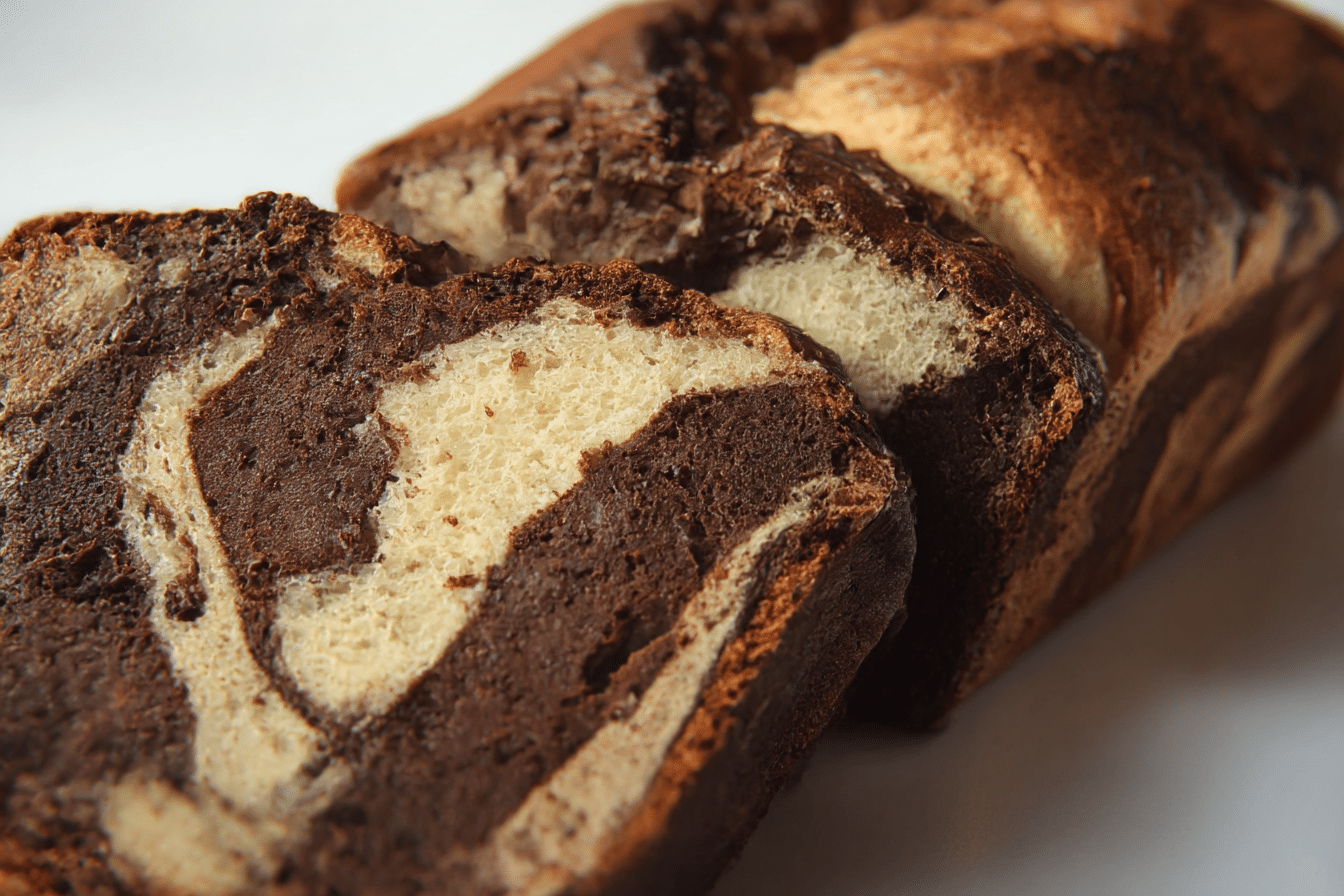
Chocolate Marble Bread
There’s a special kind of joy in slicing into a loaf of Chocolate Marble Bread. The moment your knife glides through the golden crust and reveals those mesmerizing swirls of vanilla and chocolate, it feels like opening a gift. Soft, moist, and beautifully balanced, this loaf is as delightful to eat as it is to look at. Whether you serve it for breakfast, brunch, or an indulgent afternoon snack, this recipe brings a touch of elegance to everyday baking.
Behind the Recipe
It all started with a craving for something sweet that wasn’t too fussy. I wanted a bake that looked fancy, tasted rich, but didn’t require a mixer or mountains of ingredients. The result? A chocolate marble bread that’s simple in method but big on charm. That first loaf—warm from the oven, sliced into with eager hands—was gone before the day was over. And just like that, a new favorite was born.
Recipe Origin or Trivia
Marble cakes have been gracing tables for centuries, with roots traced back to 19th-century Germany. Traditionally made by combining light and dark batters, these cakes symbolize harmony and contrast. This version takes that classic inspiration and transforms it into a loaf that’s perfect for everyday enjoyment. The marbled effect not only creates visual drama, but it also offers the best of both worlds—rich cocoa and smooth vanilla in every bite.
Why You’ll Love Chocolate Marble Bread
This isn’t just another loaf cake. It’s a little slice of joy that checks every box.
Versatile: Enjoy it for breakfast, dessert, or a mid-day treat.
Budget-Friendly: Simple ingredients you likely have at home.
Quick and Easy: No fancy tools required, just mix, swirl, and bake.
Customizable: Add nuts, espresso powder, or even a glaze.
Crowd-Pleasing: Always a hit at brunches and potlucks.
Make-Ahead Friendly: Stays moist and flavorful for days.
Great for Leftovers: Delicious toasted or topped with nut butter.
Chef’s Pro Tips for Perfect Results
To get those dramatic swirls and a tender crumb, follow these tried-and-true tips.
- Use room temperature ingredients for a smooth, even batter.
- Don’t overmix once the flour is added to keep the loaf tender.
- Use good quality cocoa powder for deep chocolate flavor.
- Alternate spoonfuls of batter to create natural marbling.
- Use a knife or skewer gently to swirl without blending too much.
Kitchen Tools You’ll Need
No stand mixer needed here—just your trusty basics.
Loaf Pan (9×5): Ensures even baking and a tall rise.
Mixing Bowls: For separating the chocolate and vanilla batters.
Whisk and Spatula: Essential for smooth mixing and gentle folding.
Measuring Cups and Spoons: Accuracy makes all the difference.
Butter Knife or Skewer: For creating those gorgeous swirls.
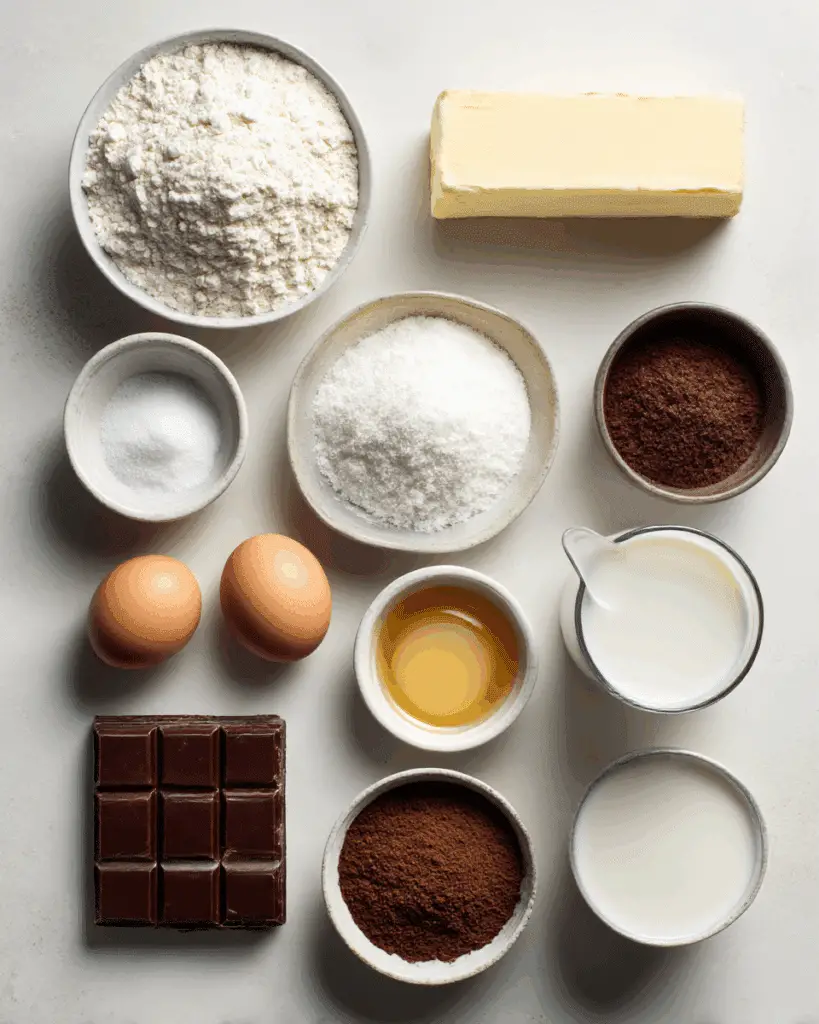
Ingredients in Chocolate Marble Bread
Every ingredient plays its part to create the perfect texture and flavor harmony.
All-Purpose Flour: 2 cups. Forms the soft and sturdy base.
Granulated Sugar: 3/4 cup. Adds sweetness and caramelizes the crust.
Baking Powder: 2 teaspoons. Gives lift and structure.
Salt: 1/2 teaspoon. Balances the sweetness.
Eggs: 2 large. Bind the batter and add richness.
Whole Milk: 1 cup. Keeps the loaf tender and moist.
Vegetable Oil: 1/2 cup. Adds moisture without heaviness.
Vanilla Extract: 1 tablespoon. Adds aroma and smooth flavor.
Unsweetened Cocoa Powder: 1/3 cup. Deep, chocolatey flavor for the swirl.
Boiling Water: 2 tablespoons. Loosens cocoa for smoother mixing.
Ingredient Substitutions
Make it your own with these easy swaps.
Whole Milk: Use almond, oat, or soy milk for a dairy-free version.
Vegetable Oil: Try melted coconut oil or light olive oil.
All-Purpose Flour: Substitute with whole wheat pastry flour for added fiber.
Granulated Sugar: Use coconut sugar for a more caramel-like sweetness.
Eggs: Replace with flax eggs for a vegan-friendly option.
Ingredient Spotlight
Cocoa Powder: Unsweetened and deeply flavorful, it brings rich chocolate depth and beautiful contrast.
Vanilla Extract: More than a background note—it rounds out the sweetness and enhances every bite.
Instructions for Making Chocolate Marble Bread
This part is where the magic unfolds. Let’s swirl things up, shall we?
-
Preheat Your Equipment:
Preheat oven to 350°F (175°C) and grease a 9×5-inch loaf pan. Line with parchment paper for easy removal. -
Combine Ingredients:
In a large bowl, whisk together flour, sugar, baking powder, and salt. In a separate bowl, whisk eggs, milk, oil, and vanilla until smooth. Add wet ingredients to dry and mix until just combined. -
Prepare Your Cooking Vessel:
Pour half of the batter into another bowl. Stir cocoa powder and boiling water into one half to make the chocolate batter. -
Assemble the Dish:
Alternate spoonfuls of vanilla and chocolate batter into the prepared pan. Use a butter knife to gently swirl the batters together in a figure-eight motion. -
Cook to Perfection:
Bake for 50–60 minutes until a toothpick inserted in the center comes out clean. -
Finishing Touches:
Cool in the pan for 10 minutes, then transfer to a wire rack to cool completely. -
Serve and Enjoy:
Slice and serve plain, toasted, or topped with butter, jam, or chocolate spread.
Texture & Flavor Secrets
This bread walks the line between cake and loaf—soft and moist with just the right density. The vanilla layers are tender and buttery, while the chocolate ribbons deliver a rich, fudgy bite. Together, they create a sensory contrast that keeps you reaching for another slice.
Cooking Tips & Tricks
Maximize flavor and presentation with these easy tips.
- Use room-temperature eggs for better emulsion.
- Sift cocoa powder to prevent lumps in the chocolate batter.
- Let it cool completely before slicing for clean swirls and less crumbling.
What to Avoid
Avoid these pitfalls to ensure a flawless loaf.
- Overmixing the batter. It can lead to dense or dry bread.
- Over-swirl the batters. Too much blending will muddy the marble effect.
- Removing from pan too soon. Let it cool to avoid breakage.
Nutrition Facts
Servings: 10
Calories per serving: 280
Note: These are approximate values.
Preparation Time
Prep Time: 15 minutes
Cook Time: 55 minutes
Total Time: 1 hour 10 minutes
Make-Ahead and Storage Tips
This loaf keeps wonderfully. Wrap tightly in plastic wrap and store at room temperature for up to 3 days or refrigerate for up to a week. To freeze, wrap in foil and freeze slices for up to 2 months. Reheat gently in a toaster or microwave.
How to Serve Chocolate Marble Bread
Serve warm with butter for breakfast or with a dollop of whipped cream for dessert. It pairs beautifully with coffee, tea, or even a tall glass of cold milk. Dress it up with a drizzle of chocolate ganache or dusting of powdered sugar.
Creative Leftover Transformations
Turn extra slices into something new and delicious.
- Toast and slather with almond butter.
- Use in bread pudding for a chocolatey twist.
- Layer with yogurt and berries in a breakfast parfait.
Additional Tips
- Sprinkle chocolate chips over the top before baking for extra indulgence.
- Add a touch of espresso powder to deepen the chocolate notes.
- Let the loaf sit overnight—flavors develop beautifully by the next day.
Make It a Showstopper
Presentation is everything. Slice cleanly and fan pieces on a serving tray. Add a light glaze or dusting of powdered sugar for a bakery-worthy finish. Garnish with fresh berries or edible flowers for color.
Variations to Try
- Chocolate Orange: Add orange zest to the vanilla batter.
- Nutty Swirl: Mix chopped walnuts or pecans into the chocolate batter.
- Coconut Marble: Replace some milk with coconut milk and top with shredded coconut.
- Mocha Marble: Add espresso powder to the chocolate batter.
- Glazed Delight: Top with vanilla or chocolate glaze for a bakery finish.
FAQ’s
Q1: Can I make this without eggs?
Yes, use flax eggs or a commercial egg replacer.
Q2: Is this recipe dairy-free?
Yes, if you use a plant-based milk.
Q3: Can I add chocolate chips?
Absolutely! Fold them into the chocolate batter or sprinkle on top.
Q4: How do I store leftovers?
Wrap tightly and store at room temperature or refrigerate.
Q5: Can I use butter instead of oil?
Yes, melted butter works beautifully for a richer loaf.
Q6: Can I double the recipe?
Yes, for two loaves—but bake in separate pans.
Q7: Can I make muffins instead?
Yes! Adjust baking time to 18–22 minutes for muffins.
Q8: What if I don’t have cocoa powder?
You can use melted dark chocolate, but reduce the liquid slightly.
Q9: Why is my bread dry?
It may have been overbaked or the batter overmixed.
Q10: Can I freeze it?
Yes! Wrap slices in foil and freeze for up to 2 months.
Conclusion
Chocolate Marble Bread is the kind of recipe that feels both homey and impressive. It’s simple enough to whip up on a whim, yet elegant enough to serve with pride. With its hypnotic swirls, balanced flavors, and soft crumb, this loaf is sure to earn a regular spot in your baking rotation. One slice and you’ll see—it’s worth every bite.
Print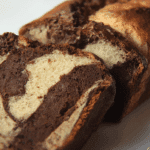
Chocolate Marble Bread
- Total Time: 1 hour 10 minutes
- Yield: 10 slices
- Diet: Vegetarian
Description
A moist and elegant loaf swirled with rich chocolate and buttery vanilla, this Chocolate Marble Bread is a visual and flavorful delight perfect for any occasion.
Ingredients
- All-Purpose Flour: 2 cups
- Granulated Sugar: 3/4 cup
- Baking Powder: 2 teaspoons
- Salt: 1/2 teaspoon
- Eggs: 2 large
- Whole Milk: 1 cup
- Vegetable Oil: 1/2 cup
- Vanilla Extract: 1 tablespoon
- Unsweetened Cocoa Powder: 1/3 cup
- Boiling Water: 2 tablespoons
Instructions
- Preheat Your Equipment: Preheat oven to 350°F (175°C) and grease a 9×5-inch loaf pan. Line with parchment paper.
- Combine Ingredients: In one bowl, whisk together flour, sugar, baking powder, and salt. In another, mix eggs, milk, oil, and vanilla. Combine wet and dry ingredients.
- Prepare Your Cooking Vessel: Divide the batter evenly. Mix cocoa and boiling water into one half.
- Assemble the Dish: Alternate spoonfuls of each batter in the pan and swirl with a knife.
- Cook to Perfection: Bake for 50–60 minutes until a toothpick comes out clean.
- Finishing Touches: Cool in pan 10 minutes, then on a wire rack.
- Serve and Enjoy: Slice and enjoy as is or with your favorite toppings.
Notes
- Use room-temperature ingredients for a smooth batter.
- Swirl gently for defined marbling.
- Cool fully before slicing for best texture.
- Prep Time: 15 minutes
- Cook Time: 55 minutes
- Category: Breakfast, Snack
- Method: Baking
- Cuisine: American
Nutrition
- Serving Size: 1 slice
- Calories: 280
- Sugar: 16g
- Sodium: 210mg
- Fat: 12g
- Saturated Fat: 2g
- Unsaturated Fat: 9g
- Trans Fat: 0g
- Carbohydrates: 38g
- Fiber: 2g
- Protein: 5g
- Cholesterol: 35mg