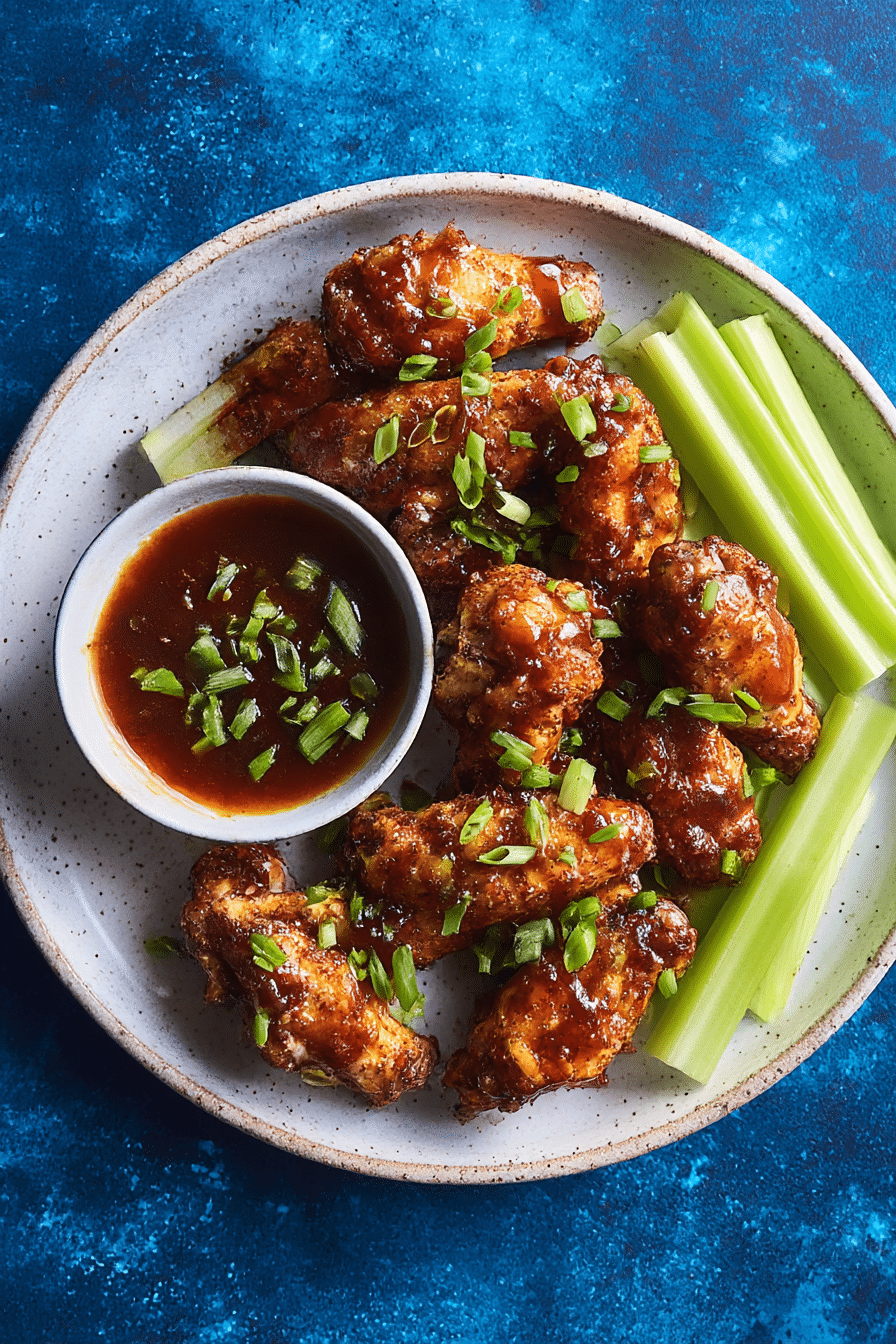
Crispy Chicken Wings
There’s just something about biting into a perfectly crispy chicken wing — that golden crackle on the outside, juicy meat on the inside, and the irresistible flavor that makes you reach for just one more. Whether you’re serving them for game night, a casual dinner, or just because you need something finger-licking good, these Crispy Chicken Wings never disappoint.
Behind the Recipe
This recipe came to life on a Saturday when friends were coming over and I needed something bold, snackable, and easy to prepare. I didn’t want to deep fry, but I wanted that crunch. So, after a few test runs and some clever tweaks, I landed on this oven-baked version that delivers big flavor with minimal fuss. Now, these wings are a non-negotiable at any get-together in my house.
Recipe Origin or Trivia
Chicken wings became a sensation in Buffalo, New York, back in the 1960s, when they were first tossed in hot sauce and butter. Since then, wings have evolved into a worldwide obsession, with every region putting its own spin on the crispy, saucy staple. What makes these wings special is that they skip the fryer entirely — yet still deliver that same satisfying crunch, thanks to a clever mix of baking powder and high heat.
Why You’ll Love Crispy Chicken Wings
Here’s why this recipe earns a permanent spot in your weekly rotation:
Versatile: Serve them plain, sauced, or spiced up with your favorite rub.
Budget-Friendly: Chicken wings are affordable and go a long way.
Quick and Easy: Minimal prep, maximum flavor.
Customizable: Toss in any sauce or dip — they’re a blank canvas.
Crowd-Pleasing: No one says no to wings.
Make-Ahead Friendly: Season in advance and bake when ready.
Great for Leftovers: Reheat easily and stay crispy.
Chef’s Pro Tips for Perfect Results
Want that signature crunch every time? Here’s how to get it right:
- Pat the wings completely dry before seasoning to ensure crisp skin.
- Use baking powder, not baking soda, for that golden, puffed texture.
- Let them rest uncovered in the fridge overnight to dry out the skin.
- Flip halfway through baking for even crisping on all sides.
- Use a wire rack on your baking sheet to allow heat to circulate underneath.
Kitchen Tools You’ll Need
Here’s your quick kitchen checklist before we get cooking:
Large Mixing Bowl: To coat the wings evenly with seasoning.
Paper Towels: For drying the wings thoroughly before baking.
Wire Rack: Crucial for airflow and maximum crispiness.
Baking Sheet: Line with foil for easy cleanup.
Tongs: For flipping wings without piercing the skin.
Oven: High-temperature baking is the secret weapon here.
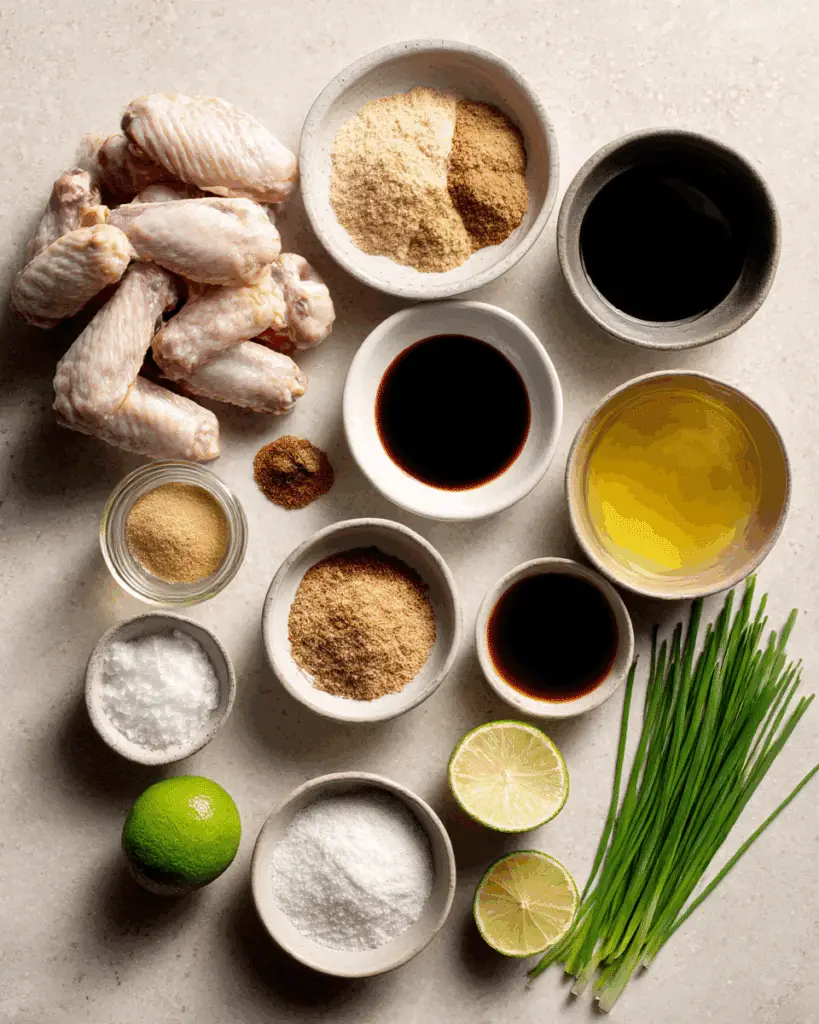
Ingredients in Crispy Chicken Wings
Each component here plays a part in making these wings ridiculously crisp and full of flavor.
- Chicken Wings: 2 pounds — Use split wings and drumettes for even cooking.
- Baking Powder (aluminum-free): 1 tablespoon — Helps blister the skin for that crunchy texture.
- Salt: 1 teaspoon — Seasons and helps draw moisture from the skin.
- Black Pepper: 1/2 teaspoon — Adds a subtle heat.
- Garlic Powder: 1 teaspoon — Infuses savory depth without overpowering.
- Paprika: 1 teaspoon — Adds color and a mild smoky note.
- Olive Oil: 2 tablespoons — Helps the seasoning stick and promotes browning.
- Chili Powder (optional): 1/2 teaspoon — For a gentle kick of spice.
Ingredient Substitutions
Make it work with what you’ve got:
Chicken Wings: You can also use drumsticks or boneless thighs.
Baking Powder: There’s no real substitute for this technique, but air-drying wings overnight helps.
Olive Oil: Any neutral oil like avocado or canola works.
Paprika: Try smoked paprika for deeper flavor.
Ingredient Spotlight
Baking Powder: This pantry staple is the unsung hero. It raises the pH of the skin, allowing it to brown and crisp up like it’s been deep-fried.
Chicken Wings: When split and trimmed, they cook evenly and quickly, giving you juicy meat with crispy skin every time.
Instructions for Making Crispy Chicken Wings
Let’s dive into the steps and get your wings on the table — golden, crisp, and ready to devour.
-
Preheat Your Equipment:
Set your oven to 425°F. Line a baking sheet with foil and place a wire rack on top. -
Combine Ingredients:
Pat wings dry with paper towels. In a large bowl, toss them with baking powder, salt, pepper, garlic powder, paprika, and chili powder if using. Drizzle olive oil and toss again until well coated. -
Prepare Your Cooking Vessel:
Arrange wings in a single layer on the wire rack, making sure they aren’t touching. -
Assemble the Dish:
Let wings sit at room temperature for 10 minutes while the oven heats. This helps the skin dry further. -
Cook to Perfection:
Bake wings for 20 minutes, then flip and bake another 20–25 minutes, or until crispy and golden brown. -
Finishing Touches:
Remove from oven and let rest 5 minutes. This allows the skin to finish crisping up. -
Serve and Enjoy:
Serve plain or toss in your favorite sauce — buffalo, BBQ, garlic parmesan — and enjoy with ranch or blue cheese on the side.
Texture & Flavor Secrets
The magic here lies in the crispy outer shell and juicy interior. You get a crackly bite that gives way to tender, flavorful meat. The garlic and paprika add depth, while baking powder guarantees that crave-worthy crunch.
Cooking Tips & Tricks
These tricks make all the difference:
- Marinate with dry rub the night before for deeper flavor.
- Don’t overcrowd the pan — airflow is key to crisping.
- For extra-crispy skin, broil the wings for 2 minutes at the end.
- Toss in sauce after baking, not before.
What to Avoid
Watch out for these common mistakes:
- Using wet wings — moisture = soggy skin.
- Confusing baking soda with baking powder — it won’t work.
- Overcrowding the tray — this leads to steaming, not crisping.
- Skipping the wire rack — wings need air underneath to crisp.
Nutrition Facts
Servings: 4
Calories per serving: 320
Note: These are approximate values.
Preparation Time
Prep Time: 10 minutes
Cook Time: 45 minutes
Total Time: 55 minutes
Make-Ahead and Storage Tips
You can season the wings a day ahead and let them dry out in the fridge — this actually makes them even crispier. Store leftovers in an airtight container in the fridge for up to 3 days. To reheat, bake at 375°F for 10–15 minutes until hot and crispy again. Avoid microwaving — it makes the skin soggy.
How to Serve Crispy Chicken Wings
Serve hot with cold celery sticks and your favorite dipping sauces like ranch, blue cheese, or honey mustard. They pair perfectly with fries, coleslaw, or even a side salad for balance. For a party platter, offer a trio of sauces so everyone can pick their favorite.
Creative Leftover Transformations
Don’t let any wings go to waste:
- Wing Tacos: Shred meat and load into tortillas with slaw.
- Buffalo Chicken Salad: Toss chopped wings over crisp greens and drizzle with ranch.
- Wing Fried Rice: Chop and toss into leftover rice with veggies.
Additional Tips
- Use aluminum-free baking powder to avoid a metallic aftertaste.
- Let wings rest 5 minutes before serving — helps crispness set.
- Add a squeeze of lemon or lime before serving to brighten flavors.
Make It a Showstopper
Serve wings stacked high on a rustic wooden board with dipping bowls lined up beside them. Sprinkle with chopped parsley or green onions for color. Add mini flags or labels for different sauce flavors if serving a crowd.
Variations to Try
- Garlic Parmesan: Toss in melted butter, garlic, and grated parmesan.
- Sweet & Spicy: Glaze with honey and sriracha after baking.
- Lemon Pepper: Finish with lemon zest and cracked black pepper.
- BBQ Glazed: Brush with your favorite BBQ sauce for the final 10 minutes.
- Asian-Inspired: Toss in hoisin, soy sauce, and sesame oil.
FAQ’s
Q1: Can I make these in an air fryer?
A1: Yes! Cook at 400°F for 20–25 minutes, flipping halfway.
Q2: What’s the best dipping sauce?
A2: Ranch, blue cheese, or even a spicy aioli work great.
Q3: Can I use frozen wings?
A3: Yes, but thaw and pat completely dry first for best results.
Q4: How do I make them extra crispy?
A4: Dry them overnight in the fridge and broil the last 2 minutes.
Q5: Are these spicy?
A5: Only mildly, but you can skip the chili powder or amp it up as you like.
Q6: Can I add sauce before baking?
A6: No, sauce should go on after baking to keep the skin crispy.
Q7: What kind of baking powder should I use?
A7: Use aluminum-free to avoid a bitter aftertaste.
Q8: Can I double the batch?
A8: Yes, but bake in two batches or on two trays to avoid overcrowding.
Q9: Are they healthy?
A9: Healthier than deep-fried wings, especially if you use minimal oil.
Q10: How long do leftovers last?
A10: Up to 3 days in the fridge, just reheat in the oven to crisp them up.
Conclusion
When you need something simple, bold, and totally addictive, these Crispy Chicken Wings deliver every time. They’re golden, crunchy, and loaded with flavor — and you didn’t even have to break out the fryer. Trust me, once you make them this way, there’s no going back. These wings are a total game-changer and worth every single bite.
Print
Crispy Chicken Wings
Description
These oven-baked Crispy Chicken Wings come out perfectly golden and crackly without the need for frying. Juicy on the inside and irresistibly crisp on the outside, they’re perfect for game day or any day.
Ingredients
- 2 pounds chicken wings, split and tips removed
- 1 tablespoon aluminum-free baking powder
- 1 teaspoon salt
- 1/2 teaspoon black pepper
- 1 teaspoon garlic powder
- 1 teaspoon paprika
- 2 tablespoons olive oil
- 1/2 teaspoon chili powder (optional)
Instructions
- Preheat oven to 425°F. Line a baking sheet with foil and place a wire rack on top.
- Pat wings dry thoroughly. In a bowl, toss wings with baking powder, salt, pepper, garlic powder, paprika, and chili powder if using.
- Drizzle with olive oil and toss again to coat evenly.
- Arrange wings on the rack in a single layer, not touching.
- Let wings sit at room temperature for 10 minutes while the oven finishes preheating.
- Bake for 20 minutes, flip, then bake another 20–25 minutes until golden and crispy.
- Let rest 5 minutes before serving. Toss in sauce if desired and serve with dips.
Notes
- Use aluminum-free baking powder to avoid bitter taste.
- For extra crispness, refrigerate wings uncovered overnight.
- Flip halfway through baking to ensure even browning.
- Use a wire rack to let heat circulate all around the wings.