Indian-Inspired Breakfast Paratha
Waking up to the aroma of sizzling ghee on a hot pan is a memory many of us hold close. This flaky, golden breakfast paratha, crisped on the outside and soft within, wraps comfort and tradition into one warm bite. Paired with cool yogurt or a tangy pickle, it’s the kind of meal that makes mornings worth savoring.
Why This Breakfast Paratha Will Win Your Mornings
There’s something incredibly satisfying about starting your day with a hot, freshly made paratha. The layered texture, the subtle blend of spices, and that unmistakable homemade feel—it checks all the boxes for a hearty, fulfilling breakfast. This version keeps things simple yet flavorful, ideal for both busy weekdays and lazy weekends.
A Taste of Indian Mornings
In many Indian homes, breakfast is more than just fuel. It’s a ritual. The paratha, especially in northern regions like Punjab, is often stuffed with spiced potatoes, cauliflower, or paneer. But even in its plain form, it holds cultural weight. Served with dahi (yogurt), achar (pickle), or even a pat of butter, it reflects the warmth of Indian hospitality and the love that goes into each handmade round.
What Makes This Recipe a Go-To Favorite
This paratha recipe has earned its place at the breakfast table for so many good reasons. Let’s break them down.
Versatile: You can enjoy it plain or add fillings like potato or spinach to switch it up.
Budget-Friendly: Uses pantry staples like flour, oil, and basic spices.
Quick and Easy: With minimal prep, these come together in no time once you get the hang of rolling.
Customizable: Adjust the thickness, spice level, or even make it gluten-free with alternate flours.
Crowd-Pleasing: Everyone loves a warm, flaky paratha, especially when served hot from the pan.
Make-Ahead Friendly: Dough can be prepped in advance and refrigerated.
Great for Leftovers: Leftover parathas can be reheated, used for wraps, or turned into layered snacks.
Insider Secrets for Perfect Parathas
Let me tell you, nailing a perfect paratha takes a little practice—but these tips will get you there faster.
- Use warm water when kneading your dough. It helps activate the gluten and makes the dough smoother.
- Rest the dough for at least 20 minutes. This makes it easier to roll out without tearing.
- Don’t over-stuff if you choose to add a filling. Too much and it’ll burst while rolling.
- Use medium heat when cooking. Too hot and it burns, too low and it turns chewy.
- Ghee or oil, but don’t skip it. That fat gives the paratha its classic golden crust.
Tools You’ll Need to Make It Happen
No fancy gadgets needed here—just a few kitchen basics.
Mixing Bowl: For kneading the dough and letting it rest.
Rolling Pin: To roll the parathas into even circles.
Flat Pan or Tawa: A flat, heavy-bottomed pan distributes heat evenly for that perfect golden crust.
Brush or Spoon: To drizzle or spread ghee or oil while cooking.
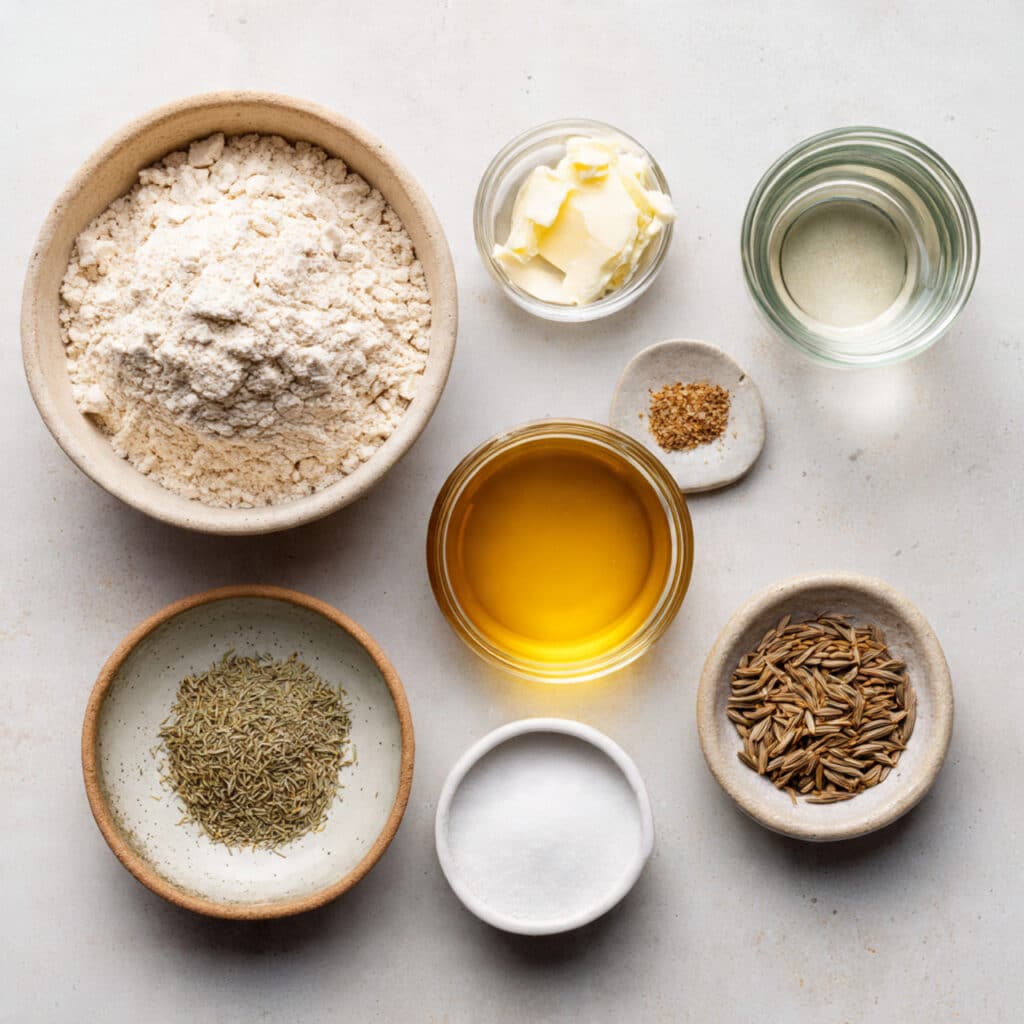
Ingredients You Will Need For This Indian Delight
The beauty of this dish is how just a few simple ingredients can come together into something magical.
- Whole Wheat Flour: 2 cups. This forms the base of your dough and adds a nutty, hearty flavor.
- Warm Water: 3/4 cup. Helps bind the dough smoothly.
- Salt: 1 teaspoon. Balances out the flavors.
- Ghee or Oil: 2 tablespoons, plus more for cooking. Adds richness and gives the paratha its signature crispiness.
- Optional Spices (Cumin Seeds or Ajwain): 1/2 teaspoon. Adds a hint of earthy flavor to the dough.
Ingredient Swaps for Every Pantry
Running low on something? No worries, we’ve got you covered.
Whole Wheat Flour: All-purpose flour works, but the texture will be softer.
Ghee: Use neutral cooking oil if you prefer a vegan version.
Ajwain: Try crushed fennel seeds or cumin seeds instead.
Warm Water: Milk can be used for a richer dough.
Ingredient Spotlight: What Makes It Shine
Ghee: This golden clarified butter gives the paratha its trademark crispiness and a deep, buttery aroma that elevates every bite.
Ajwain Seeds: A tiny ingredient with big flavor. These seeds add a slight bitterness and earthy tone that cuts through the richness.
Let’s Make Breakfast Magic: Step-by-Step
Get your rolling pin ready, because once you try these steps, you’ll want to make parathas every morning.
1. Preheat Your Equipment:
Place your tawa or flat pan on medium heat while you prep.
2. Combine Ingredients:
In a mixing bowl, add flour, salt, and optional spices. Slowly mix in warm water, kneading until a soft dough forms. Add 1 tablespoon ghee or oil and knead again.
3. Prepare Your Cooking Vessel:
Heat the tawa or skillet over medium. Lightly grease with ghee or oil.
4. Assemble the Dish:
Divide dough into equal balls. Roll each into a circle about 6 inches wide. You can drizzle a bit of ghee inside and fold it for layers, then roll again.
5. Cook to Perfection:
Place the paratha on the hot tawa. Cook for 30–45 seconds, flip, apply ghee, and cook until both sides are golden brown with dark spots.
6. Finishing Touches:
Press gently with a spatula to puff it up slightly. Repeat with all the dough.
7. Serve and Enjoy:
Serve hot with yogurt, pickles, or even a hot cup of chai. Trust me, it’s worth every bite.
Crispy Edges, Soft Center: The Texture Journey
The texture of a good paratha is unmistakable. The exterior is crisp and golden, with little blisters from the hot tawa. Inside, the dough stays tender and chewy. Every layer carries flavor, especially when infused with ghee. Together, the contrast of crispy edges and soft, warm insides creates a sensory delight.
Smart Cooking Tips for Busy Mornings
Don’t worry if your first one turns out a bit wonky—these tips will help smooth the way.
- Let dough rest to relax gluten and improve rolling ease.
- Use a dry surface with just a sprinkle of flour to prevent sticking.
- Flip only when you see bubbles and light browning on the first side.
Avoid These Common Mistakes
Little errors can mess with the final result, but they’re easy to dodge.
- Too much flour on the board: Makes the paratha dry and powdery.
- Cooking on high heat: Burns outside before inside cooks through.
- Skipping resting time: Makes dough tough and hard to roll.
- Over-kneading: Leads to chewy, tight parathas.
Nutritional Breakdown
Servings: 4
Calories per serving: 210
Note: These are approximate values.
Time You’ll Need
Prep Time: 15 minutes
Cook Time: 20 minutes
Total Time: 35 minutes
Prep Ahead and Save Time
Paratha dough keeps beautifully in the fridge for up to 2 days. Just wrap it tight. You can also roll out raw parathas and freeze them in layers between parchment. Reheat cooked ones in a skillet or wrap in foil and warm in the oven.
The Best Way to Serve It
Serve hot off the pan with a bowl of yogurt, spicy mango pickle, or even a dollop of butter. It also pairs beautifully with masala chai or a spiced lentil soup if you’re making it brunch-style.
Leftovers, But Better
Turn leftover parathas into breakfast wraps with scrambled eggs. Or cut them into wedges, crisp them up, and use as dippers for hummus or chutneys. They even make a great base for a desi-style quesadilla.
Small Extras That Make a Big Difference
- Add chopped herbs like coriander or fenugreek to the dough.
- Sprinkle chili flakes while rolling for a spicy kick.
- Use flavored ghee for a deeper aroma.
Make It Look as Good as It Tastes
Brush with a little ghee right before serving for a golden sheen. Stack neatly and wrap in a clean cloth for a rustic presentation. Serve on a wooden board with small dipping bowls for yogurt and pickle to make it photo-worthy.
Fun Variations to Explore
- Stuffed Aloo Paratha: Add mashed spiced potatoes inside.
- Methi Paratha: Mix fenugreek leaves into the dough.
- Cheese Paratha: Melt shredded cheese inside for gooey bites.
- Sweet Paratha: Sprinkle sugar and cardamom inside before folding.
- Garlic Herb Paratha: Add crushed garlic and fresh herbs to the dough.
FAQ’s
Q1: Can I make this gluten-free?
Yes, you can use a gluten-free flour blend, though rolling may be more delicate.
Q2: What kind of flour works best?
Traditional whole wheat flour, or atta, is best for flavor and texture.
Q3: How do I know when it’s cooked through?
Look for golden spots and slight puffing. It should feel firm but not hard.
Q4: Can I freeze the dough?
Absolutely. Wrap tightly and freeze up to a month. Thaw overnight in the fridge.
Q5: Why is my paratha dry?
You may be overusing dry flour while rolling or undercooking on low heat.
Q6: How do I reheat it?
Skillet on medium heat for a few minutes per side works best.
Q7: Can I add fillings?
Yes! Try mashed potatoes, paneer, or spinach with spices.
Q8: What’s the best oil to use?
Neutral oils like sunflower or vegetable oil work well, or go traditional with ghee.
Q9: Is this kid-friendly?
Definitely. Just go easy on the spices for little taste buds.
Q10: Can I use milk instead of water?
Yes, milk adds richness and softness to the dough.
Conclusion
Whether it’s your first try or your hundredth, this breakfast paratha brings joy to the table every single time. It’s warm, hearty, and filled with love in every fold. Trust me, you’re going to love this.
Print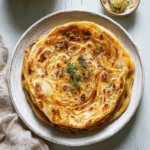
Indian-Inspired Breakfast Paratha
Description
Crispy on the outside, soft on the inside, this Indian-inspired breakfast paratha is a warm, comforting way to start your day. Made with whole wheat flour, ghee, and a few pantry spices, it’s a flavorful classic that pairs perfectly with yogurt or pickle.
Ingredients
- 2 cups whole wheat flour
- 3/4 cup warm water
- 1 teaspoon salt
- 2 tablespoons ghee or oil, plus more for cooking
- 1/2 teaspoon cumin seeds or ajwain (optional)
Instructions
- In a mixing bowl, combine flour, salt, and optional spices. Gradually add warm water while kneading into a soft dough. Add 1 tablespoon ghee or oil and knead again.
- Cover the dough and let it rest for 20 minutes.
- Divide the dough into equal balls. Roll each ball into a 6-inch circle. For layered texture, drizzle a bit of ghee inside, fold, and roll again.
- Heat a flat pan or tawa over medium heat and lightly grease it with ghee or oil.
- Place the rolled paratha on the pan. Cook for 30–45 seconds, flip, spread ghee, and cook until golden brown with dark spots on both sides.
- Press lightly with a spatula to help puff. Repeat with remaining dough balls.
- Serve hot with yogurt, pickles, or chai.
Notes
- Resting the dough helps make rolling easier and improves texture.
- Don’t overuse flour while rolling to avoid dryness.
- Use medium heat to ensure even cooking without burning.