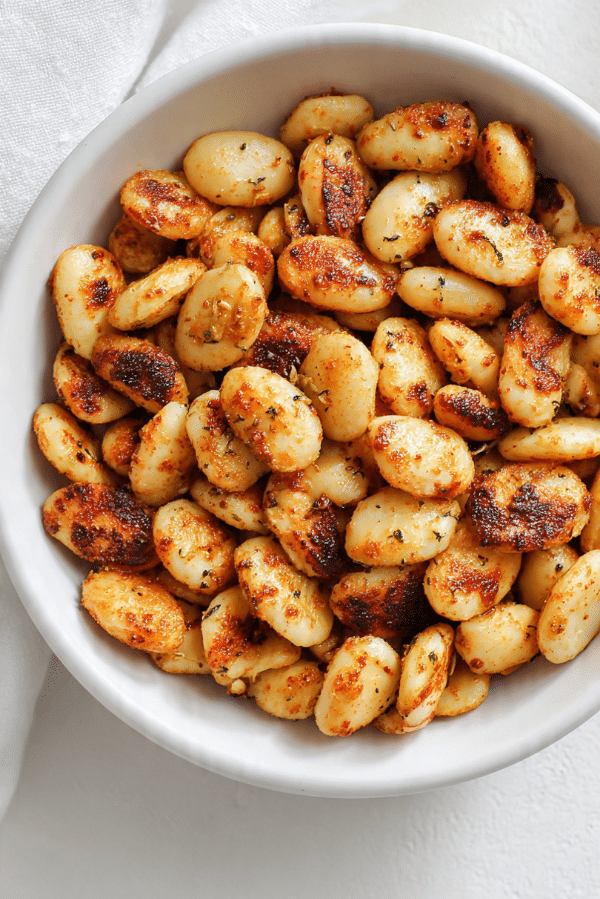
air-fried butter beans
There is something so satisfying about turning a humble can of butter beans into a snack or side dish that tastes crisp, savory, and seriously irresistible. The outside gets lightly golden and a little crackly, while the inside stays soft and creamy, which is exactly the kind of contrast that makes you keep reaching back for one more bite. Trust me, you’re going to love this. It is simple, cozy, and somehow feels both wholesome and a little addictive at the same time.
Why These Crispy Butter Beans Are Worth Making Again and Again
Some recipes are flashy, and some quietly win you over after the first bite. This one definitely falls into the second category. Air-fried butter beans are quick to pull together, packed with flavor, and perfect when you want something that feels snacky but still nourishing. They can sit next to lunch, bulk up a grain bowl, or disappear straight from the bowl while they are still warm. Let me tell you, it’s worth every bite.
A Little Backstory Behind This Comforting Bean Dish
Beans have been a staple in kitchens across the world for generations, mostly because they are affordable, filling, and endlessly adaptable. Butter beans, which are mature lima beans, have a particularly creamy texture that makes them stand out. In Mediterranean and Southern style cooking, beans often show up in soulful, practical dishes that make the most of simple pantry ingredients. This recipe gives them a modern twist by using the air fryer to create a crisp exterior without much effort, and now let’s dive into what makes this version such a keeper.
Why This Recipe Always Delivers
This recipe has a lot going for it, and once you make it, you will see why it becomes an easy repeat.
Versatile: You can serve these as a snack, a crunchy salad topper, or a simple side for lunch and dinner. They fit into all kinds of meals without needing much planning.
Budget-Friendly: Butter beans are one of those ingredients that give you a lot for very little. A few pantry spices and a drizzle of oil are all it takes to make them feel special.
Quick and Easy: The prep is minimal, and the air fryer does most of the work. This one’s a total game-changer on busy days when you still want something homemade.
Customizable: You can keep the seasoning smoky and savory, or lean into heat, citrus, or herbs depending on your mood. The base recipe is flexible, which makes it fun to play with.
Crowd-Pleasing: Even people who think beans are boring tend to change their minds here. The crispy edges and warm seasoning make them surprisingly snackable.
Make-Ahead Friendly: You can season the beans ahead of time and air fry them when you are ready. That makes them useful for meal prep or quick last-minute sides.
Great for Leftovers: Leftovers can be tossed into bowls, wraps, soups, or salads. They hold onto flavor beautifully and bring great texture to other dishes.
Pro Tips That Make a Big Difference
Before you start cooking, a few small details can really help you get the best texture and flavor.
- Dry The Beans Well: Moisture is the biggest enemy of crispness. Pat the beans very thoroughly with paper towels before seasoning them.
- Do Not Crowd The Basket: Give the beans a little space so the hot air can circulate. That is what helps them crisp instead of steam.
- Shake Halfway Through: A quick shake helps the beans brown more evenly and keeps any side from getting too dark.
- Season While They Are Lightly Oiled: The spices stick better when the beans are coated evenly with oil first.
- Watch The Final Minutes Closely: Air fryers can vary a lot, so the last couple of minutes matter. You want blistered and crisp, not dry.
Kitchen Tools That Help Everything Go Smoothly
A recipe this simple does not ask for much, which is part of its charm.
Air Fryer: This is the star tool here, because it creates that crisp outer texture fast and with very little oil.
Mixing Bowl: You will use this to coat the beans evenly with oil and seasoning without smashing them.
Paper Towels or Clean Kitchen Towel: These help remove extra moisture, which is essential for better browning.
Measuring Spoons: A small tool, but useful for keeping the seasoning balanced and consistent.
Spatula or Spoon: Handy for tossing the beans gently so they stay whole and well coated.
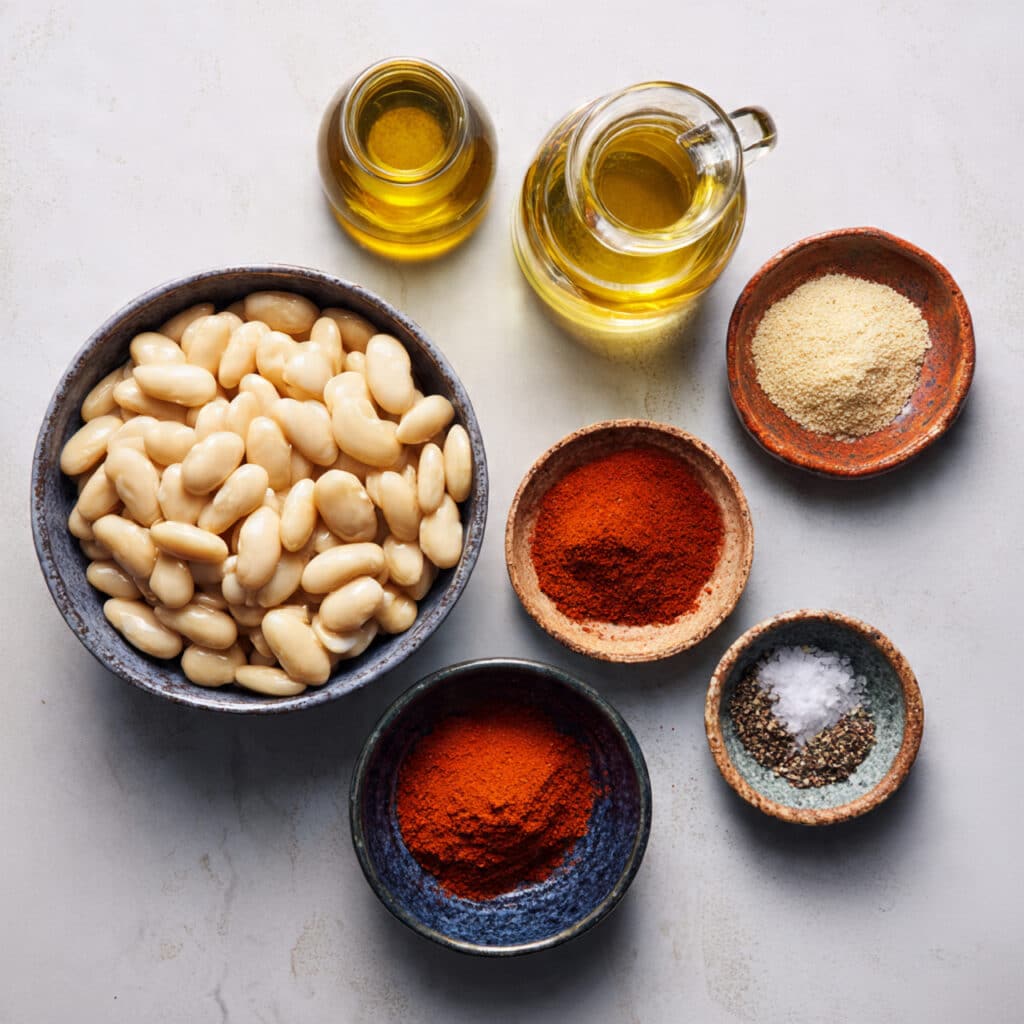
The Simple Ingredients That Make It All Work
The beauty of this recipe is how a few pantry staples come together to create something warm, savory, and full of texture. Each ingredient pulls its weight, and together they make a bowl of beans that tastes far more exciting than the effort suggests.
- Butter Beans: 2 cups canned butter beans, drained and rinsed. These are the creamy base of the recipe, and they crisp on the outside while staying soft inside.
- Olive Oil: 1 tablespoon. This helps the beans brown in the air fryer and gives the seasonings something to cling to.
- Garlic Powder: 1 teaspoon. It adds a mellow savory note that spreads through every bite.
- Smoked Paprika: 1 teaspoon. This brings warmth, color, and a subtle smoky depth that makes the beans feel richer.
- Salt: 1/2 teaspoon, or to taste. Salt wakes everything up and helps the simple ingredients taste more complete.
- Black Pepper: 1/4 teaspoon. It adds a gentle bite and rounds out the seasoning.
Easy Swaps If You Want To Change Things Up
Once you have the basic version down, it is easy to tweak based on what you have in the cupboard.
Olive Oil: Avocado oil.
Garlic Powder: Onion powder or a pinch of granulated garlic.
Smoked Paprika: Sweet paprika, chili powder, or ground cumin.
Black Pepper: Crushed red pepper flakes for a spicier finish.
Butter Beans: Cannellini beans or chickpeas, though the texture will be a little different.
Spotlight On The Ingredients That Make The Magic Happen
A couple of ingredients really define the final flavor and texture here, and they deserve a little love.
Butter Beans: Their creamy middle is what makes this recipe special. When the skins crisp up, you get that amazing contrast between crunchy and soft in the same bite.
Smoked Paprika: This spice adds warmth and a subtle smoky edge that makes the beans taste deeper and more complex without needing a long ingredient list.
Let’s Get Cooking
This is the kind of recipe that feels easy from the very first step, and that is part of why it is so satisfying. A little seasoning, a little heat, and you are on your way to a batch of crisp, golden beans that smell amazing the moment the basket opens.
- Preheat Your Equipment: Preheat your air fryer to 390°F (200°C) for 3 minutes so the beans start crisping as soon as they hit the basket.
- Combine Ingredients: In a mixing bowl, add the drained and rinsed butter beans, olive oil, garlic powder, smoked paprika, salt, and black pepper. Toss gently until the beans are evenly coated.
- Prepare Your Cooking Vessel: Lightly pat the seasoned beans again if they still seem damp, then spread them in the air fryer basket in a mostly even layer with a bit of space between them.
- Assemble the Dish: Check that the beans are not piled too heavily on top of each other. This small step helps them brown better and keeps the texture more even.
- Cook to Perfection: Air fry for 12 to 15 minutes, shaking the basket halfway through, until the beans are golden, lightly blistered, and crisp around the edges.
- Finishing Touches: Taste while they are still warm and add a little extra salt or pepper if needed. You can also add another light pinch of smoked paprika for a deeper finish.
- Serve and Enjoy: Serve immediately while the outside is still crisp and the centers are soft and creamy.
The Texture And Flavor Story In Every Bite
What makes this recipe stand out is the contrast. The butter beans become lightly crisp and almost nutty on the outside, while the inside stays tender and buttery. The olive oil helps the seasonings bloom, the garlic powder adds a mellow savory note, and the smoked paprika brings warmth and depth. Altogether, the flavor lands somewhere between a snack and a side dish, and it is deeply comforting in the best possible way.
Helpful Tips For Even Better Results
Once you make them once, these little tricks help you get even closer to your perfect version.
- Dry the beans really well before seasoning, because extra water softens the final texture.
- Serve them soon after cooking for the best crispness.
- Toss them gently so they stay whole and do not break apart.
- Add a squeeze of lemon after cooking if you want a brighter finish.
Mistakes To Skip For The Best Batch
A few tiny missteps can change the texture, but they are easy to avoid once you know what to look for.
- Overcrowding the basket can make the beans steam instead of crisp, so cook in batches if needed.
- Using too much oil can make them heavy rather than crisp, so stick close to the measured amount.
- Skipping the shake halfway through can lead to uneven browning.
- Cooking too long can dry out the centers, so check on them near the end.
A Quick Look At The Nutrition
Servings: 4
Calories per serving: 105
Note: These are approximate values.
Time Breakdown Before You Start
Prep Time: 8 minutes
Cook Time: 15 minutes
Total Time: 23 minutes
Make-Ahead And Storage Tips That Actually Help
If you want to stay a step ahead, you can drain, rinse, and dry the beans earlier in the day, then toss them with the seasoning right before air frying. Leftovers can be stored in an airtight container in the fridge for up to 3 days. They will lose some crispness as they sit, but the flavor stays lovely. To reheat, pop them back in the air fryer for 3 to 4 minutes at 375°F. Freezing is not ideal here, because the texture tends to soften too much after thawing.
Tasty Ways To Serve Them
These crispy beans are incredibly easy to work into meals. Serve them as a snack with a little lemon on the side, or scatter them over a salad for crunch. They are great tucked into wraps, spooned over rice bowls, or served next to roasted vegetables. You can also pair them with a creamy dip or yogurt sauce if you want something cool against the warm spices.
Smart Ideas For Leftovers
Leftovers are far from boring here. Toss them into a grain bowl with greens and a simple dressing, add them to soup right before serving, or fold them into a warm veggie wrap. You can even crush a few lightly and spoon them over toast with avocado for a savory lunch that feels a little unexpected.
A Few More Helpful Details
Sometimes the smallest tweaks make the biggest difference, so here are a few extra ideas to keep in mind as you make this recipe your own.
For More Crispness: Cook them for an extra 1 to 2 minutes, but keep a close eye so the centers do not dry out.
For More Flavor: Add a pinch of cumin or chili flakes with the paprika.
For Better Freshness: Serve them right after cooking, because that is when the texture is at its best.
For Easier Cleanup: Line your prep area with paper towels before drying the beans so everything stays quick and tidy.
How To Make Them Look Extra Special
A simple recipe can still feel beautiful on the plate. Serve the beans in a shallow bowl so their golden color shows off, and finish with a light dusting of smoked paprika for a warm, earthy look. A few lemon wedges on the side make the whole dish feel brighter and more inviting. This one’s a total game-changer when you want something easy that still looks like you put in real effort.
Variations Worth Trying
If you love the basic version, there are a few fun ways to take it in a different direction.
Spicy Version: Add 1/4 teaspoon chili flakes or cayenne for a little heat.
Herby Finish: Toss the hot beans with chopped parsley and a squeeze of lemon juice right before serving.
Cumin Twist: Swap half the paprika for ground cumin for a deeper, earthier flavor.
Crispy Garlic Style: Add a small pinch of granulated onion along with the garlic powder for a fuller savory note.
Snack Bowl Style: Serve with a side of hummus or tahini dip for an easy party snack.
FAQ’s
Q1: Can I use dried butter beans instead of canned?
Yes, but they need to be cooked first. Once tender, dry them very well before seasoning and air frying.
Q2: Do I have to peel the skins off the beans?
No, not at all. The skins actually help create that crisp outer layer.
Q3: Why are my beans not getting crispy?
The most common reason is excess moisture or overcrowding in the basket. Dry them thoroughly and spread them out more.
Q4: Can I make these oil-free?
You can try, but they will not brown or crisp quite as well. A small amount of oil makes a big difference here.
Q5: What air fryer temperature works best?
390°F works really well for getting the outside crisp while keeping the inside creamy.
Q6: Can I use different beans?
Yes, cannellini beans or chickpeas can work too, though the final texture will change a bit.
Q7: Are these good for meal prep?
Yes, especially if you plan to reheat them briefly in the air fryer before serving.
Q8: Can I make them spicy?
Absolutely. Chili flakes, cayenne, or even a spicy seasoning blend work beautifully.
Q9: What do they taste like?
They are savory, lightly smoky, and a little nutty, with crisp edges and creamy centers.
Q10: Can I serve them cold?
You can, especially in salads, but they are definitely best warm when the texture is freshest.
Conclusion
Air-fried butter beans are one of those simple recipes that surprise you in the best way. They are crisp, creamy, savory, and incredibly easy to pull together with ingredients you might already have at home. Whether you serve them as a quick snack, a crunchy topping, or a cozy side, they bring big flavor without making life complicated. Trust me, you’re going to love this, and once you make them the first time, you will probably start finding all kinds of excuses to make them again.
Print
air-fried butter beans
Description
Crispy air-fried butter beans with smoky paprika and garlic, a quick and easy snack or side dish with creamy centers and golden edges.
Ingredients
- 2 cups canned butter beans, drained and rinsed
- 1 tablespoon olive oil
- 1 teaspoon garlic powder
- 1 teaspoon smoked paprika
- 1/2 teaspoon salt, or to taste
- 1/4 teaspoon black pepper
Instructions
- Preheat the air fryer to 390°F (200°C) for 3 minutes.
- Pat the butter beans very dry with paper towels.
- In a mixing bowl, toss the butter beans with olive oil, garlic powder, smoked paprika, salt, and black pepper until evenly coated.
- Spread the beans in the air fryer basket in a mostly even layer without overcrowding.
- Air fry for 12 to 15 minutes, shaking the basket halfway through, until the beans are golden and lightly crisp.
- Taste and add extra salt or pepper if needed.
- Serve warm for the best texture.
Notes
- Dry the beans well before seasoning for better crispness.
- Do not overcrowd the basket, cook in batches if needed.
- Serve immediately for the crispiest result.
- Add a squeeze of lemon after cooking for a brighter flavor.