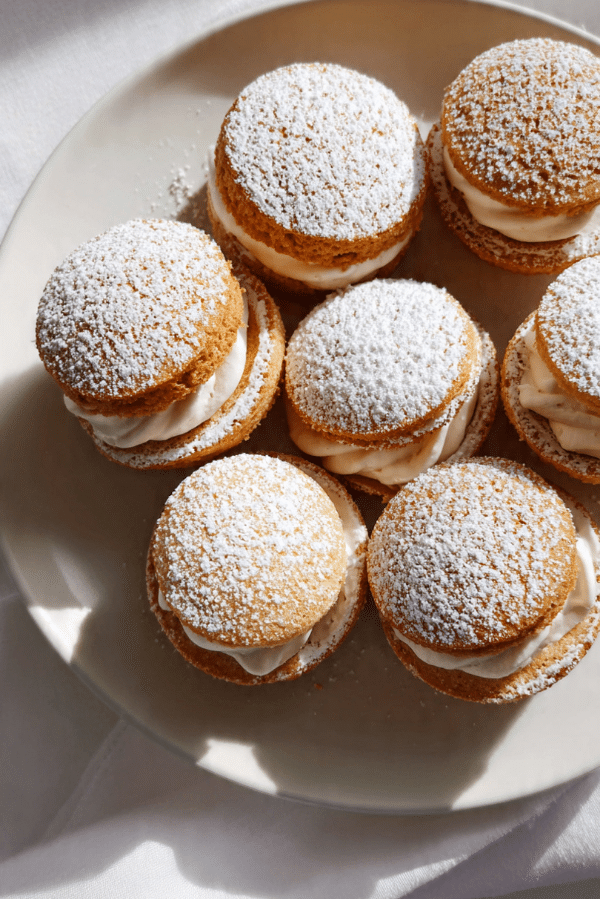
Mini Cakes with Hazelnut Cream
There is something magical about a dessert that feels both delicate and indulgent at the same time. These mini cakes bring that exact feeling, soft golden layers hugging a smooth, nutty hazelnut cream that melts gently with every bite. The moment you cut into one, you get that perfect contrast between fluffy cake and silky filling, and honestly, it is hard to stop at just one.
A Little Bite of Elegance in Every Layer
These little cakes are more than just dessert, they feel like a small celebration on a plate. Perfect for gatherings, afternoon treats, or even those quiet moments when you want something sweet without going overboard. Their size makes them charming, but their flavor makes them unforgettable.
The Sweet Story Behind This Treat
Hazelnut desserts have long been loved across European kitchens, especially in places where nuts and chocolate play a big role in traditional sweets. The combination of soft sponge and nutty cream feels timeless, like something passed down through generations.
Mini cakes like these became popular as a way to serve elegant desserts in individual portions, making them perfect for sharing without the need for slicing a large cake. It is a simple idea, but one that brings both beauty and practicality to the table.
Why These Mini Cakes Always Turn Out Amazing
Once you try them, you will understand why they quickly become a favorite.
Versatile: Perfect for birthdays, tea time, or just a sweet craving after dinner.
Budget-Friendly: Uses simple pantry staples with a small amount of hazelnut spread for big flavor.
Quick and Easy: The batter comes together quickly, and the filling is simple yet rich.
Customizable: You can adjust sweetness, add chocolate, or even layer with fruit.
Crowd-Pleasing: Soft cake and creamy filling are always a winning combo.
Make-Ahead Friendly: Bake the cakes in advance and fill them later.
Great for Leftovers: They stay soft and delicious for a couple of days when stored properly.
Simple Tricks That Make Them Taste Bakery-Level
Before we start baking, a few small tips can really elevate the final result.
- Use room temperature eggs: This helps create a lighter batter.
- Do not overmix: Keep the cake soft and airy.
- Chill the cream slightly: It spreads better and holds shape inside the cakes.
- Sift the flour: This keeps the texture smooth and delicate.
- Use quality hazelnut spread: It makes a noticeable difference in flavor.
Tools You Will Need in Your Kitchen
A few basic tools make the process smooth and enjoyable.
Mixing Bowls: For combining wet and dry ingredients.
Hand Mixer or Whisk: Helps create a light and airy batter.
Mini Cake Molds or Muffin Tin: Perfect for shaping the cakes evenly.
Spatula: Useful for folding and spreading.
Cooling Rack: Allows cakes to cool without becoming soggy.
Knife or Cake Cutter: For slicing and filling the cakes.
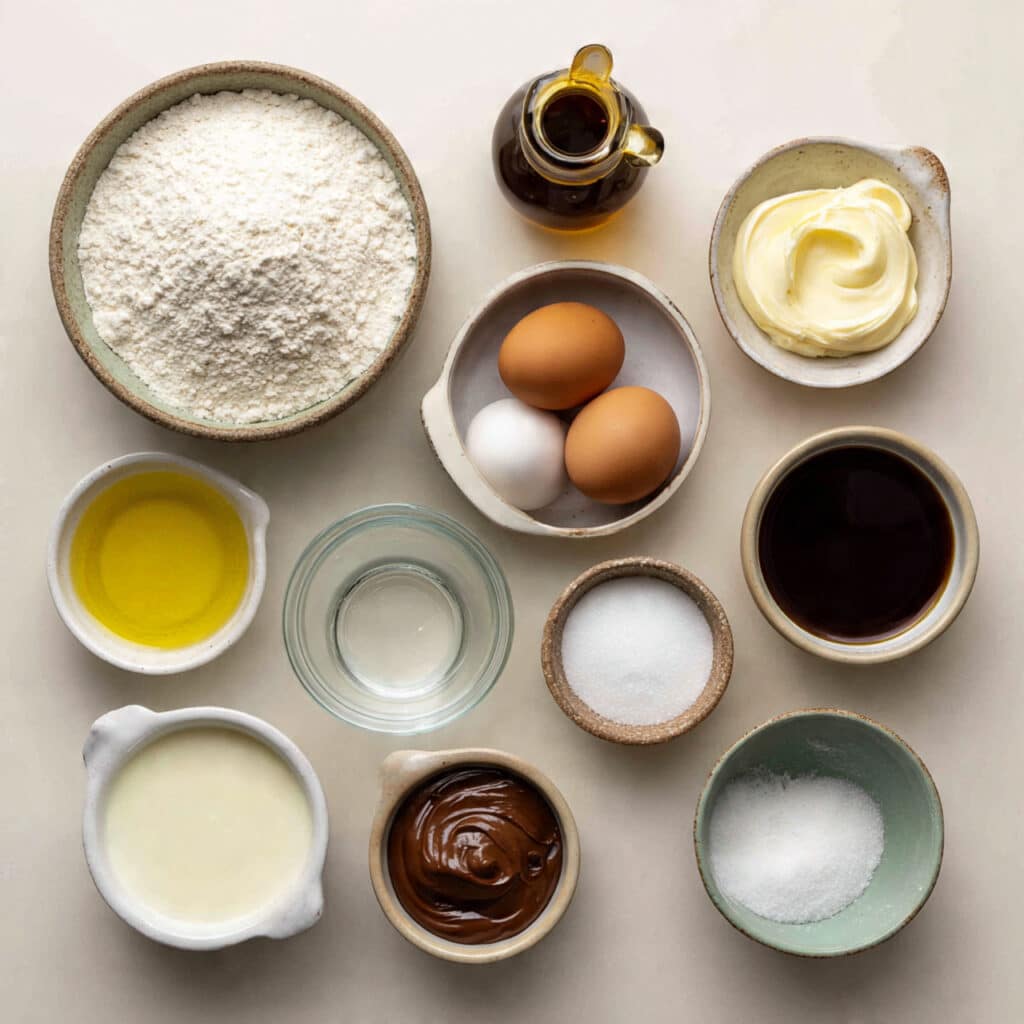
Ingredients That Bring It All Together
Each ingredient plays its role in creating that soft, creamy bite.
- All-purpose flour: 1 cup, gives structure to the cakes.
- Granulated sugar: 1/2 cup, adds sweetness and helps with texture.
- Eggs: 2 large, at room temperature, for richness and fluffiness.
- Milk: 1/2 cup, keeps the cake moist.
- Vegetable oil: 1/3 cup, adds softness.
- Baking powder: 1 teaspoon, helps the cakes rise.
- Vanilla extract: 1 teaspoon, enhances flavor.
- Salt: 1/4 teaspoon, balances sweetness.
- Hazelnut spread: 3/4 cup, for the creamy filling.
- Heavy cream: 1/2 cup, whipped to lighten the filling.
- Powdered sugar: 2 tablespoons, for light sweetness and dusting.
Easy Ingredient Swaps If Needed
Flexibility makes this recipe even more useful.
Vegetable oil: Melted butter.
Milk: Almond milk or oat milk.
Hazelnut spread: Chocolate spread or peanut butter.
Heavy cream: Whipped coconut cream.
The Star Ingredients That Make the Difference
Some ingredients truly define the experience.
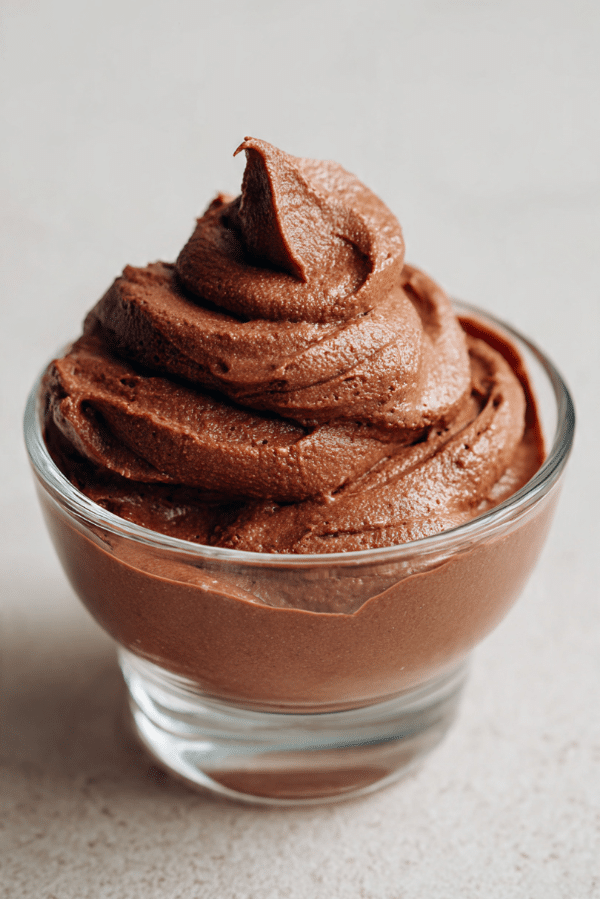
Hazelnut spread: This is where all the richness comes from, smooth, nutty, and slightly sweet.
Eggs: They give the cake its light, airy structure that pairs perfectly with the creamy filling.
Let’s Bake These Little Beauties
Now comes the fun part where everything starts coming together.
- Preheat Your Equipment: Preheat your oven to 350°F and prepare your mini cake molds.
- Combine Ingredients: In a bowl, whisk eggs and sugar until light. Add milk, oil, and vanilla, then mix. In another bowl, combine flour, baking powder, and salt, then fold into the wet mixture.
- Prepare Your Cooking Vessel: Grease the molds lightly to prevent sticking.
- Assemble the Dish: Pour batter evenly into molds, filling about three-quarters full.
- Cook to Perfection: Bake for 15 to 18 minutes until golden and a toothpick comes out clean.
- Finishing Touches: Let cakes cool, slice each in half, mix hazelnut spread with whipped cream, then fill the cakes.
- Serve and Enjoy: Dust with powdered sugar and serve fresh.
The Texture and Flavor Experience
Each bite gives you a soft, airy cake that gently holds the rich hazelnut cream. The filling is smooth and slightly fluffy thanks to the whipped cream, creating a perfect balance between light and indulgent.
The sweetness is just right, not overwhelming, and the nutty notes linger pleasantly, making you want another bite.
Helpful Tips for Perfect Results
A few extra tips can make all the difference.
- Do not overbake: Keep them soft and moist.
- Cool completely before filling: This prevents the cream from melting.
- Use a piping bag for filling: It gives a cleaner finish.
What to Avoid When Making These Cakes
Even simple desserts have a few things to watch out for.
- Overmixing the batter: This can make the cakes dense.
- Filling warm cakes: The cream will melt and lose texture.
- Skipping measurements: Precision helps maintain the perfect balance.
Nutritional Snapshot
Servings: 6
Calories per serving: 320
Note: These are approximate values.
Time Needed to Make Them
Prep Time: 15 minutes
Cook Time: 18 minutes
Total Time: 33 minutes
Make-Ahead and Storage Tips
You can bake the cakes a day ahead and store them in an airtight container. Fill them just before serving for the best texture.
Store filled cakes in the refrigerator for up to 2 days. Let them sit at room temperature for a few minutes before serving to bring back their softness.
How to Serve These Mini Cakes
Serve them on a simple plate with a light dusting of powdered sugar. They pair beautifully with coffee or tea, making them perfect for afternoon treats or dessert platters.
Creative Ways to Use Leftovers
Turn leftover cakes into a layered dessert by crumbling them into a glass and adding extra cream. You can also freeze them and enjoy later as a chilled treat.
Extra Tips for Even Better Flavor
Add a touch of cocoa powder to the batter for a chocolate twist, or drizzle melted chocolate on top for extra indulgence.
Make Them Look Bakery-Perfect
Keep the edges clean when slicing, and use a fine sieve to dust powdered sugar evenly. A small swirl of cream on top can make them look extra special.
Fun Variations to Try
- Chocolate Version: Add cocoa powder to the batter.
- Berry Twist: Add fresh berries inside the filling.
- Nut Crunch: Sprinkle chopped hazelnuts on top.
- Coffee Flavor: Add a hint of espresso to the cream.
- Vanilla Cream Option: Replace hazelnut with vanilla cream.
FAQ’s
1. Can I make these without eggs?
Yes, you can use egg substitutes like yogurt or applesauce.
2. Can I freeze these cakes?
Yes, freeze them without filling for best results.
3. What if I do not have molds?
A muffin tin works perfectly.
4. Can I use store-bought whipped cream?
Yes, but homemade gives better texture.
5. How do I keep them moist?
Do not overbake and store properly.
6. Can I add chocolate chips?
Yes, they work well in the batter.
7. Is the filling too sweet?
You can reduce powdered sugar if needed.
8. Can I make them gluten free?
Yes, use a gluten-free flour blend.
9. How long do they last?
Up to 2 days in the fridge once filled.
10. Can I double the recipe?
Absolutely, just adjust baking batches.
Conclusion
These mini cakes with hazelnut cream bring together softness, richness, and just the right amount of sweetness in every bite. They are simple to make, beautiful to serve, and impossible to resist. Once you try them, they will quickly become one of those desserts you keep coming back to.
Print
Mini Cakes with Hazelnut Cream
Description
Soft mini cakes filled with creamy hazelnut filling, light, fluffy, and perfect for any sweet craving.
Ingredients
- 1 cup all-purpose flour
- 1/2 cup granulated sugar
- 2 large eggs
- 1/2 cup milk
- 1/3 cup vegetable oil
- 1 teaspoon baking powder
- 1 teaspoon vanilla extract
- 1/4 teaspoon salt
- 3/4 cup hazelnut spread
- 1/2 cup heavy cream
- 2 tablespoons powdered sugar
Instructions
- Preheat oven to 350°F and prepare mini cake molds.
- Whisk eggs and sugar until light, then add milk, oil, and vanilla.
- Mix flour, baking powder, and salt separately, then fold into wet mixture.
- Grease molds and pour batter evenly.
- Bake for 15 to 18 minutes until golden and cooked through.
- Cool completely, then slice cakes in half.
- Whip heavy cream and mix with hazelnut spread.
- Fill cakes with cream mixture.
- Dust with powdered sugar and serve.
Notes
- Do not overmix batter to keep cakes soft.
- Cool cakes fully before filling.
- Use a piping bag for neat filling.