Mud Hen Bars
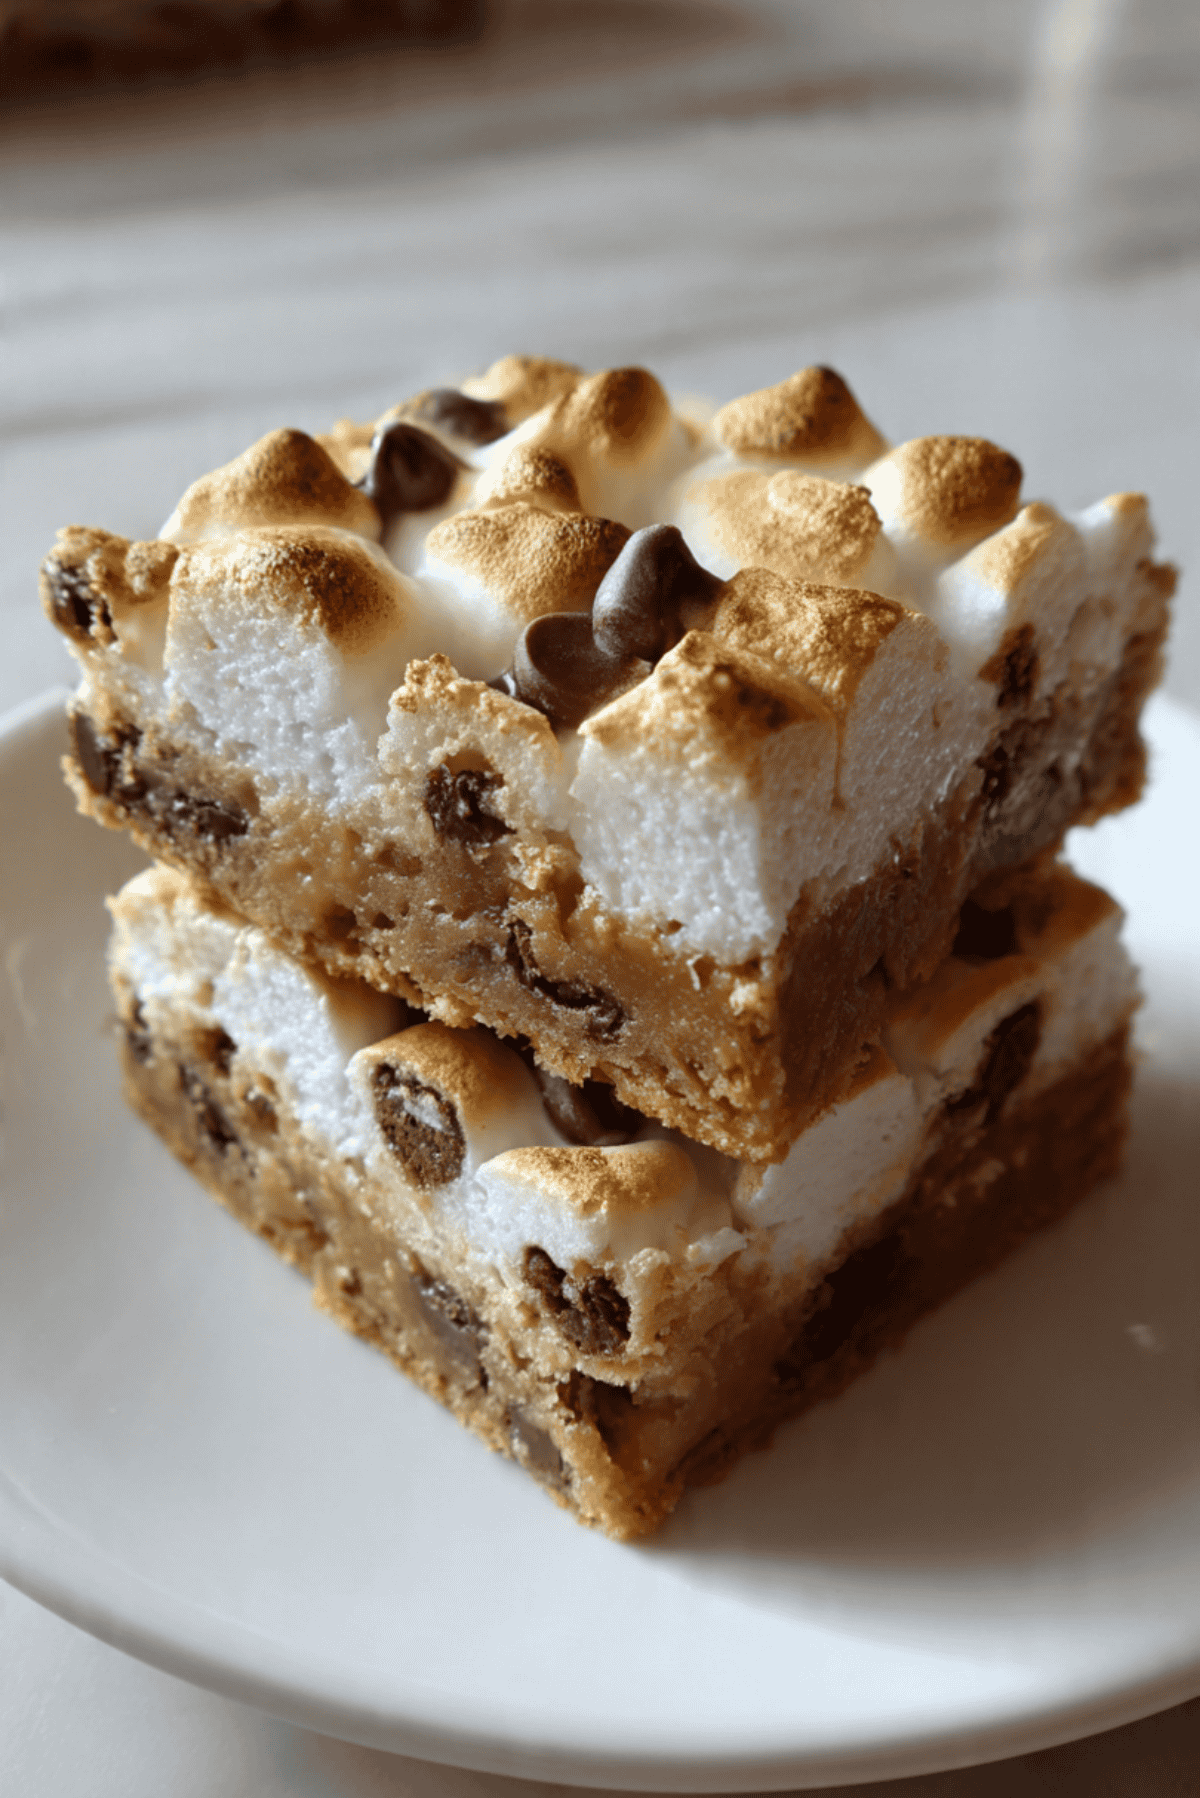
There’s something magical about the first bite of a Mud Hen Bar. Your teeth sink through the soft cookie base, hit the ooey-gooey chocolate chip pockets, and finally melt into the marshmallow-kissed meringue top that’s sweet, crackly, and golden brown. It’s a textural masterpiece, baked in a single pan, and honestly, it tastes like childhood and comfort all rolled into one. These bars are cozy, crumbly, and slightly chewy in all the right places. Trust me, you’re going to love this.
Behind the Recipe
Mud Hen Bars have been passed around for generations, often scribbled on index cards and tucked inside grandma’s favorite cookbook. It’s the kind of dessert that doesn’t need reinventing because it already hits every nostalgic note. The first time I made these, I was surprised by how something so simple could feel so indulgent. It felt like unlocking a secret, old-school treat you wish you’d known about sooner.
Recipe Origin or Trivia
Let’s talk trivia, shall we? Despite the curious name, Mud Hen Bars are believed to have Southern roots, particularly in the Mississippi Delta region. The “mud hen” itself is actually a bird, and while the bars thankfully contain no actual bird, the name likely reflects their rustic, layered appearance. This vintage dessert is a staple in many Southern homes, especially during the holidays or potlucks, where it never lasts long on the table.
Why You’ll Love Mud Hen Bars
These bars are the kind of dessert you crave again and again. Here’s why:
Versatile: Perfect for lunchboxes, bake sales, or midnight snacks.
Budget-Friendly: Uses simple pantry staples like flour, eggs, and sugar.
Quick and Easy: No fancy equipment, just layers, mix, and bake.
Customizable: Swap the nuts, add more chocolate, or toss in butterscotch chips.
Crowd-Pleasing: Always the first to disappear at gatherings.
Make-Ahead Friendly: Tastes even better the next day.
Great for Leftovers: They stay chewy and moist for days.
Chef’s Pro Tips for Perfect Results
Want to nail it on the first try? Here are a few tricks:
- Room temp eggs make a fluffier meringue. Cold eggs don’t whip as well, so let them sit out before starting.
- Line your pan with parchment. It makes lifting and cutting the bars a breeze.
- Don’t overbake the top. You want the meringue to be golden, not crisp and dry.
- Cool completely before slicing. This helps the layers set and prevents a gooey mess.
- Use fresh brown sugar. It gives that caramel note to the base that pairs perfectly with the chocolate.
Kitchen Tools You’ll Need
You don’t need much to whip these up, just the basics:
Mixing bowls: For the base, meringue, and folding everything together.
Hand or stand mixer: Essential for getting those egg whites nice and fluffy.
Spatula: Helps spread layers evenly without deflating the meringue.
9×13 baking pan: Classic size for the perfect batch.
Parchment paper: Keeps the bars from sticking and makes cleanup easy.
Ingredients in Mud Hen Bars
This recipe shines with just a few simple ingredients working in sweet harmony:
- Unsalted Butter: ½ cup (softened) — Adds richness to the cookie base.
- Granulated Sugar: 1 cup — Sweetens the base perfectly.
- Eggs: 3 large (2 yolks for base, 3 whites for meringue) — Separates for structure and that glossy top.
- All-Purpose Flour: 1½ cups — The backbone of the cookie layer.
- Baking Powder: 1 teaspoon — Gives the base a little lift.
- Salt: ½ teaspoon — Balances the sweetness.
- Mini Marshmallows: 1 cup — Melt into gooey pockets in the middle.
- Semi-Sweet Chocolate Chips: 1 cup — Brings melty, rich chocolate flavor.
- Chopped Pecans: ½ cup — Adds crunch and a nutty bite.
- Brown Sugar: 1 cup (packed) — Used in the meringue for a caramelized top.
Ingredient Substitutions
No worries if you’re missing a thing or two:
Pecans: Walnuts or almonds work well too.
Brown Sugar: Use coconut sugar for a deeper flavor.
Chocolate Chips: White or butterscotch chips add a fun twist.
Butter: Margarine or plant-based butters can be used for dairy-free.
Flour: Gluten-free flour blends can sub 1:1 in most cases.
Ingredient Spotlight
Brown Sugar: Gives the meringue a beautiful caramel note and chewy texture.
Mini Marshmallows: They melt just enough to create a gooey, sweet middle layer that’s irresistible.

Instructions for Making Mud Hen Bars
These bars are all about layers. Let’s walk through them step by step:
-
Preheat Your Equipment:
Set your oven to 350°F and line a 9×13-inch pan with parchment paper. -
Combine Ingredients:
In a large bowl, cream together softened butter and granulated sugar. Beat in 2 egg yolks (save the whites), then mix in flour, baking powder, and salt until smooth. -
Prepare Your Cooking Vessel:
Spread the cookie dough base evenly into the prepared pan. -
Assemble the Dish:
Sprinkle marshmallows, chocolate chips, and pecans evenly over the base. -
Cook to Perfection:
In a clean bowl, whip the 3 egg whites until stiff peaks form, then gently fold in the brown sugar. Spread this meringue mixture evenly over the top of the bars. -
Finishing Touches:
Bake for 30–35 minutes or until the top is golden and set. Let it cool completely in the pan. -
Serve and Enjoy:
Once cooled, slice into squares. The chewy base, melty middle, and crisp top create a trio of textures in every bite.
Texture & Flavor Secrets
The magic of Mud Hen Bars lies in the contrast. The base is buttery and soft, like a chewy sugar cookie. The middle layer melts slightly thanks to marshmallows and chocolate chips, while the top meringue adds a sweet crunch with just a hint of caramel from the brown sugar. Each bite is a full symphony of textures.
Cooking Tips & Tricks
Here are a few helpful reminders:
- Use fresh eggs for fluffier meringue.
- Don’t skip the parchment paper — it makes slicing easier.
- Store in an airtight container to keep the top crispy.
- Let bars cool completely for cleaner cuts.
What to Avoid
To keep your Mud Hen Bars on point, avoid these common mishaps:
- Overbeating the egg whites — it can make the meringue dry and brittle.
- Undercooking the base — it’ll fall apart when cutting.
- Cutting too soon — always let them cool fully to set the layers.
Nutrition Facts
Servings: 16
Calories per serving: 260
Note: These are approximate values.
Preparation Time
Prep Time: 15 minutes
Cook Time: 35 minutes
Total Time: 50 minutes
Make-Ahead and Storage Tips
You can make these bars a day ahead, and they actually taste even better after sitting overnight. Store in an airtight container at room temp for up to 4 days, or freeze individually wrapped bars for up to a month. To enjoy again, let thaw at room temp or pop in the microwave for 10 seconds.
How to Serve Mud Hen Bars
These bars are delicious as-is, but you can also:
- Serve with a scoop of vanilla ice cream
- Dust with powdered sugar before plating
- Pair with a cold glass of milk or hot coffee
Creative Leftover Transformations
Leftovers? Lucky you. Here’s how to remix them:
- Crumble over yogurt or ice cream for a crunchy topping
- Cut into mini cubes and stir into vanilla pudding
- Use in a trifle layered with whipped cream and fruit
Additional Tips
- Let the meringue rest a few minutes before spreading
- Add a pinch of cinnamon to the base for extra warmth
- Use a warm knife to cut through cleanly without cracking the top
Make It a Showstopper
Presentation counts. Try this:
- Stack bars in a pyramid on a white cake stand
- Drizzle lightly with melted chocolate
- Garnish the serving plate with a few extra marshmallows or chocolate chips
Variations to Try
- S’mores Style: Add crushed graham crackers to the base.
- PB Choco Swirl: Add swirls of peanut butter between layers.
- Holiday Twist: Use red and green M&Ms for a festive look.
- Salted Caramel: Drizzle caramel over the meringue before baking.
- Nut-Free: Skip the nuts or use sunflower seeds for crunch.
FAQ’s
Q1: Can I make Mud Hen Bars without nuts?
Absolutely. Just leave them out or substitute with seeds.
Q2: What kind of pan should I use?
A 9×13 baking pan works best for even layers.
Q3: Do I need to refrigerate them?
No, room temperature is fine unless your kitchen is very warm.
Q4: Can I double the recipe?
Yes, just use a larger pan or bake in two batches.
Q5: Can I freeze Mud Hen Bars?
Totally. Wrap tightly and freeze for up to a month.
Q6: Can I use marshmallow fluff instead?
Not recommended — it doesn’t hold up like mini marshmallows.
Q7: Why is my meringue weeping?
It could be overbeaten or undercooked. Aim for stiff but glossy peaks.
Q8: Can I use a hand whisk for meringue?
Technically yes, but it takes a lot of elbow grease.
Q9: Is parchment paper necessary?
It makes everything easier. Use it if you can.
Q10: How do I get clean slices?
Let bars cool completely, then use a sharp, clean knife.
Conclusion
Mud Hen Bars are that hidden gem dessert you never knew you needed until now. Sweet, chewy, gooey, and crackly in every bite — this recipe brings warmth, nostalgia, and a whole lot of flavor to your table. Try it once, and you’ll be making it on repeat.
Print
Mud Hen Bars
Description
Mud Hen Bars are a nostalgic dessert featuring a soft cookie base, gooey chocolate and marshmallow center, and a crisp brown sugar meringue top. Perfectly layered and full of texture, these bars are a comforting treat that’s easy to make and impossible to resist.
Ingredients
- 1/2 cup unsalted butter (softened)
- 1 cup granulated sugar
- 3 large eggs (2 yolks for base, 3 whites for meringue)
- 1 1/2 cups all-purpose flour
- 1 teaspoon baking powder
- 1/2 teaspoon salt
- 1 cup mini marshmallows
- 1 cup semi-sweet chocolate chips
- 1/2 cup chopped pecans
- 1 cup packed brown sugar
Instructions
- Preheat oven to 350°F and line a 9×13-inch pan with parchment paper.
- Cream together the softened butter and granulated sugar in a large bowl. Add in 2 egg yolks and beat until smooth.
- Mix in the flour, baking powder, and salt until a thick dough forms.
- Spread the dough evenly into the bottom of the prepared pan.
- Sprinkle marshmallows, chocolate chips, and pecans evenly on top of the dough.
- In a separate bowl, beat 3 egg whites until stiff peaks form, then gently fold in the brown sugar.
- Spread the meringue mixture over the top layer.
- Bake for 30–35 minutes or until the top is golden and set.
- Let the bars cool completely before slicing and serving.
Notes
- Use room temperature eggs for fluffier meringue.
- Parchment paper helps lift the bars out easily.
- Cool completely before cutting for clean slices.
- Can be made ahead and stored for up to 4 days.