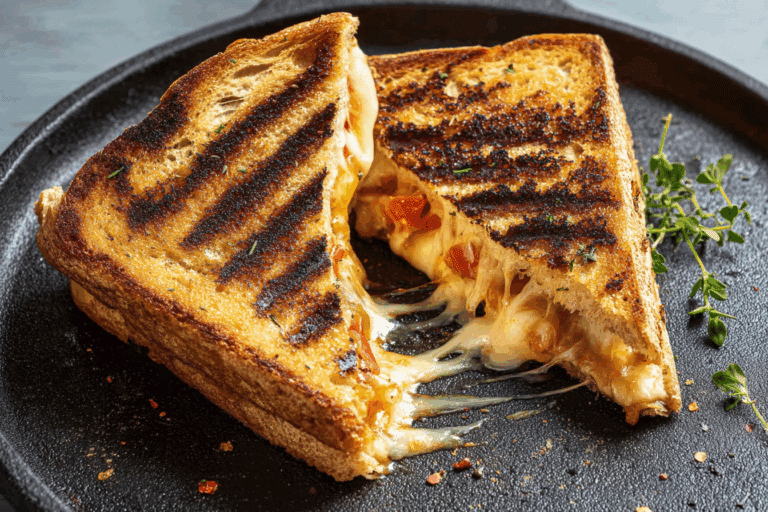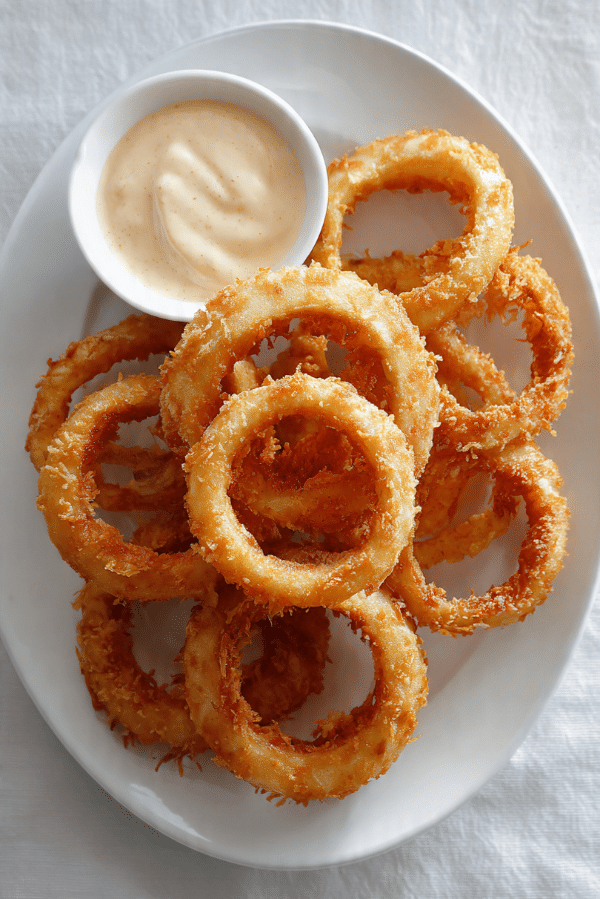
Onion Rings
There is something so satisfying about biting into a hot, crunchy ring and hearing that first crisp crackle before the sweet onion gives way underneath. It is the kind of snack that instantly feels fun, a little nostalgic, and totally worth making at home. Trust me, you’re going to love this, because once you taste that golden coating with the tender center, store bought just does not hit the same way.
Why These Crispy Rings Always Steal the Show
Some foods just know how to make an entrance, and this one does it every single time. The outside turns beautifully crisp, the inside stays soft and slightly sweet, and the whole thing feels like the best kind of comfort food. Let me tell you, it’s worth every bite, especially when you serve them fresh with your favorite dip on the side.
A Little Backstory Behind This Snack Shop Favorite
These crunchy rings have deep roots in diner culture, pub menus, and classic fair style comfort food. They became especially popular in North America as a fried side dish and snack, loved for that contrast between sweet onion and savory coating. Over time, home cooks created their own versions, some using simple flour batters, others leaning into extra crunch with cornmeal or breadcrumbs, and that is part of the fun. There is no single way to love them, but the crispy golden version is always a winner.
Why This Recipe Works So Well Every Time
This recipe has that sweet spot of being simple enough for a casual craving, but reliable enough that you will want to make it again and again. And now let dive to the reasons it earns a permanent place in the snack rotation.
Versatile: These work as a party snack, a burger side, or even a fun weekend appetizer. They fit into almost any casual meal and always feel welcome on the table.
Budget-Friendly: Onions, flour, milk, and a few pantry basics come together into something that tastes like a treat. You do not need anything fancy to get that crispy result.
Quick and Easy: Once the coating is mixed and the oil is hot, everything moves fast. The rings cook in just a few minutes, which makes them ideal when you want something satisfying without a long kitchen session.
Customizable: You can keep the seasoning simple or add a little paprika, garlic powder, or black pepper for extra personality. The dipping sauce can go classic, spicy, or tangy depending on your mood.
Crowd-Pleasing: Crispy, salty, golden snacks disappear quickly, and this one is no exception. Put out a plate and watch how fast it goes.
Make-Ahead Friendly: You can slice the onions and mix the dry ingredients ahead of time, which makes the final cooking feel much easier. It is a great little head start when guests are coming.
Great for Leftovers: If you happen to have extras, they can be reheated in the oven or air fryer to bring back some crunch. They also make a fun topping for sandwiches and burgers.
Insider Secrets for Better Crunch
A few small details make a big difference here, and this one’s a total game-changer when you want that restaurant-style texture.
- Keep the onion slices thick enough: Aim for about 1/2 inch thick rings so the onion stays tender and juicy inside the coating.
- Let the batter rest briefly: A short rest of about 10 minutes helps the flour hydrate, which gives you a smoother coating.
- Dust before dipping: A light flour coating helps the batter cling better and keeps the crust from slipping off.
- Fry in batches: Overcrowding drops the oil temperature, and that can lead to greasy results instead of crisp ones.
- Serve immediately: They are at their absolute best when hot, fresh, and still audibly crunchy.
Kitchen Tools That Make the Job Easier
Before the batter starts coming together, it helps to have a few basics ready so the whole process feels smooth and stress free.
Chef’s knife: For slicing the onions into even, sturdy rings.
Mixing bowls: You will need one for the dry ingredients and one for the batter setup.
Whisk: Helps create a smooth batter without lumps.
Heavy pot or deep skillet: Essential for frying safely and evenly.
Tongs or spider strainer: Makes lowering and lifting the rings much easier.
Wire rack or paper towel lined tray: Helps the fried rings stay crisp while draining.
Ingredients That Build the Perfect Bite
The beauty of this recipe is how a few everyday ingredients come together to create something deeply crunchy, savory, and completely irresistible. Each one plays a real role, so here is what you will need and why it matters.
- Sweet onion: 2 large sweet onions, sliced into 1/2-inch rings, these are the star and bring that tender, mellow sweetness.
- All-purpose flour: 1 1/4 cups, this forms the base of the coating and gives structure to the batter.
- Baking powder: 1 teaspoon, this helps lighten the coating so it fries up crisp instead of heavy.
- Salt: 1 teaspoon, this seasons the batter and brings the flavors into focus.
- Garlic powder: 1/2 teaspoon, this adds a savory background note that works beautifully with onion.
- Paprika: 1/2 teaspoon, this gives gentle warmth and a richer golden color.
- Black pepper: 1/4 teaspoon, this adds a little edge and balances the sweetness.
- Milk: 1 cup, this brings the batter together and keeps it smooth.
- Egg: 1 large, this helps the batter cling and adds richness.
- Breadcrumbs: 1 cup, these give the outside an extra crunchy finish.
- Vegetable oil: about 1 quart for frying, this creates the crisp exterior and cooks the rings quickly.
- Extra flour for dredging: 1/4 cup, this helps the batter stick to the onion rings more evenly.
Easy Swaps When You Need Them
Even though the classic version is hard to beat, there is still room to adjust things based on what you already have in the kitchen.
Milk: Buttermilk for a slightly tangier flavor.
Breadcrumbs: Panko for an even lighter, crunchier finish.
Paprika: Smoked paprika for a deeper savory note.
Sweet onion: Yellow onion if sweet onions are not available.
Vegetable oil: Canola oil or peanut oil for frying.
The Ingredients That Truly Make the Magic
A couple of ingredients do a lot of heavy lifting here, and they are worth a little extra love before we move into the cooking.
Sweet onion: This is what gives the finished rings their signature tender center and mellow sweetness. When fried, the flavor softens and turns almost buttery.
Breadcrumbs: These create that irresistible crisp shell that makes each bite feel extra satisfying. They also help the coating stay textured instead of flat.

Let’s Get These Golden and Crispy
Now comes the fun part, where simple ingredients turn into a hot, crunchy plate that smells amazing the second it hits the table. Here are the steps you’re going to follow.
- Preheat Your Equipment: Heat the vegetable oil in a deep skillet or heavy pot to 375°F. Set a wire rack or paper towel lined tray nearby for draining.
- Combine Ingredients: In one bowl, whisk together 1 1/4 cups flour, baking powder, salt, garlic powder, paprika, and black pepper. In another bowl, whisk the milk and egg until smooth, then whisk in the seasoned flour mixture to form a thick batter. Place the breadcrumbs in a separate shallow bowl.
- Prepare Your Cooking Vessel: Add the extra 1/4 cup flour to a plate or shallow bowl. Separate the onion slices into rings and lightly dredge them in the flour, shaking off the excess.
- Assemble the Dish: Dip each floured ring into the batter, letting the excess drip off, then coat it in the breadcrumbs so the outside is fully covered.
- Cook to Perfection: Fry the coated rings in batches for 2 to 3 minutes per side, or until deeply golden and crisp. Do not crowd the pan, because the temperature needs room to stay steady.
- Finishing Touches: Transfer the hot rings to the prepared rack or tray and sprinkle lightly with a little extra salt while they are still warm.
- Serve and Enjoy: Serve immediately with ranch, spicy mayo, ketchup, or your favorite dipping sauce while they are still hot and crunchy.
What Makes the Texture and Flavor So Good
What makes these so special is the contrast. The outside is crisp, savory, and slightly crackly, while the onion inside turns soft, sweet, and almost silky. As they cook, the batter browns into a deeply golden shell and the onion loses its sharpness, becoming mellow and rich. That mix of sweet, salty, crunchy, and tender is exactly what keeps you reaching for another one.
Smart Tips for Frying Success
A little attention goes a long way here, especially once the oil is hot and the batches start moving quickly.
- Use similar sized rings: Evenly sized pieces cook more consistently and look nicer on the plate.
- Check the oil temperature often: Too cool and the coating gets greasy, too hot and the outside browns before the onion softens.
- Season right after frying: A pinch of salt sticks best while the rings are still hot.
- Keep finished batches on a rack: This helps preserve the crisp texture better than stacking them in a bowl.
Mistakes to Skip for Better Results
Even simple recipes have a few little traps, but once you know them, the whole process feels much easier.
- Do not slice the onions too thin: Thin rings can soften too much and lose their structure in the oil.
- Do not skip the flour dredge: Without it, the batter may slide off instead of clinging nicely.
- Do not overcrowd the pan: Too many rings at once can lower the oil temperature and make them soggy.
- Do not let them sit too long before serving: These are best right away, when the coating is still crisp and lively.
Nutrition at a Glance
Servings: 4
Calories per serving: 430
Note: These are approximate values.
Time Breakdown Before You Start
Prep Time: 20 minutes
Cook Time: 15 minutes
Total Time: 35 minutes
Make Ahead, Store, Freeze, and Reheat
If you want to get ahead, slice the onions and mix the dry ingredients a few hours in advance. You can also separate your dipping and breading station before frying, which makes the final process feel much less messy.
For storage, let the rings cool completely and place them in an airtight container in the fridge for up to 2 days. For freezing, arrange them in a single layer first so they do not stick together, then transfer to a freezer safe container. To reheat, use an oven or air fryer so the coating crisps back up nicely. The microwave works in a pinch, but the texture will be softer.
Best Ways to Serve Them
These are excellent with burgers, sandwiches, hot dogs, or grilled chicken. They also make a great snack board addition with a few dipping sauces like ranch, honey mustard, or spicy mayo. For a casual party spread, pile them onto a platter with pickles, fries, and a couple of different sauces and let everyone dig in.
Fun Ideas for Leftovers
If you have leftovers, tuck them into a sandwich for crunch, chop them over a salad for texture, or slide them into a wrap with a creamy sauce and some lettuce. They are also surprisingly good on top of a burger when you want that extra crispy layer.
Extra Little Helps for the Best Batch
For even more flavor, add a pinch of cayenne or a little extra black pepper to the breadcrumb mixture. If you love a thicker crust, let the battered rings sit for a minute before coating them in breadcrumbs. And if you are making a big batch, keep finished rings warm in a low oven while the rest fry.
Turn the Plate Into a Showstopper
Presentation matters with food like this because that golden color deserves a little spotlight. Stack the rings high on a plate or in a lined basket, place a small dipping bowl in the center or on the side, and finish with a tiny sprinkle of salt. The contrast between the crunchy coating and creamy sauce always looks inviting.
Delicious Twists to Try Next Time
- Spicy Version: Add cayenne and a little chili powder to the seasoning mix for gentle heat.
- Panko Crunch: Swap regular breadcrumbs for panko if you want a lighter, extra craggy crust.
- Buttermilk Style: Use buttermilk instead of regular milk for a tangier flavor and tender coating.
- Herb Seasoned: Add a pinch of dried oregano or parsley to the breadcrumb mixture for an herby finish.
- Cheesy Crust: Mix a little finely grated Parmesan into the breadcrumbs for extra savory flavor.
FAQ’s
1. Can I make these ahead of time?
Yes, you can prep the onions and coating ingredients ahead, but fry them just before serving for the best crunch.
2. What kind of onion works best?
Sweet onions are ideal because they become tender and mellow when cooked, but yellow onions also work well.
3. Why is my coating falling off?
This usually happens when the rings are not lightly dredged in flour first or when the batter is too thin.
4. Can I use panko instead of regular breadcrumbs?
Absolutely. Panko gives a lighter and crunchier texture.
5. How do I know when the oil is ready?
A thermometer is best, and you want it around 375°F for crisp, even frying.
6. Can I bake these instead of frying?
You can, though the texture will be different. They will still be tasty, just less deeply crisp.
7. What sauce goes best with them?
Ranch, spicy mayo, ketchup, and honey mustard are all great choices.
8. How thick should I slice the onions?
About 1/2 inch is a good target because it gives structure and a tender center.
9. How do I reheat leftovers?
Use an oven or air fryer so the outside crisps up again.
10. Can I make them without breadcrumbs?
Yes, you can use just batter for a simpler finish, but breadcrumbs give that extra crunch many people love.
Conclusion
There is just something joyful about serving up a plate of hot, golden rings that crackle the second you bite into them. They are simple, comforting, and full of that sweet and savory balance that makes homemade snacks feel extra special. Whether you are making them for game day, burger night, or just because the craving hit hard, this recipe brings that crisp, satisfying payoff every single time.
Print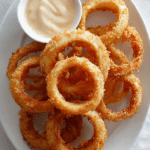
Onion Rings
Description
Golden, crispy onion rings with a tender sweet onion center and a crunchy breadcrumb coating, perfect for snacking, sharing, or serving alongside burgers and sandwiches.
Ingredients
- 2 large sweet onions, sliced into 1/2-inch rings
- 1 1/4 cups all-purpose flour
- 1 teaspoon baking powder
- 1 teaspoon salt
- 1/2 teaspoon garlic powder
- 1/2 teaspoon paprika
- 1/4 teaspoon black pepper
- 1 cup milk
- 1 large egg
- 1 cup breadcrumbs
- 1 quart vegetable oil, for frying
- 1/4 cup all-purpose flour, for dredging
Instructions
- Heat the vegetable oil in a deep skillet or heavy pot to 375°F. Prepare a wire rack or a paper towel lined tray for draining.
- In a bowl, whisk together 1 1/4 cups flour, baking powder, salt, garlic powder, paprika, and black pepper.
- In another bowl, whisk the milk and egg until smooth, then whisk in the seasoned flour mixture to make a thick batter.
- Place the breadcrumbs in a separate shallow bowl and the extra 1/4 cup flour in another shallow bowl or plate.
- Separate the onion slices into rings and lightly dredge each ring in the extra flour, shaking off any excess.
- Dip each floured ring into the batter, let the excess drip off, then coat completely in the breadcrumbs.
- Fry the coated rings in batches for 2 to 3 minutes per side, until golden brown and crisp. Do not overcrowd the pan.
- Transfer to the prepared rack or tray and sprinkle lightly with extra salt while still hot.
- Serve immediately with your favorite dipping sauce.
Notes
- Use sweet onions for the best mellow flavor and tender texture.
- Keep the oil at a steady 375°F for the crispiest result.
- Panko can be used instead of regular breadcrumbs for extra crunch.
- Reheat leftovers in the oven or air fryer to bring back the crisp texture.