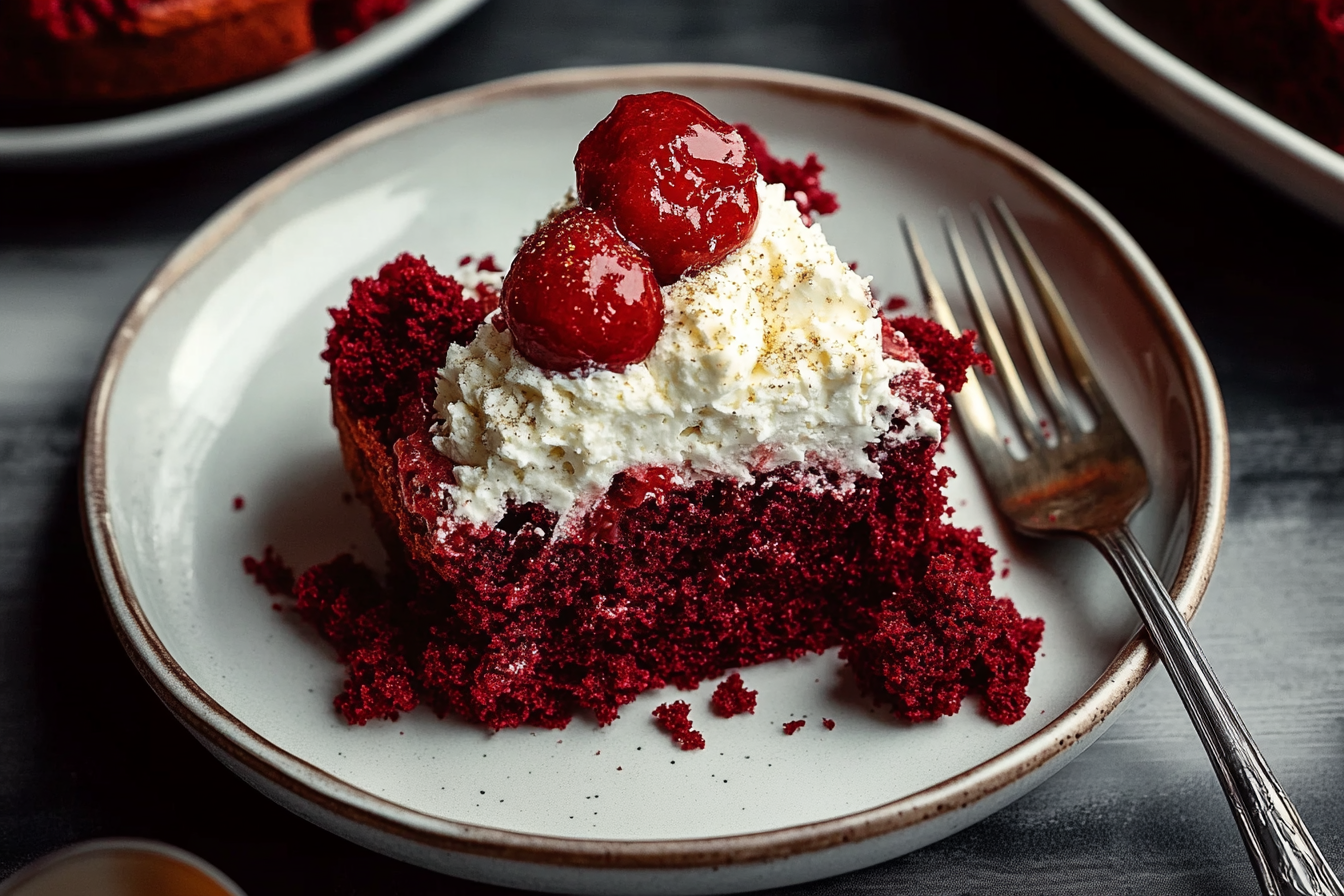
Easy Red Velvet Dump Cake Recipe Dessert
If you’re looking for a dessert that combines ease and indulgence, you’ve found it with this Easy Red Velvet Dump Cake Recipe. It’s rich, moist, and packed with the classic flavors of red velvet, coming together in minutes without any complicated baking techniques. Whether you’re a beginner or just need a no-fuss dessert that tastes like it took hours, this cake will quickly become your go-to for celebrations, weeknight treats, or whenever that sweet tooth calls.
Why You’ll Love This Recipe
- Simple preparation: Just dump the ingredients together—no mixing bowls, no mess, just quick and easy assembly.
- Classic red velvet flavor: Enjoy that beloved blend of cocoa and buttermilk with a hint of vanilla in every bite.
- Moist and tender texture: Unlike traditional cakes, this has a melt-in-your-mouth softness with a lightly crispy topping.
- Time-saving dessert: Ready in under an hour, it’s perfect for spontaneous gatherings or last-minute cravings.
- Minimal ingredients: Uses pantry staples and one cake mix for a foolproof, flavorful result.
Ingredients You’ll Need
The beauty of this Easy Red Velvet Dump Cake Recipe is in its simplicity. Each ingredient plays a crucial role in building flavor, richness, and texture without overcomplicating the process.
- Red velvet cake mix: Choose your favorite box mix as the cake base and flavor driver.
- Canned red velvet or cherry pie filling: Adds moisture, sweetness, and that signature red color.
- Butter: Melted butter helps form the crispy, golden crust on top.
- Buttermilk or sour cream (optional): Boosts moisture and richness for a more authentic red velvet taste.
- Vanilla extract: Enhances the flavor depth with subtle sweetness.
Variations for Easy Red Velvet Dump Cake Recipe
Customizing this recipe is not only simple but also a great way to suit different tastes or dietary needs. Whether you like it more chocolatey, creamier, or even dairy-free, adapting is a breeze.
- Chocolate chip addition: Sprinkle in chocolate chips before baking for extra melty chocolate bits.
- Use cream cheese topping: Mix cream cheese and powdered sugar for a luscious, homemade frosting finish.
- Dairy-free version: Substitute butter with coconut oil and use non-dairy milk alternatives.
- Nut topping: Add crushed pecans or walnuts on top for crunch and nuttiness.
- Fruit swap: Replace pie filling with raspberry or strawberry for a fruity twist.

How to Make Easy Red Velvet Dump Cake Recipe
Step 1: Prepare your baking dish
Preheat your oven to 350°F (175°C). Lightly grease a 9×13-inch baking dish with butter or non-stick spray to prevent sticking and make clean-up easier.
Step 2: Add the pie filling
Evenly spread the entire can of red velvet or cherry pie filling across the bottom of your prepared baking dish. This will keep the cake moist and infuse it with sweet, tangy flavors.
Step 3: Sprinkle the cake mix
Next, evenly dump the dry red velvet cake mix on top of the pie filling layer. Don’t stir—just spread it out gently to cover as much of the filling as possible.
Step 4: Drizzle with melted butter
Pour melted butter evenly over the cake mix. The butter is essential to create a golden crust and ensure the dry cake mix hydrates while baking.
Step 5: Bake until bubbly and golden
Place the pan in the oven and bake for about 40-45 minutes. The top should turn golden brown, and the filling will bubble up around the edges, signaling it’s done.
Step 6: Cool and serve
Allow the cake to cool for 15 minutes before serving to let the layers set. Serve warm or at room temperature, optionally with whipped cream or vanilla ice cream.
Pro Tips for Making Easy Red Velvet Dump Cake Recipe
- Melt butter evenly: Use a spoon to ensure butter covers the entire cake mix layer so it bakes uniformly.
- Don’t stir the ingredients: For the perfect texture, avoid mixing cake mix with the filling or butter.
- Use fresh cake mix: Using a fresh red velvet cake mix will give you the best flavor and rise.
- Check your pie filling: If too thick, thin with a little water to help it bubble through during baking.
- Let it rest before serving: This step helps the cake set so it slices beautifully without falling apart.
How to Serve Easy Red Velvet Dump Cake Recipe
Garnishes
Top your dump cake with whipped cream, a dusting of powdered sugar, or shaved white chocolate to enhance its visual appeal and add flavor contrast.
Side Dishes
Pair it with a scoop of vanilla or cream cheese-flavored ice cream and a few fresh berries to balance richness with freshness.
Creative Ways to Present
Serve individual portions in ramekins topped with a drizzle of chocolate sauce and a sprig of mint, making this simple cake feel special and festive.
Make Ahead and Storage
Storing Leftovers
Keep any leftover cake in an airtight container in the refrigerator for up to 3 days. It will retain moisture and flavor well when covered properly.
Freezing
This dump cake freezes beautifully—wrap it tightly in plastic wrap and then foil, and freeze for up to 2 months. Thaw overnight in the fridge before reheating.
Reheating
Warm leftovers in the microwave for about 30 seconds or in a preheated 325°F oven for 10-15 minutes until heated through without drying out.
FAQs
Can I make this dessert gluten-free?
Yes! Simply swap the cake mix for a gluten-free red velvet mix and ensure the pie filling you use is gluten-free as well.
Is it possible to make this recipe from scratch?
Absolutely, but using a boxed cake mix simplifies the process tremendously and still delivers great taste and texture for this dump cake style.
Can I use frozen pie filling?
Fresh or thawed frozen pie filling works best to avoid excess liquid; just make sure it’s properly thawed and drained if needed.
What if I don’t have red velvet pie filling?
You can substitute cherry, strawberry, or even raspberry pie filling to add a fruity twist that pairs excellently with red velvet flavors.
How do I make this cake more decadent?
Add cream cheese frosting or a dollop of mascarpone on top, or mix some chocolate chips into the cake layer before baking for extra richness.
Final Thoughts
This Easy Red Velvet Dump Cake Recipe is a must-try for anyone who loves a homemade dessert without the mess and fuss. Its combination of bold flavors, simple ingredients, and quick prep means you’ll be whipping up this crowd-pleaser time and time again. Trust me, once you try it, it’ll become a staple in your dessert rotation—you’re going to want to keep this recipe handy for every occasion!
Related Posts
- Big Pink Cookie Cake Perfect for Celebrations
- Chocolate Dipped Strawberry Cookies for Sweet Treats
- Biscoff Banana Pudding with Dulce de Leche Dessert Treat
Easy Red Velvet Dump Cake Recipe
- Total Time: 50-55 minutes
- Yield: 12 servings
- Diet: Vegetarian
Description
This Easy Red Velvet Dump Cake is a quick, no-mess dessert that combines the classic flavors of red velvet with a moist, tender texture and a crispy golden crust. Using simple pantry staples and a boxed cake mix, it comes together in minutes and bakes into a rich, indulgent treat perfect for any occasion, from weeknight desserts to celebrations.
Ingredients
Main Ingredients
- 1 box red velvet cake mix
- 1 can (21 oz) red velvet or cherry pie filling
- 1/2 cup (1 stick) unsalted butter, melted
- 2 tablespoons buttermilk or sour cream (optional)
- 1 teaspoon vanilla extract
Instructions
- Prepare your baking dish: Preheat your oven to 350°F (175°C). Lightly grease a 9×13-inch baking dish with butter or non-stick spray to prevent sticking and make clean-up easier.
- Add the pie filling: Evenly spread the entire can of red velvet or cherry pie filling across the bottom of your prepared baking dish. This will keep the cake moist and infuse it with sweet, tangy flavors.
- Sprinkle the cake mix: Evenly dump the dry red velvet cake mix on top of the pie filling layer. Don’t stir—just spread it out gently to cover as much of the filling as possible.
- Drizzle with melted butter: Pour melted butter evenly over the cake mix. The butter is essential to create a golden crust and ensure the dry cake mix hydrates while baking.
- Bake until bubbly and golden: Place the pan in the oven and bake for about 40-45 minutes. The top should turn golden brown, and the filling will bubble up around the edges, signaling it’s done.
- Cool and serve: Allow the cake to cool for 15 minutes before serving to let the layers set. Serve warm or at room temperature, optionally with whipped cream or vanilla ice cream.
Notes
- Melt butter evenly: Use a spoon to ensure butter covers the entire cake mix layer so it bakes uniformly.
- Don’t stir the ingredients: For the perfect texture, avoid mixing cake mix with the filling or butter.
- Use fresh cake mix: Using a fresh red velvet cake mix will give you the best flavor and rise.
- Check your pie filling: If too thick, thin with a little water to help it bubble through during baking.
- Let it rest before serving: This step helps the cake set so it slices beautifully without falling apart.
- Prep Time: 10 minutes
- Cook Time: 40-45 minutes
- Category: Desserts
- Method: Baking
- Cuisine: American
Nutrition
- Serving Size: 1 slice (1/12 of cake)
- Calories: 350
- Sugar: 32g
- Sodium: 320mg
- Fat: 15g
- Saturated Fat: 9g
- Unsaturated Fat: 5g
- Trans Fat: 0.5g
- Carbohydrates: 48g
- Fiber: 1g
- Protein: 3g
- Cholesterol: 40mg