LAZY BAO
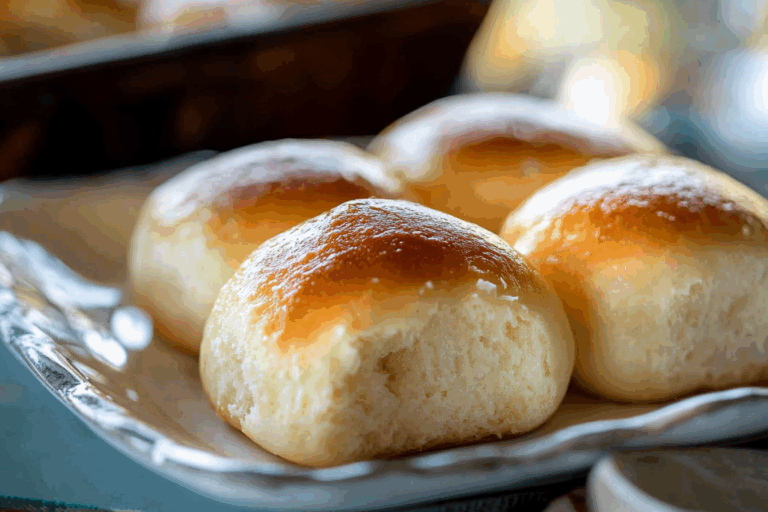
There is something deeply comforting about a warm, fluffy bun with a savory center, especially when the bottom turns beautifully golden in the pan and the filling stays juicy enough to make you pause after the first bite. This one is for those nights when you want something that feels special, cozy, and a little impressive, but you do not want to spend the whole evening in the kitchen. Trust me, you’re going to love this.
Why this cozy little bun deserves a spot on your table
Some recipes feel like weekend projects, and then some feel like a smart little secret. This is the second kind. You get soft dough, rich savory filling, and that irresistible contrast between a tender top and a crisp bottom. Let me tell you, it’s worth every bite.
A shortcut version inspired by beloved street style buns
These pan cooked buns are inspired by the kind of filled buns that show up across East Asian cooking traditions, especially the juicy pan fried buns that are loved for their fluffy dough and crisp base. Traditional versions can take more time and technique, but this version keeps the spirit of that experience while making the process feel far more doable in a home kitchen. It still gives you that warm, steamy, golden result that makes the whole table go quiet for a second.
Reasons this recipe works every single time
Before we get into mixing and folding, it helps to know why this one is such a keeper. It is not just delicious, it is dependable too.
Versatile: You can serve these as a snack, a light dinner, or part of a bigger spread with crunchy salad, quick pickles, or soup.
Budget-Friendly: The dough uses pantry basics, and the filling leans on simple everyday ingredients that stretch beautifully without tasting plain.
Quick and Easy: It looks like something that took all afternoon, but the steps are surprisingly straightforward and very manageable.
Customizable: You can tweak the filling, adjust the seasoning, or swap the garnish depending on what you have on hand.
Crowd-Pleasing: Soft, savory, juicy, and golden is a combination that wins over almost everyone at the table.
Make-Ahead Friendly: The filling can be mixed earlier in the day, which makes the final cooking feel much easier.
Great for Leftovers: They reheat well, and the flavor settles in even more by the next day.
Smart little secrets for better buns
Once you know a few small tricks, the process feels much more relaxed.
- Keep the dough soft: A slightly tacky dough gives you a softer final texture, so resist the urge to add too much extra flour.
- Chop the cabbage finely: This helps the filling stay compact and easy to seal, while also giving every bite a tender texture.
- Do not overfill: It is tempting, I know, but a modest amount of filling makes shaping much easier and helps prevent leaks.
- Use a tight lid while steaming: That trapped steam is what gives the tops their lovely pillowy finish.
- Let the bottoms color slowly: Medium heat gives you a crisp golden crust without burning before the inside cooks through.
Kitchen tools that make the process easier
And now that the game plan feels clear, here are the tools that make everything smoother from start to finish.
Large mixing bowl: Big enough to comfortably bring the dough together without flour ending up everywhere.
Small skillet or sauté pan: Perfect for cooking the filling before you shape the buns.
Rolling pin: Helps flatten each dough piece evenly so the buns cook at the same rate.
Large nonstick skillet with lid: This is the real hero for getting both the crisp bottom and the steamy top.
Wooden spoon or spatula: Useful for stirring the filling and scraping up all those flavorful bits.
Measuring cups and spoons: Important here, because good dough loves a little accuracy.
Everything you need for these fluffy, savory buns
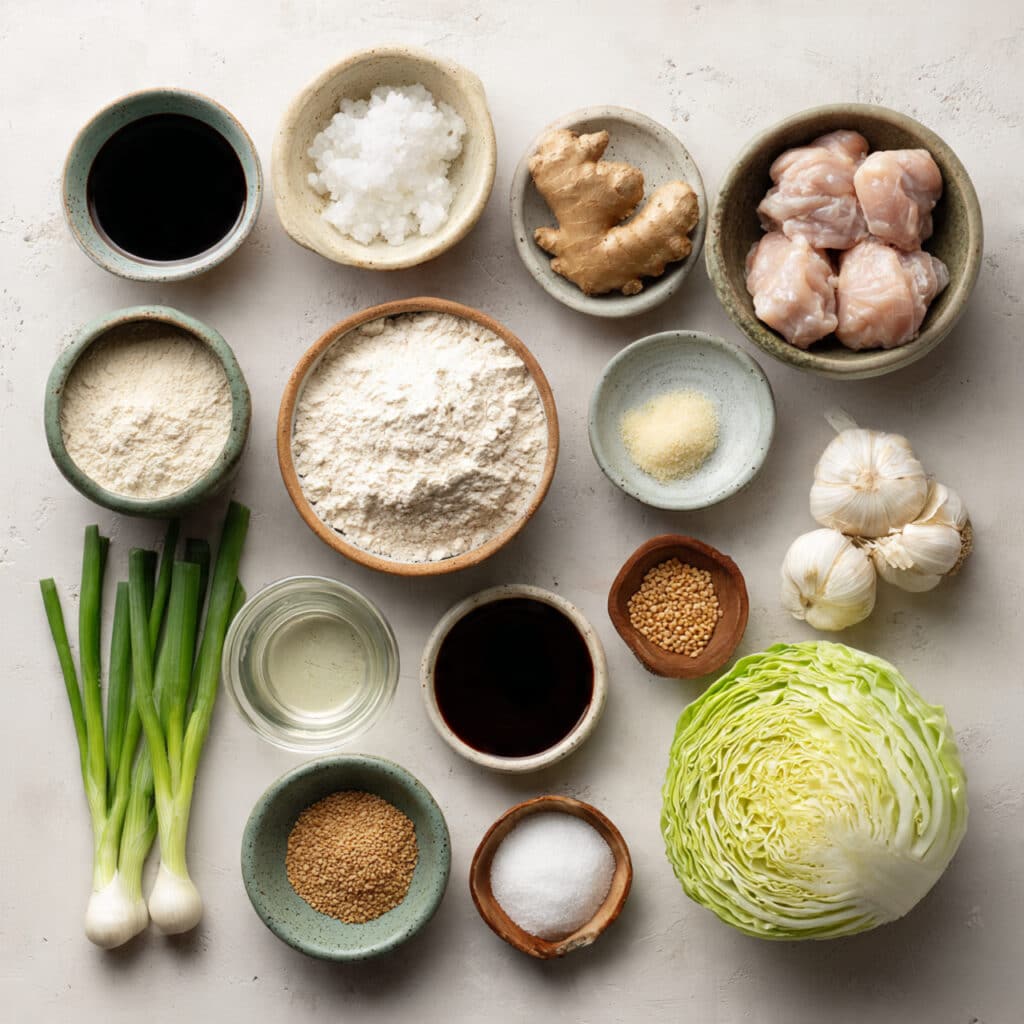
The beauty of this recipe is how ordinary ingredients come together into something that tastes like way more effort than it really is.
- All-purpose flour: 3 cups, this forms the base of the dough and gives the buns their soft but structured texture.
- Instant yeast: 2 1/4 teaspoons, this helps the dough rise and keeps the crumb light.
- Granulated sugar: 2 tablespoons, this adds balance and supports the yeast.
- Baking powder: 1 teaspoon, this gives the dough an extra bit of lift for that tender finish.
- Fine salt: 3/4 teaspoon, this seasons the dough and rounds out the flavor.
- Warm water: 1 cup, this hydrates the dough and helps everything come together smoothly.
- Neutral oil: 2 tablespoons, this keeps the dough supple and adds a little richness.
- Ground chicken thighs: 1 pound, this makes the filling juicy and flavorful without needing lots of extra fat.
- Green cabbage: 2 cups, finely chopped, this adds sweetness, tenderness, and a little body to the filling.
- Green onions: 3, thinly sliced, these bring freshness and a mild onion note.
- Garlic: 3 cloves, minced, this adds deep savory flavor right from the start.
- Fresh ginger: 1 tablespoon, grated, this keeps the filling bright and aromatic.
- Soy sauce: 2 tablespoons, this gives the filling saltiness and umami.
- Hoisin sauce: 1 tablespoon, this adds a gentle sweetness and glossy depth.
- Sesame oil: 1 teaspoon, this brings that unmistakable nutty finish.
- Cornstarch: 1 teaspoon, this helps hold the filling together so it stays juicy, not watery.
- Black pepper: 1/4 teaspoon, this gives a soft background warmth.
- Neutral oil: 2 tablespoons, this is for pan cooking the buns and building that crisp golden bottom.
- Water: 1/3 cup, this goes into the pan for steaming the buns through.
- Toasted sesame seeds: 1 tablespoon, these add a lightly nutty finish and a bit of texture on top.
- Extra sliced green onions: 1 tablespoon, these brighten the final look and flavor.
- Soy sauce for serving: 2 tablespoons, this makes a simple dipping option that works beautifully.
Easy swaps when you need a flexible option
If your kitchen is missing one or two things, you still have plenty of room to make this work.
Ground chicken thighs: Ground turkey thighs or ground chicken.
Green cabbage: Napa cabbage or very finely chopped bok choy.
Hoisin sauce: Oyster-free stir fry sauce or a mix of soy sauce and a little honey.
Green onions: Finely chopped chives or a little extra regular onion in the filling.
Fresh ginger: 1/2 teaspoon ground ginger, though fresh gives a brighter result.
Sesame oil: A small splash of neutral oil, though you will lose some of that signature nutty aroma.
The ingredients that quietly do the heavy lifting
A couple of ingredients really shape the whole personality of the dish, and they deserve a little moment.
Ground chicken thighs: This is the reason the filling stays tender and juicy. It has enough richness to stay flavorful without becoming greasy.
Green cabbage: It softens into the filling and brings a gentle sweetness that keeps everything balanced and satisfying.
Let’s make them step by step
This is where the fun really starts. Once the filling is mixed and the dough is soft beneath your hands, the whole recipe begins to feel less like a task and more like a little kitchen ritual.
- Preheat Your Equipment: Set a large nonstick skillet with a lid nearby and lightly oil a clean work surface. You do not need a hot oven for this recipe, but having your cooking pan ready makes the shaping and cooking flow much more smoothly.
- Combine Ingredients: In a large bowl, mix the all-purpose flour, instant yeast, granulated sugar, baking powder, and fine salt. Add the warm water and 2 tablespoons neutral oil, then stir until a shaggy dough forms. Knead for 8 minutes until smooth and soft. Cover and let it rest for 20 minutes. While it rests, combine the ground chicken thighs, green cabbage, green onions, garlic, fresh ginger, soy sauce, hoisin sauce, sesame oil, cornstarch, and black pepper in another bowl. Mix until fully combined.
- Prepare Your Cooking Vessel: Heat 1 teaspoon of neutral oil in a small skillet over medium heat. Add the filling mixture and cook for 4 to 5 minutes, stirring often, until the chicken is just cooked and the cabbage has softened. Transfer the filling to a plate and let it cool for 10 minutes so it is easier to handle.
- Assemble the Dish: Divide the dough into 8 equal pieces. Roll each piece into a circle about 4 inches wide, keeping the center slightly thicker than the edges. Spoon about 2 tablespoons of filling into the center of each one. Pleat and pinch the dough closed at the top, then gently shape each bun into a round.
- Cook to Perfection: Add the remaining 2 tablespoons neutral oil to the large nonstick skillet over medium heat. Arrange the buns sealed side up, leaving a little space between them. Cook for 2 to 3 minutes until the bottoms begin to turn golden. Carefully pour in the 1/3 cup water and cover immediately with the lid. Let the buns steam for 8 to 10 minutes until puffed and cooked through. Remove the lid and cook 1 to 2 minutes more so the bottoms crisp again.
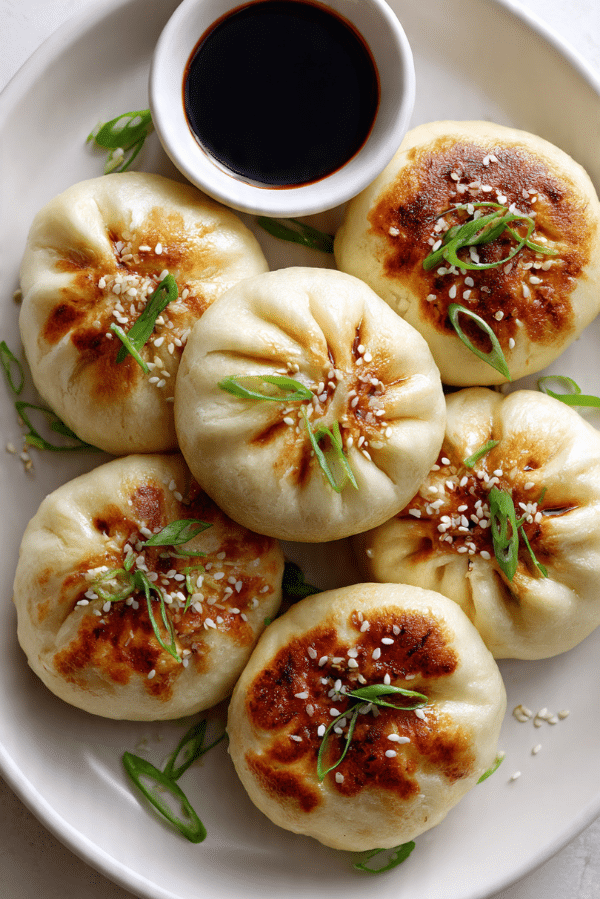
- Finishing Touches: Sprinkle the tops with toasted sesame seeds and extra sliced green onions. That little final shower makes them look bright, fresh, and completely irresistible.
- Serve and Enjoy: Serve hot with the soy sauce on the side for dipping. The first bite should give you soft dough, juicy filling, and that golden crisp edge all at once. This one’s a total game-changer.
The texture story that makes every bite so good
What really makes these special is the contrast. The tops stay soft and pillowy from the steam, while the bottoms turn lightly crisp and golden in the pan. Inside, the filling is savory and juicy, with the cabbage melting gently into the chicken and soaking up all that garlic, ginger, and soy. It is warm, aromatic, and deeply satisfying without feeling heavy.
Helpful tricks for a smoother cooking session
By this point, you already know the recipe has a friendly rhythm to it, and these little tips make it even easier.
- Keep a small bowl of flour nearby: It helps during shaping, but use it lightly so the dough stays tender.
- Cool the filling before stuffing: Warm filling can soften the dough too much and make sealing tricky.
- Cover the pan quickly after adding water: That quick burst of steam is what helps the buns rise and cook through.
- Serve them hot: They are at their absolute best when the tops are soft and the bottoms are still crisp.
Common slip-ups and how to avoid them
Even easy recipes have a few little traps, but none of them are hard to dodge once you know what to watch for.
- Do not make the dough too dry: A stiff dough will give you heavier buns, so stop adding flour once it feels smooth and workable.
- Do not use filling that is too wet: Too much moisture can make sealing difficult and may cause leaks in the pan.
- Do not rush the browning stage: If the bottoms have no color before steaming, you will miss that delicious contrast later.
- Do not overcrowd the skillet: The buns need a bit of breathing room so they puff properly and cook evenly.
A quick look at the nutrition
These numbers are approximate, but they give you a useful snapshot before you dig in.
Servings: 4
Calories per serving: 430
Note: These are approximate values.
Time well spent in the kitchen
The nice part here is that the effort feels very reasonable for something this comforting and satisfying.
Prep Time: 25 minutes
Cook Time: 20 minutes
Total Time: 45 minutes
How to prep ahead and store them without losing the magic
If you want to make dinner feel easier later, the filling can be cooked and chilled up to 1 day ahead. You can also shape the buns a few hours in advance and keep them covered in the fridge until cooking time. Leftovers keep well in an airtight container in the refrigerator for up to 3 days. For longer storage, freeze the cooked buns on a tray, then transfer them to a freezer bag for up to 2 months. Reheat in a covered skillet with a splash of water so they warm through and soften on top while the bottoms crisp back up.
The best ways to bring them to the table
These buns are lovely on their own, but they also play well with a few fresh sides. Serve them with quick cucumber salad, shredded carrot slaw, or a simple bowl of clear soup. A little chili crisp on the side is wonderful if you like some heat, and a fresh sprinkle of green onions right before serving makes the whole plate look lively and inviting.
Delicious ways to reinvent the leftovers
Leftover buns are one of those happy problems.
Slice them in half and warm them in a skillet for a crisped sandwich style bite. Chop them up and serve alongside a crunchy salad for a fast lunch. You can even pair them with scrambled eggs the next morning for a savory brunch plate that feels unexpectedly fancy.
A few extra notes that make a difference
Flavor always gets better when you taste as you go, especially with the filling. If you like a bolder savory note, add a tiny splash more soy sauce. If you want freshness, add more green onions right at the end rather than mixing all of them into the filling. And if shaping feels awkward at first, do not stress, the rustic ones are usually the most charming.
Small presentation details that make them look restaurant worthy
A clean plate, a small dipping dish, and a sprinkle of sesame seeds go a long way here. Arrange the buns in a loose circle or clustered slightly off center for a more natural look. A few extra green onion slices on top add color, and serving them while they are still glossy from the steam makes them look especially tempting.
Fun directions to take this recipe next time
Once you make them once, it is hard not to start thinking of little twists.
Spicy version: Add 1 teaspoon chili paste to the filling for a warmer, bolder bite.
Mushroom twist: Replace half the chicken with very finely chopped mushrooms for extra umami and tenderness.
Ginger-forward version: Add an extra teaspoon of fresh ginger if you love a brighter, more aromatic filling.
Sweet and savory finish: Brush the tops lightly with a tiny bit of hoisin mixed with warm water right after cooking.
Crunchy side pairing: Serve with a quick cabbage slaw dressed with rice vinegar and a pinch of sugar for contrast.
FAQ’s
1. Can I make the dough in advance?
Yes, you can make the dough earlier in the day and keep it covered in the refrigerator. Let it sit at room temperature for about 20 minutes before shaping.
2. Can I use store bought dough instead?
You can, though the texture will be different. A soft yeast dough works best if you want that fluffy finish.
3. How do I know the buns are cooked through?
They should look puffed, feel slightly firm on top, and the filling should be hot all the way through when you open one.
4. Can I skip cooking the filling first?
It is better not to. Pre cooking the filling keeps the texture reliable and prevents excess moisture from soaking the dough.
5. What dipping sauce works best?
Simple soy sauce is great, but soy sauce mixed with a tiny splash of sesame oil and chopped green onions is even better.
6. Can I freeze them before cooking?
Yes, but freeze them on a tray first so they hold their shape. Cook from thawed for the best texture.
7. Why did my buns open while cooking?
They were likely overfilled or not sealed tightly enough. Pinch the tops firmly and keep the edges clean while shaping.
8. Can I make these vegetarian?
Yes, swap the chicken for finely chopped mushrooms and crumbled firm tofu, then season well.
9. What pan works best for this recipe?
A nonstick skillet with a lid makes the process easiest because you need both browning and steaming in the same pan.
10. Are they best fresh or reheated?
Fresh is the dream, especially for that crisp bottom, but reheated leftovers are still very good when warmed in a skillet with a splash of water.
Conclusion
These buns have that rare mix of comfort and excitement, the kind of recipe that feels cozy enough for a quiet night but special enough to show off a little. The soft dough, juicy filling, and golden crisp base make every bite feel rewarding. Trust me, once you make them, they are going to earn a regular place in your kitchen.
Print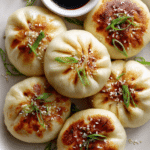
LAZY BAO
Description
Soft pan-steamed buns with juicy chicken and cabbage filling, golden crisp bottoms, and a savory finish of sesame seeds and green onions.
Ingredients
- 3 cups all-purpose flour
- 2 1/4 teaspoons instant yeast
- 2 tablespoons granulated sugar
- 1 teaspoon baking powder
- 3/4 teaspoon fine salt
- 1 cup warm water
- 2 tablespoons neutral oil
- 1 pound ground chicken thighs
- 2 cups green cabbage, finely chopped
- 3 green onions, thinly sliced
- 3 cloves garlic, minced
- 1 tablespoon fresh ginger, grated
- 2 tablespoons soy sauce
- 1 tablespoon hoisin sauce
- 1 teaspoon sesame oil
- 1 teaspoon cornstarch
- 1/4 teaspoon black pepper
- 2 tablespoons neutral oil, for pan cooking
- 1/3 cup water, for steaming
- 1 tablespoon toasted sesame seeds
- 1 tablespoon extra sliced green onions
- 2 tablespoons soy sauce, for serving
Instructions
- In a large bowl, mix the all-purpose flour, instant yeast, granulated sugar, baking powder, and fine salt. Add the warm water and 2 tablespoons neutral oil, then stir until a shaggy dough forms. Knead for 8 minutes until smooth and soft. Cover and let rest for 20 minutes.
- In another bowl, combine the ground chicken thighs, green cabbage, green onions, garlic, fresh ginger, soy sauce, hoisin sauce, sesame oil, cornstarch, and black pepper.
- Heat 1 teaspoon of neutral oil in a small skillet over medium heat. Add the filling mixture and cook for 4 to 5 minutes, stirring often, until the chicken is just cooked and the cabbage has softened. Transfer to a plate and cool for 10 minutes.
- Divide the dough into 8 equal pieces. Roll each piece into a 4-inch circle, keeping the center slightly thicker than the edges. Spoon about 2 tablespoons of filling into the center of each round. Pleat and pinch closed at the top, then shape into rounds.
- Add the remaining 2 tablespoons neutral oil to a large nonstick skillet over medium heat. Arrange the buns sealed side up and cook for 2 to 3 minutes until the bottoms begin to turn golden.
- Carefully pour in the 1/3 cup water and cover immediately with a lid. Steam for 8 to 10 minutes until puffed and cooked through. Remove the lid and cook for 1 to 2 minutes more so the bottoms crisp again.
- Sprinkle with toasted sesame seeds and extra sliced green onions. Serve hot with the soy sauce for dipping.
Notes
- Keep the dough soft for the fluffiest texture.
- Cool the filling before shaping so the dough is easier to seal.
- Do not overcrowd the skillet or the buns may cook unevenly.
- Reheat leftovers in a covered skillet with a splash of water for the best texture.