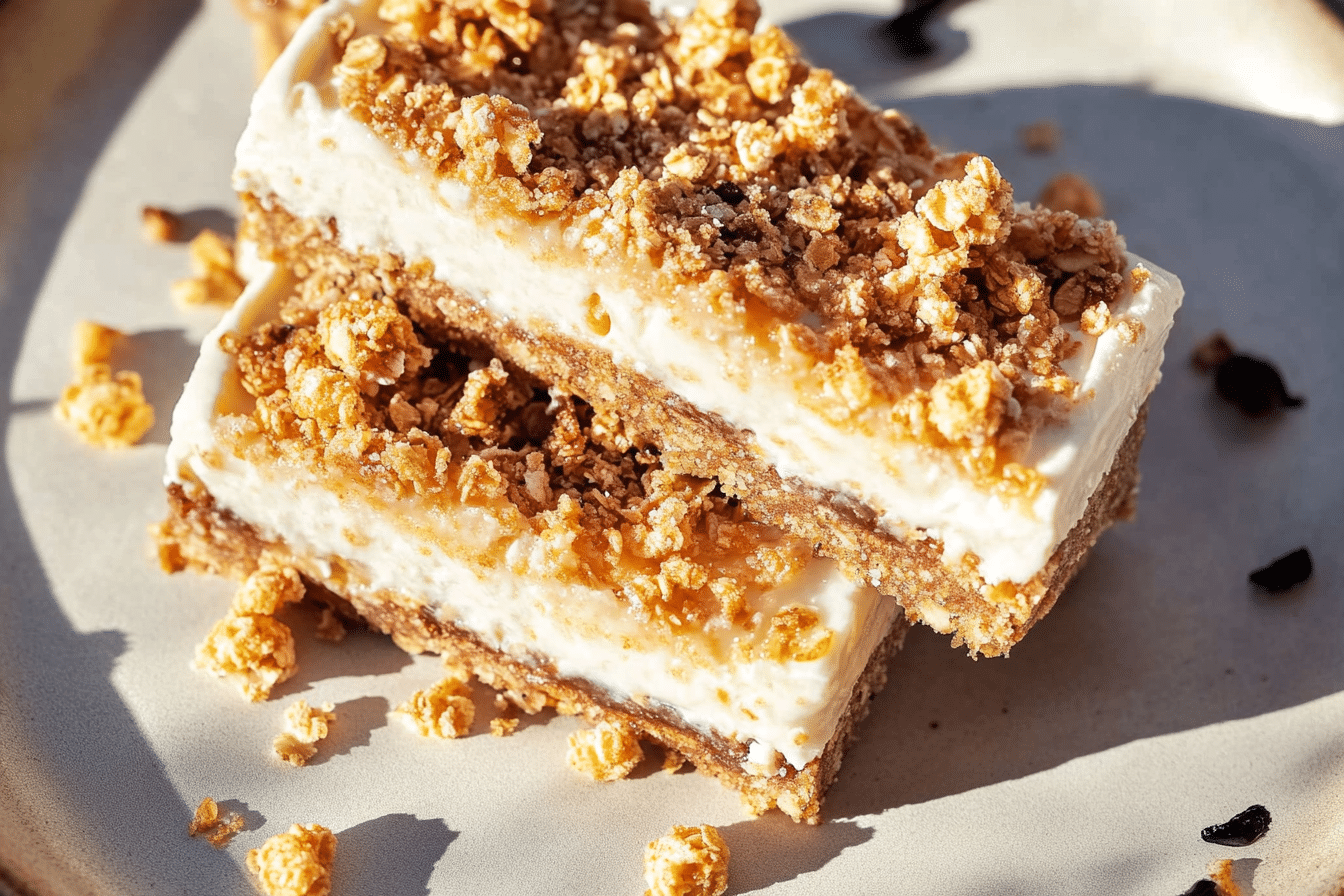
Nostalgic Crunch: Milk and Cereal Bars to Satisfy Cravings
Welcome to a delicious culinary experience featuring Milk and Cereal Bars, a convenient, tasty snack packed with your favorite breakfast flavors on-the-go. Combining the crunchiness of cereals with creamy milk, these bars are not only nostalgic but also perfect for those who love a quick bite, fueling you through your busy day or a fun adventure.
Why You’ll Love This Recipe
- Quick and Easy: Prepare these delightful bars in no time, making them a fantastic option for busy mornings.
- Customizable: Tailor the ingredients according to your taste or dietary needs, ensuring everyone can enjoy them.
- Kids Love Them: Children will adore these bars; it’s a fun way to get them excited about breakfast flavors.
- Perfect for Snacking: Keep them on hand for an energy boost anytime, anywhere, without compromising on flavor.
- Nostalgic Flavor: Every bite evokes childhood memories of pouring cereal in a bowl and adding milk, bringing joy to snack time.
Ingredients You’ll Need
Gathering the ingredients for Milk and Cereal Bars is simple and straightforward. With just a few staple items, you’ll create a delightful treat that is both satisfying and full of flavor.
- Rolled Oats: Provides a chewy texture and essential fiber, making each bar filling.
- Cereal of Choice: Choose your favorite breakfast cereal to add a delightful crunch and flavor.
- Nut Butter: Acts as a binding agent while adding healthy fats and creamy richness.
- Honey or Maple Syrup: Adds natural sweetness and helps bind the ingredients together for a tasty treat.
- Dried Fruits or Nuts: Optional additions that enhance flavor and texture, perfect for personalizing your bars.
Variations for Milk and Cereal Bars
The great thing about Milk and Cereal Bars is how easily you can modify the recipe to suit your taste or dietary preferences. Here are some fun variations you might try!
- Chocolate-Covered: Dip the bars in melted chocolate for a rich, indulgent twist that chocolate lovers will adore.
- Granola Style: Add a mix of granola for extra crunch and variety in textures.
- Fruit Flavors: Incorporate freeze-dried fruits like strawberries or blueberries for a fruity punch.
- Protein-Packed: Include protein powder in the mixture for a post-workout snack that fuels recovery.
- Vegan Option: Use maple syrup and nut butter to create a completely plant-based version that everyone can enjoy.

How to Make Milk and Cereal Bars
Step 1: Gather Your Ingredients
Start by collecting all your ingredients to ensure you have everything ready for the process. It makes cooking much smoother!
Step 2: Mix Dry Ingredients
In a large bowl, mix together the rolled oats and your selected cereal until they are well combined. This creates a solid base for your bars.
Step 3: Combine Wet Ingredients
In another bowl, combine the nut butter and honey or maple syrup. Mix until smooth, ensuring that the nut butter is completely blended with the sweetener.
Step 4: Combine Both Mixtures
Pour the wet mixture into the dry ingredients. Stir until everything is evenly coated, making sure there are no dry patches left.
Step 5: Add Extras
If you want to add dried fruits or nuts, fold them into the mixture at this stage. It’s all about customization and making it your own!
Step 6: Press and Set
Line a baking pan with parchment paper, and pour the mixture in. Use a spatula to press it down firmly, ensuring it holds its shape while cutting.
Step 7: Chill and Cut
Refrigerate the mixture for about an hour, allowing it to set. Once firm, remove it from the pan and cut it into bar shapes. Enjoy your homemade Milk and Cereal Bars!
Pro Tips for Making Milk and Cereal Bars
- Line Your Pan: Using parchment paper helps easily lift the bars out of the pan without sticking.
- Use Nut-Free Butter: For school snacks, replace nut butter with sunflower seed butter to create a nut-free alternative.
- Don’t Overmix: Stir just enough for the ingredients to combine; overmixing can lead to a tough texture.
- Experiment with Textures: Mix different cereals to create a variety of textures and flavors in each bite.
- Portion Control: Cut the bars into small pieces for easy snacking, and to help control serving sizes.
How to Serve Milk and Cereal Bars
Garnishes
For an extra touch, drizzle some melted chocolate or a sprinkle of powdered sugar over the bars just before serving. This elevates the presentation and offers a delightful flavor contrast.
Side Dishes
Pair these bars with yogurt or a smoothie for a wholesome breakfast or snack. They complement a variety of beverages beautifully.
Creative Ways to Present
Serve your Milk and Cereal Bars on a colorful platter, or individually wrap them in parchment paper tied with twine for a rustic touch, making them perfect for gifting.
Make Ahead and Storage
Storing Leftovers
Store leftover Milk and Cereal Bars in an airtight container at room temperature for up to a week. If you prefer a softer texture, keep them in the refrigerator to maintain freshness.
Freezing
For longer storage, you can freeze the bars. Wrap them individually in plastic wrap and place them in a freezer bag. They’ll last for up to three months, perfect for an on-the-go snack option.
Reheating
If you enjoy these bars warm, you can reheat them in the microwave for a few seconds to enjoy a comforting, gooey treat.
FAQs
Can I use gluten-free oats?
Absolutely! Gluten-free oats are a great option for those with gluten sensitivity and work perfectly in this recipe.
How can I make them lower in sugar?
Reduce the amount of honey or maple syrup, or substitute them with a sugar-free syrup to lower the sweetness without sacrificing flavor.
Are these bars good for meal prep?
Yes, these bars are ideal for meal prep. Make a batch ahead of time and store them for quick, accessible snacks throughout the week.
Can I substitute almond butter for peanut butter?
Yes, almond butter is a great alternative to peanut butter, adding a unique taste while keeping the bars creamy and delicious.
What types of cereal can I use?
You can use any type of cereal you love! From classic cornflakes to granola, the options are endless.
Final Thoughts
Now that you have all the delicious details at hand, I invite you to try your hand at making these flavorful Milk and Cereal Bars. They’ll not only satisfy your cravings but also fill your kitchen with delightful memories of breakfast. Enjoy every bite and share this nostalgic treat with friends and family!
Related Posts
- Join the Trend with Viral Dumpling Salad
- Mississippi Sin Dip Recipe for Irresistible Game Day Snacking
- Pani Popo Samoan Coconut Buns Bring Island Flavors Home
Milk and Cereal Bars
- Total Time: 1 hour 10 minutes
- Yield: 10 bars
- Diet: Vegetarian
Description
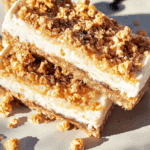
Milk and Cereal Bars are a convenient, tasty snack packed with breakfast flavors. These bars combine the crunchiness of cereals with creamy milk, making them nostalgic and perfect for busy days.
Ingredients
Rolled Oats
- 2 cups rolled oats
Cereal of Choice
- 1 cup cereal of your choice
Nut Butter
- 1/2 cup nut butter
Honey or Maple Syrup
- 1/3 cup honey or maple syrup
Dried Fruits or Nuts
- 1/2 cup dried fruits or nuts (optional)
Instructions
- Gather Your Ingredients: Start by collecting all your ingredients to ensure you have everything ready for the process. It makes cooking much smoother!
- Mix Dry Ingredients: In a large bowl, mix together the rolled oats and your selected cereal until they are well combined. This creates a solid base for your bars.
- Combine Wet Ingredients: In another bowl, combine the nut butter and honey or maple syrup. Mix until smooth, ensuring that the nut butter is completely blended with the sweetener.
- Combine Both Mixtures: Pour the wet mixture into the dry ingredients. Stir until everything is evenly coated, making sure there are no dry patches left.
- Add Extras: If you want to add dried fruits or nuts, fold them into the mixture at this stage. It’s all about customization and making it your own!
- Press and Set: Line a baking pan with parchment paper, and pour the mixture in. Use a spatula to press it down firmly, ensuring it holds its shape while cutting.
- Chill and Cut: Refrigerate the mixture for about an hour, allowing it to set. Once firm, remove it from the pan and cut it into bar shapes. Enjoy your homemade Milk and Cereal Bars!
Notes
- Line Your Pan: Using parchment paper helps easily lift the bars out of the pan without sticking.
- Use Nut-Free Butter: For school snacks, replace nut butter with sunflower seed butter to create a nut-free alternative.
- Don’t Overmix: Stir just enough for the ingredients to combine; overmixing can lead to a tough texture.
- Experiment with Textures: Mix different cereals to create a variety of textures and flavors in each bite.
- Portion Control: Cut the bars into small pieces for easy snacking, and to help control serving sizes.
- Prep Time: 10 minutes
- Cook Time: 0 minutes
- Category: Snack
- Method: No-Bake
- Cuisine: American
Nutrition
- Serving Size: 1 bar
- Calories: 150
- Sugar: 6g
- Sodium: 50mg
- Fat: 7g
- Saturated Fat: 1g
- Unsaturated Fat: 4g
- Trans Fat: 0g
- Carbohydrates: 20g
- Fiber: 3g
- Protein: 4g
- Cholesterol: 0mg