Strawberry Cheesecake Jars
There is something quietly magical about digging into a spoonful of creamy cheesecake layered with buttery crumbs and sweet strawberries. It feels indulgent yet playful, like dessert decided to dress up just for you. These little jars are not just pretty, they are packed with flavor in every single layer, and trust me, you are going to love this.
A Sweet Treat That Feels Like a Little Celebration
As we start this journey together, imagine the contrast of textures, the crunch of biscuit meeting the silky cream and the bright burst of strawberries. This dessert brings comfort and freshness in one bite, which makes it perfect for both quiet evenings and lively gatherings.
A Modern Twist on a Classic Favorite
Cheesecake has been around for centuries, with roots tracing back to ancient Greece. Over time, it evolved into the creamy dessert we know today. These jars are simply a modern, no bake version that keeps the soul of the classic while making it easier and more fun to enjoy.
Why This Recipe Always Delivers
Before we dive deeper, let me share why this one keeps winning hearts.
Versatile: You can serve it in jars, glasses, or even small bowls, which makes it adaptable for any occasion.
Budget-Friendly: Simple ingredients, no fancy tools, and still tastes like something from a bakery.
Quick and Easy: No oven needed, which means less waiting and more enjoying.
Customizable: Swap fruits or adjust sweetness to your taste.
Crowd-Pleasing: Everyone loves layered desserts, especially when they look this good.
Make-Ahead Friendly: Prepare it in advance and chill until ready to serve.
Great for Leftovers: They store beautifully, so nothing goes to waste.
Chef Secrets That Make All the Difference
Now that you are excited, let me share a few insider tricks.
- Use full fat cream cheese for a richer texture.
- Chill the jars long enough so the layers set properly.
- Crush biscuits finely but leave a few small chunks for texture.
- Taste the strawberry layer before assembling to balance sweetness.
Tools You Will Need to Get Started
Let us make sure your kitchen is ready.
Mixing Bowl: For combining the creamy filling smoothly.
Electric Mixer or Whisk: Helps achieve that light and fluffy texture.
Small Glass Jars: Perfect for layering and serving.
Spatula: Useful for folding and smoothing layers.
Ingredients That Build the Magic
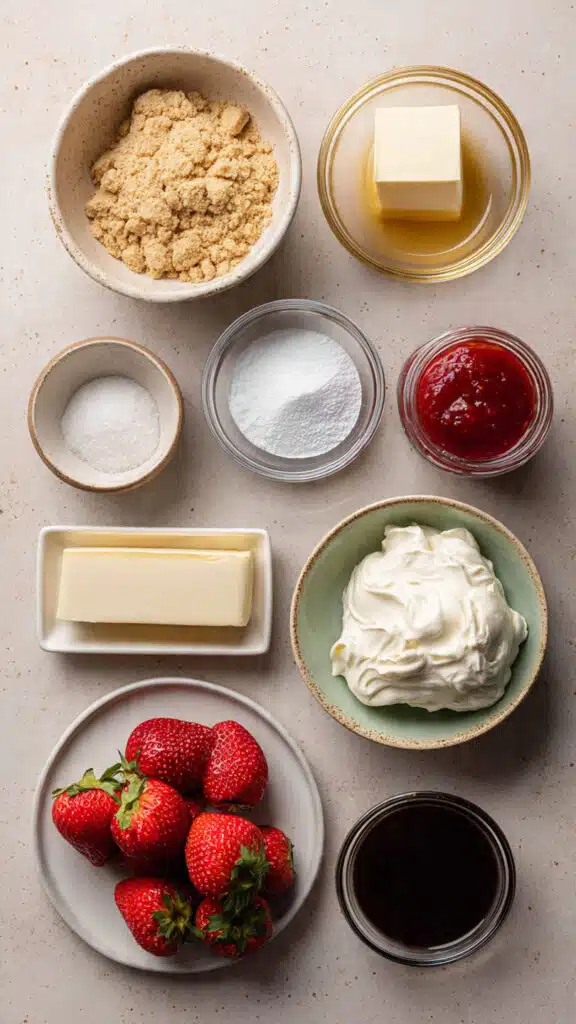
As we move forward, here is everything you will need.
- Digestive Biscuits: 1 cup crushed, creates the buttery base.
- Unsalted Butter: 4 tablespoons melted, binds the crumbs together.
- Cream Cheese: 2 cups softened, forms the creamy heart of the dessert.
- Powdered Sugar: 1/2 cup, adds smooth sweetness.
- Vanilla Extract: 1 teaspoon, enhances flavor.
- Heavy Cream: 1 cup whipped, makes the filling light and airy.
- Fresh Strawberries: 1 1/2 cups chopped, brings freshness and color.
- Strawberry Jam: 1/2 cup, intensifies the fruit layer.
Easy Ingredient Swaps You Can Try
Sometimes you want to switch things up.
Digestive Biscuits: Graham crackers.
Heavy Cream: Whipped topping.
Strawberries: Raspberries or blueberries.
Spotlight on Key Flavors
Let us take a closer look at what makes this shine.
Cream Cheese: The creamy backbone that gives that signature cheesecake taste.
Strawberries: Bright, juicy, and slightly tangy, they balance the richness perfectly.
Let’s Put It All Together
Now comes the fun part, and now let dive to the steps you are going to follow.
- Preheat Your Equipment: No oven needed, just ensure all ingredients are at room temperature.
- Combine Ingredients: Mix cream cheese, powdered sugar, and vanilla until smooth, then fold in whipped cream gently.
- Prepare Your Cooking Vessel: Mix crushed biscuits with melted butter until evenly coated.
- Assemble the Dish: Add a layer of biscuit base into each jar, followed by cheesecake filling, then strawberry mixture.
- Cook to Perfection: Chill the jars in the fridge for at least 2 hours until set.
- Finishing Touches: Add extra strawberries on top for a fresh finish.
- Serve and Enjoy: Grab a spoon and enjoy every creamy, crunchy bite.
A Harmony of Texture and Flavor
Each layer tells its own story. The base is slightly crunchy and buttery, the middle is smooth and creamy, and the top is fresh and fruity. Together, they create a balance that feels both rich and refreshing.
Helpful Tips for Best Results
Here are a few tips to keep everything perfect.
- Chill longer for firmer layers.
- Use fresh ripe strawberries for best flavor.
- Do not overmix the whipped cream.
What to Avoid While Making This
Mistakes happen, but we can avoid them.
- Skipping chilling time, it affects texture.
- Using cold cream cheese, it creates lumps.
- Overloading jars, which makes layering messy.
Nutrition Overview
Servings: 4
Calories per serving: 320
Note: These are approximate values.
Time Breakdown
Prep Time: 20 minutes
Cook Time: 0 minutes
Total Time: 20 minutes plus chilling
Make-Ahead and Storage Tips
You can prepare these jars a day ahead and keep them covered in the fridge. They stay fresh for up to 3 days. Freezing is possible but may affect texture slightly. For best results, enjoy chilled.
Serving Ideas to Make It Special
Serve them with a drizzle of extra strawberry sauce or a small mint leaf for a fresh touch. They also pair beautifully with a cup of tea or coffee.
Creative Ways to Use Leftovers
If you have extra, layer them into a larger dessert dish or turn them into a frozen treat by chilling longer.
Extra Tips for Even Better Results
Use clear jars so the layers are visible, it makes a big difference in presentation. Also, taste as you go to adjust sweetness.
Make It Look Stunning
Keep layers neat and even, wipe jar edges if needed, and add a glossy strawberry on top for that perfect finish.
Fun Variations to Explore
Try chocolate biscuit base for a richer twist.
Add lemon zest to the filling for a fresh kick.
Use mixed berries for a colorful version.
Layer with caramel for a deeper flavor.
FAQ’s
Q1: Can I use frozen strawberries?
Yes, just thaw and drain them first.
Q2: Can I make it sugar free?
You can use sugar substitutes.
Q3: How long should I chill it?
At least 2 hours.
Q4: Can I use low fat cream cheese?
Yes, but texture may be lighter.
Q5: Can I skip the jam?
Yes, but flavor will be milder.
Q6: What jars should I use?
Any small glass jars work.
Q7: Can I double the recipe?
Absolutely, just scale ingredients.
Q8: Is it kid friendly?
Yes, kids love it.
Q9: Can I add chocolate chips?
Yes, for extra texture.
Q10: Can I make it vegan?
Use plant based alternatives.
Conclusion
This dessert is simple, beautiful, and full of flavor. It brings together creamy, crunchy, and fruity elements in the best way possible. Let me tell you, it is worth every bite, and once you try it, it might just become your go to treat.
Print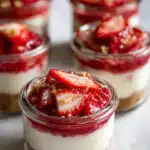
Strawberry Cheesecake Jars
Description
Creamy layered dessert with biscuit base, cheesecake filling, and fresh strawberries served in jars
Ingredients
- 1 cup crushed digestive biscuits
- 4 tablespoons melted unsalted butter
- 2 cups cream cheese
- 1/2 cup powdered sugar
- 1 teaspoon vanilla extract
- 1 cup heavy cream
- 1 1/2 cups fresh strawberries
- 1/2 cup strawberry jam
Instructions
- Mix crushed biscuits with melted butter
- Beat cream cheese, sugar, and vanilla until smooth
- Fold in whipped heavy cream
- Layer biscuit base in jars
- Add cheesecake mixture
- Top with strawberries and jam
- Chill for at least 2 hours before serving
Notes
- Use ripe strawberries for best flavor
- Chill longer for firmer texture
- Serve cold for best taste