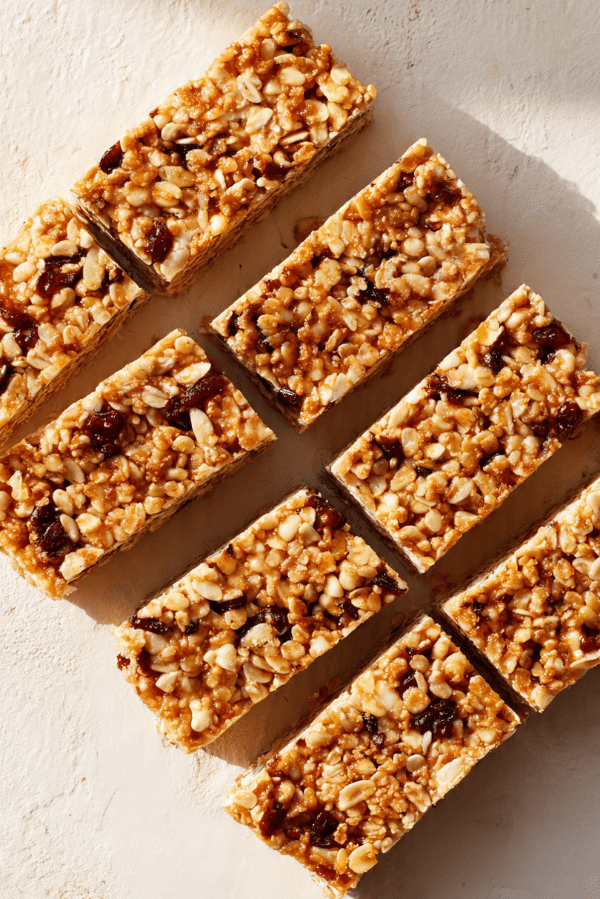
SWEET & SALTY CRUNCH BARS
There is something incredibly satisfying about the moment sweet meets salty, especially when it comes wrapped in a crunchy, chewy bar you can grab with one hand. These Sweet & Salty Crunch Bars are the kind of treat that disappears fast, the kind you promise yourself you will save for later and somehow do not. Trust me, you’re going to love this, because every bite hits that perfect balance of rich, crisp, and lightly indulgent goodness.
Behind the Recipe
This recipe came from those afternoons when the snack drawer feels empty but the craving is very real. I wanted something easy, something nostalgic, and something that felt homemade without turning the kitchen upside down. After a few test batches and plenty of taste testing, these bars became a go to favorite that always feels a little special.
Recipe Origin or Trivia
Sweet and salty snacks have been loved for generations, from caramel popcorn at fairs to chocolate covered pretzels at bakeries. The idea is simple but powerful, contrasting flavors keep your taste buds interested and coming back for more. These bars borrow that classic pairing and turn it into a modern, bake free treat that fits right into busy kitchens.
Why You’ll Love SWEET & SALTY CRUNCH BARS
Once you see how easy and satisfying these bars are, they might just become a staple in your rotation.
Versatile: These bars work as a snack, dessert, or even a quick breakfast bite when you are on the go.
Budget-Friendly: Simple pantry ingredients come together without anything fancy or hard to find.
Quick and Easy: No baking required, just mix, press, and chill.
Customizable: You can swap nuts, change the chocolate, or adjust the sweetness to fit your taste.
Crowd-Pleasing: Sweet, salty, and crunchy is a combination almost everyone loves.
Make-Ahead Friendly: They store beautifully and are ready whenever cravings strike.
Great for Leftovers: Leftovers stay delicious for days and do not lose their texture.
Chef’s Pro Tips for Perfect Results
A few small details make a big difference with these bars. Press the mixture firmly into the pan so everything holds together nicely. Use gentle heat when melting to avoid scorching the chocolate. Let the bars chill fully before slicing, patience here is worth it.
Kitchen Tools You’ll Need
You do not need anything fancy, just a few basics to make things smooth.
Mixing bowl: Large enough to combine everything evenly.
Small saucepan: Perfect for gently melting the butter and sweetener.
Spatula: Helps mix and press the mixture into the pan.
Lined baking dish: Makes removal and slicing clean and easy.
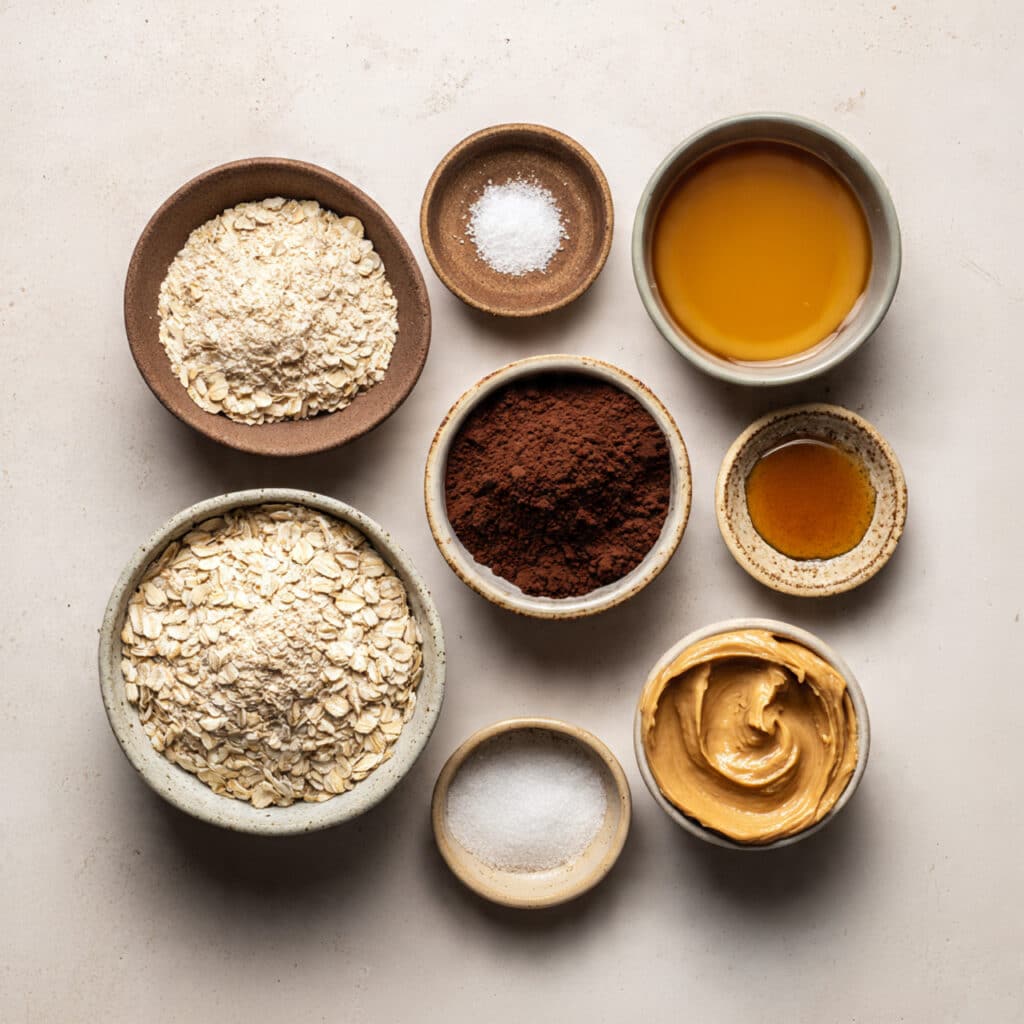
Ingredients in SWEET & SALTY CRUNCH BARS
This is where the magic starts, each ingredient plays a role in building flavor and texture.
- Old-fashioned rolled oats: 2 cups, they form the hearty, chewy base of the bars.
- Crispy rice cereal: 1 1/2 cups, adds light crunch that balances the chewiness.
- Roasted salted peanuts: 1 cup, roughly chopped, bring savory depth and texture.
- Semi-sweet chocolate chips: 3/4 cup, melt into pockets of rich sweetness.
- Creamy peanut butter: 1/2 cup, binds everything together with nutty richness.
- Honey: 1/3 cup, adds natural sweetness and helps the bars set.
- Unsalted butter: 1/4 cup, gives a smooth, indulgent mouthfeel.
- Vanilla extract: 1 teaspoon, rounds out the flavors beautifully.
- Fine sea salt: 1/2 teaspoon, sharpens the sweet and enhances contrast.
Ingredient Substitutions
Flexibility is part of the fun with this recipe.
Old-fashioned rolled oats: Quick oats can be used for a softer texture.
Roasted salted peanuts: Almonds or cashews work just as well.
Honey: Maple syrup can be swapped for a slightly different sweetness.
Peanut butter: Almond butter or sunflower seed butter are great alternatives.
Ingredient Spotlight
Sometimes one ingredient deserves a little extra attention.
Old-fashioned rolled oats: They give structure and chew, making the bars feel filling and satisfying.
Honey: This natural sweetener adds stickiness and a gentle floral note that keeps the bars from tasting flat.
Instructions for Making SWEET & SALTY CRUNCH BARS
Now let’s dive into the fun part, bringing it all together.
- Preheat Your Equipment: Line an 8 by 8 inch baking dish with parchment paper, leaving some overhang for easy removal.
- Combine Ingredients: In a large bowl, mix the oats, crispy rice cereal, chopped peanuts, and chocolate chips until evenly combined.
- Prepare Your Cooking Vessel: In a small saucepan over low heat, melt the butter, peanut butter, and honey together, stirring until smooth.
- Assemble the Dish: Remove the saucepan from heat and stir in the vanilla extract and salt, then pour the mixture over the dry ingredients.
- Cook to Perfection: Stir everything together until fully coated, then press firmly into the prepared dish.
- Finishing Touches: Refrigerate for at least 1 hour, allowing the bars to fully set.
- Serve and Enjoy: Lift out, slice into bars, and enjoy every crunchy bite.
Texture & Flavor Secrets
The real magic here is contrast. Chewy oats meet crisp cereal, rich chocolate melts into nutty peanut butter, and a touch of salt keeps everything balanced. As the bars chill, flavors deepen and the texture becomes perfectly sliceable.
Cooking Tips & Tricks
A few helpful reminders make this recipe foolproof.
- Press the mixture firmly to prevent crumbly bars.
- Chill longer if your kitchen is warm.
- Use a sharp knife for clean slices.
What to Avoid
Even simple recipes have a few pitfalls.
- Skipping the parchment paper, which makes removal messy.
- Overheating the mixture, which can cause separation.
- Cutting before fully chilled, which leads to crumbling.
Nutrition Facts
Servings: 12
Calories per serving: 210
Note: These are approximate values.
Preparation Time
Prep Time: 15 minutes
Cook Time: 5 minutes
Total Time: 20 minutes plus chilling
Make-Ahead and Storage Tips
These bars are perfect for planning ahead. Make them a day early and store in an airtight container in the fridge for up to one week. They can also be frozen, just thaw slightly before enjoying.
How to Serve SWEET & SALTY CRUNCH BARS
Serve them straight from the fridge for a firm bite, or let them sit out for a few minutes for a softer texture. They pair wonderfully with coffee, tea, or a cold glass of milk.
Creative Leftover Transformations
Crumble leftover bars over yogurt for a quick parfait, or chop them up and mix into trail mix for an on the go snack.
Additional Tips
If you like extra indulgence, drizzle melted chocolate over the top before chilling. For more crunch, add a sprinkle of extra nuts on top before pressing.
Make It a Showstopper
Cut the bars into uniform shapes and stack them neatly on a serving plate. A light sprinkle of flaky salt on top adds visual appeal and flavor.
Variations to Try
Try adding shredded coconut for tropical vibes. Swap chocolate chips for dark chocolate chunks. Add dried fruit for a chewy twist. Mix in seeds for extra crunch.
FAQ’s
1. Can I make these bars vegan?
Yes, use maple syrup and a plant based butter and they turn out great.
2. Do these bars need to stay refrigerated?
They hold best in the fridge but can sit out for short periods.
3. Can I reduce the sweetness?
You can slightly reduce the honey without affecting structure too much.
4. What pan size works best?
An 8 by 8 inch pan gives the perfect thickness.
5. Can I add protein powder?
A small amount can be added, but adjust wet ingredients slightly.
6. Are these bars kid friendly?
Absolutely, kids love the sweet and crunchy texture.
7. How long do they last?
Up to one week refrigerated, longer if frozen.
8. Can I use crunchy peanut butter?
Yes, it adds even more texture.
9. Are these gluten free?
Use certified gluten free oats and cereal to be sure.
10. Can I double the recipe?
Yes, just use a larger pan and press evenly.
Conclusion
These Sweet & Salty Crunch Bars are proof that simple ingredients can create something truly special. Let me tell you, it’s worth every bite. Once you try them, you will find yourself making them again and again, and sharing the recipe every time someone asks for it.
Print
SWEET & SALTY CRUNCH BARS
Description
These sweet and salty crunch bars are no-bake treats with chewy oats, crispy cereal, rich peanut butter, and melty chocolate, perfectly balanced with a touch of salt for an irresistible snack or dessert.
Ingredients
- 2 cups old-fashioned rolled oats
- 1 1/2 cups crispy rice cereal
- 1 cup roasted salted peanuts, roughly chopped
- 3/4 cup semi-sweet chocolate chips
- 1/2 cup creamy peanut butter
- 1/3 cup honey
- 1/4 cup unsalted butter
- 1 teaspoon vanilla extract
- 1/2 teaspoon fine sea salt
Instructions
- Line an 8 by 8 inch baking dish with parchment paper, leaving overhang for easy removal.
- In a large bowl, combine the oats, crispy rice cereal, chopped peanuts, and chocolate chips.
- In a small saucepan over low heat, melt the butter, peanut butter, and honey together, stirring until smooth.
- Remove from heat and stir in the vanilla extract and sea salt.
- Pour the warm mixture over the dry ingredients and mix until everything is evenly coated.
- Press the mixture firmly into the prepared baking dish.
- Refrigerate for at least 1 hour until fully set.
- Lift out using parchment paper, slice into bars, and serve.
Notes
- Press the mixture firmly into the pan to help the bars hold together.
- For cleaner slices, use a sharp knife and wipe it between cuts.
- Store bars in the refrigerator for best texture.