Crunchy Berliner
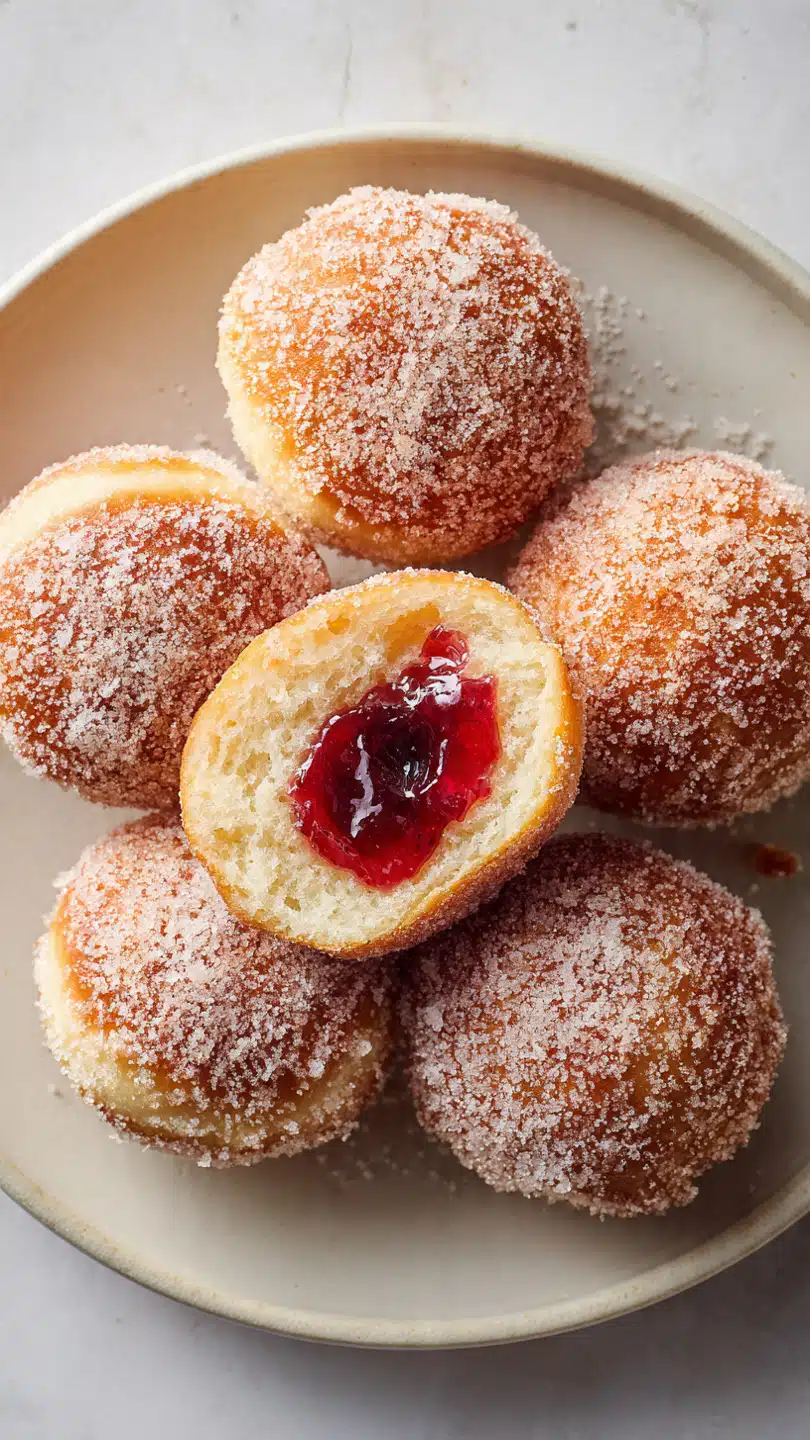
There is something wildly comforting about biting into a sugar-coated pastry and hearing that faint crisp crackle before the pillowy center gives way to a glossy spoonful of jam. That is exactly what makes this treat so irresistible. It feels nostalgic, bakery-style, and just a little dramatic in the best way. Trust me, you’re going to love this. The outside is delicately crisp, the inside is light and tender, and that fruity center pulls everything together into one joyful bite.
Why This Sweet Treat Always Steals the Show
Some pastries are good, and then there are the ones that make everyone pause after the first bite. This one lands firmly in the second category. It brings together contrast in the most satisfying way, crisp edges, fluffy dough, sparkling sugar, and a bright jam filling that keeps each bite lively. It is the kind of homemade bake that feels a little special without asking for complicated ingredients.
And now let’s dive a little deeper, because part of the charm here is not just the flavor, it is also the story behind it.
A Little Story Behind This Beloved Pastry
This classic filled doughnut has roots in Central Europe, especially Germany, where it has long been associated with celebrations, holidays, and bakery windows that are impossible to walk past without stopping. Traditionally, it is a yeast-raised pastry filled with jam and finished with sugar, which gives it that signature soft interior and sweet outer sparkle.
Over time, different regions have added their own spin, some preferring powdered sugar, others using custard, and some leaning into a more golden, slightly crisp exterior. This version celebrates that extra crunch while keeping the heart of the pastry warm, soft, and familiar. Let me tell you, it’s worth every bite.
Why You Will Want to Make This Again and Again
This is one of those recipes that earns a permanent place in the homemade favorites folder. Once you see how the texture comes together, it becomes easy to understand why people keep coming back to it.
Versatile: It works beautifully for breakfast spreads, dessert trays, weekend baking, or holiday mornings. You can keep it classic with raspberry jam or switch the filling to suit the season.
Budget-Friendly: Most of the ingredients are pantry and fridge staples, which means you can create something bakery-worthy without overspending. A little flour, yeast, eggs, and jam go a long way here.
Quick and Easy: For a yeast dough, the process is surprisingly approachable. The steps are clear, and once the dough is mixed, the rest feels smooth and rewarding.
Customizable: You can play with fillings, sugar finishes, or even citrus in the dough. Small changes make it feel fresh every time.
Crowd-Pleasing: Few things get a reaction quite like warm, jam-filled pastries. The crisp shell and soft center make them impossible to ignore on a serving plate.
Make-Ahead Friendly: The dough can be prepared in advance, which takes pressure off busy days. That little bit of prep flexibility makes a huge difference.
Great for Leftovers: If you happen to have any left, they still make a wonderful next-day treat with coffee or tea. A quick warm-up brings back much of their charm.
Smart Baker Secrets for the Best Texture
Before we get to the ingredient list, here are a few little details that make the difference between good and truly memorable.
- Use warm milk, not hot milk: The milk should feel gently warm to the touch. Too much heat can weaken the yeast and slow down the rise.
- Do not rush the proofing: A properly risen dough gives you that airy interior. If the dough looks puffy and soft, you are on the right track.
- Keep the oil steady: Medium heat is the sweet spot. If it is too hot, the outside browns before the center cooks. If it is too cool, the pastries absorb excess oil.
- Fill after cooling slightly: Warm is good, but piping jam into very hot pastries can make the filling run too much.
- Coat while still warm: This helps the sugar cling beautifully and creates that sparkling crunchy finish.
Kitchen Tools That Make the Process Easy
Once you know the key tricks, the next thing that helps is having the right setup. Nothing fancy is required, but a few tools really smooth out the process.
Large Mixing Bowl: Gives the dough room to come together and rise comfortably.
Measuring Cups and Spoons: Helpful for keeping the dough balanced and ensuring the texture stays reliable.
Rolling Pin: Lets you gently flatten the dough to an even thickness so the rounds cook evenly.
Round Cutter: A 3-inch cutter or drinking glass helps shape neat rounds with minimal fuss.
Heavy Pot or Deep Frying Pan: Keeps the frying temperature more stable, which is especially helpful for even browning.
Slotted Spoon or Spider: Makes lifting the pastries from the oil safer and cleaner.
Piping Bag or Small Filling Nozzle: The easiest way to add jam neatly without tearing the dough.
Wire Rack: Helps excess oil drain while preserving that fresh crisp finish.
Everything You Need for This Bakery-Style Favorite
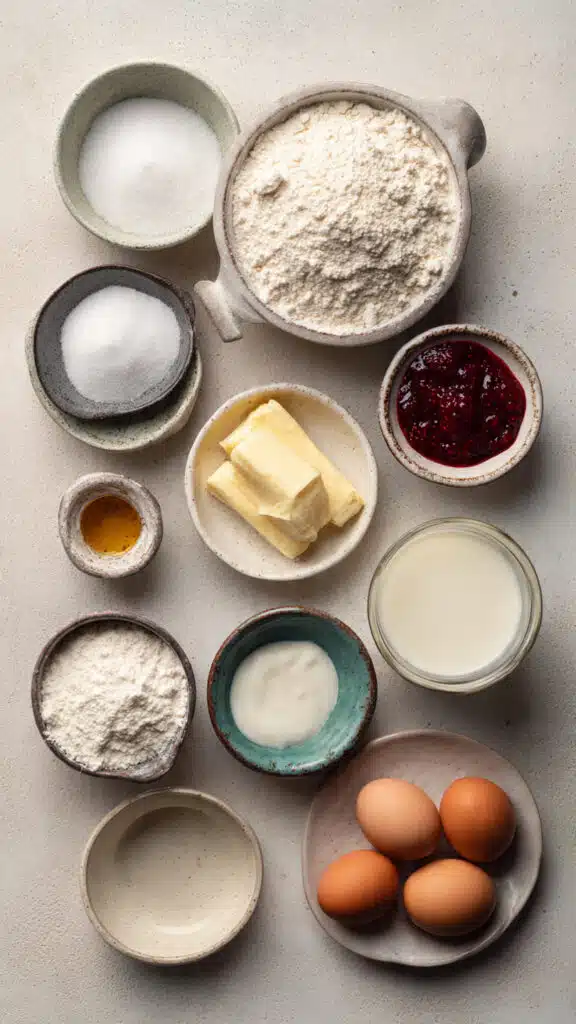
Now that the process is starting to come into focus, here are the ingredients that bring the whole thing to life. Each one plays an important role, from structure and softness to sweetness and that glossy center.
- All-Purpose Flour: 3 1/2 cups, this builds the structure of the dough while still keeping the crumb soft and tender.
- Granulated Sugar: 1/4 cup, this lightly sweetens the dough and helps it brown into a beautiful golden finish.
- Instant Yeast: 2 1/4 teaspoons, this gives the dough its lift and creates that airy interior.
- Salt: 1/2 teaspoon, this balances the sweetness and sharpens the flavor of the dough.
- Whole Milk: 3/4 cup, warm, this adds richness and helps activate the yeast for a smooth rise.
- Unsalted Butter: 1/4 cup, melted and slightly cooled, this brings softness and a rich bakery-style taste.
- Large Eggs: 2, room temperature, these add color, richness, and structure.
- Vanilla Extract: 1 teaspoon, this gives the dough a gentle sweet aroma that pairs beautifully with the jam.
- Vegetable Oil: 4 cups, for frying, this cooks the pastries into a golden shell with that signature crisp edge.
- Raspberry Jam: 3/4 cup, this fruity filling adds brightness and that classic center everyone expects.
- Granulated Sugar: 1 cup, for coating, this creates the crunchy outer finish that makes these so special.
Easy Swaps if You Want to Change Things Up
One of the reasons this bake is such a keeper is that it welcomes small tweaks without losing its charm. If you are missing something or just want a slightly different flavor, these swaps work well.
Whole Milk: Use 2 percent milk for a slightly lighter dough.
Unsalted Butter: Use the same amount of neutral oil in the dough if needed, though butter gives better flavor.
Raspberry Jam: Try strawberry, apricot, or blackcurrant jam for a different fruity center.
Vanilla Extract: Use almond extract sparingly for a more bakery-style aroma.
Granulated Sugar for Coating: Use superfine sugar if you want an even more delicate crunch.
The Ingredients That Really Make the Magic Happen
At this point, you can probably already imagine the aroma, but there are two ingredients that deserve a little extra spotlight because they carry so much of the experience.
Raspberry Jam: This is the bright, juicy center that cuts through the sweetness of the dough and sugar coating. Its tangy fruit flavor keeps each bite from feeling too heavy.
Instant Yeast: This is what transforms a simple dough into something airy and soft. It creates that lovely contrast against the crisp shell, which is what makes the texture so exciting.
Let’s Make Them Step by Step
And now the fun part begins. This is where the bowl, the dough, the warmth, and the aroma all start to come together. Take your time and enjoy the rhythm of it, because this one is a total game-changer when you pull it off at home.
- Preheat Your Equipment: There is no oven to preheat here, but this is the moment to set up your station. Line a tray with parchment, place a wire rack nearby, and make sure your frying pot and thermometer are ready for later.
- Combine Ingredients: In a large mixing bowl, whisk together the all-purpose flour, 1/4 cup granulated sugar, instant yeast, and salt. Add the warm milk, melted butter, eggs, and vanilla extract, then mix until a soft dough forms. Knead for about 8 to 10 minutes until smooth and elastic.
- Prepare Your Cooking Vessel: Lightly oil a clean bowl, place the dough inside, cover it, and let it rise for 1 to 1 1/2 hours until doubled in size. Once risen, turn the dough onto a lightly floured surface and roll it to about 1/2 inch thick.
- Assemble the Dish: Cut out rounds using a 3-inch cutter and place them on the prepared tray. Cover loosely and let them rise again for 30 minutes until puffy. This second rise helps create that light interior.
- Cook to Perfection: Heat the vegetable oil in a deep pot to 350°F. Fry the rounds in batches for about 1 1/2 to 2 minutes per side until deeply golden and crisp on the outside. Transfer them to the wire rack to drain briefly.
- Finishing Touches: While still warm, roll each one in the 1 cup granulated sugar so the surface gets evenly coated. Once cool enough to handle, use a piping bag to fill each pastry with raspberry jam.
- Serve and Enjoy: Serve slightly warm or at room temperature, when the outside still has that delicate crunch and the center stays soft, sweet, and fragrant.
The Best Part, That Crunch Meets the Soft Center
What makes these pastries so memorable is the contrast. The outside has a faint crispness from frying and sugar coating, which gives the first bite a little crackle. Then the interior opens up into a light, fluffy crumb that feels almost cloud-like. Just when that richness settles in, the jam arrives with a bright, glossy pop of fruit that lifts everything.
As they cool slightly, the sugar clings to the surface and creates even more texture. The aroma is warm and buttery with a hint of vanilla, while the filling keeps the flavor lively and balanced. It is sweet, yes, but never flat.
Helpful Tricks for a Smoother Baking Day
Now that you know what you are aiming for, here are a few extra tips to make the whole experience feel easier and more reliable.
- Let the dough rise in a warm, draft-free spot for the fluffiest texture.
- Fry one test round first to check whether your oil temperature is where it should be.
- Use a chopstick or small skewer to create a space for the jam before piping.
- Do not overfill, because a little jam goes a long way and keeps the center neat.
Common Mistakes and How to Dodge Them
Even a cozy recipe like this has a few places where things can go off track, but they are easy to avoid once you know what to watch for.
- If the dough feels too stiff, add 1 tablespoon of warm milk at a time until it softens slightly.
- If the pastries brown too fast, lower the oil temperature a little before frying the next batch.
- If the centers seem dense, the dough likely needed more rise time before frying.
- If the sugar coating slides off, coat them while they are still warm, not cold.
A Quick Look at the Nutrition
This kind of pastry is meant to feel like a treat, and it absolutely delivers on that promise. The numbers can vary slightly depending on how much jam is piped into each one and how much oil is absorbed during frying.
Servings: 10
Calories per serving: 290
Note: These are approximate values.
Timing at a Glance
A recipe like this feels very manageable when you can picture the full timeline. Most of the work is hands-off, which makes it a lovely weekend project.
Prep Time: 25 minutes
Cook Time: 20 minutes
Total Time: 45 minutes, plus rising time
Make-Ahead and Storage Tips
If you like planning ahead, this is where the recipe becomes even more appealing. The dough can be mixed and kneaded, then covered and refrigerated overnight for the first rise. The next day, let it sit at room temperature for about 30 to 45 minutes before rolling and shaping.
Once fried and filled, these are best the day they are made, but leftovers can be stored in an airtight container at room temperature for up to 1 day. For a slightly fresher texture, warm them very briefly before serving. If you want to freeze them, freeze the unfilled fried pastries, then thaw, warm lightly, coat in sugar, and fill before serving.
Best Ways to Serve Them
These pastries shine on their own, but they also fit beautifully into a bigger spread. Serve them with hot coffee, black tea, or a creamy latte for a café-style moment at home. For brunch, arrange them on a platter with fresh berries and extra jam on the side.
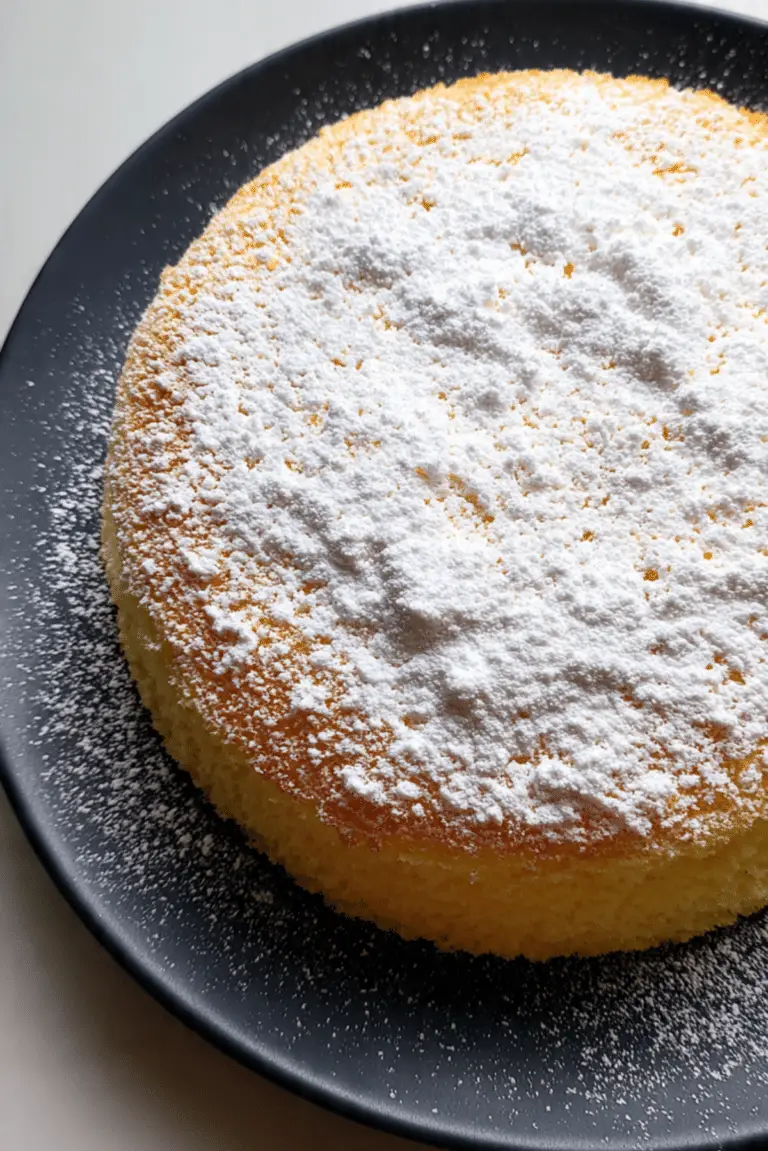
They also make a lovely dessert when served slightly warm. A small spoonful of whipped cream or a dusting of powdered sugar can make the plate feel extra inviting, though honestly, they hardly need it.
Clever Ideas for Leftovers
If you somehow end up with extras, do not worry, they can still become something fun the next day. Slice one open and warm it slightly, then serve with a spoonful of yogurt and fresh fruit for a sweet breakfast plate.
You can also cube leftovers and turn them into a playful dessert bowl layered with whipped cream and berries. It sounds a little indulgent, and it is, but that is part of the fun.
Extra Little Tips That Make a Difference
Sometimes it is the tiniest choices that take a homemade pastry from good to unforgettable. Use room temperature eggs so the dough mixes more smoothly and rises more evenly. Keep your cutter lightly floured so the dough rounds stay neat. And when piping the jam, go slowly so the filling stays centered rather than bursting through one side.
That gentle patience pays off in texture, appearance, and overall ease. And now that you have the rhythm of the recipe, it starts to feel far less intimidating.
How to Make Them Look Bakery-Worthy
Presentation is part of the joy here. Pile the finished pastries on a simple white plate or cake stand so the sugar sparkle really stands out. If one is sliced open to show the filling, place it front and center, because that ruby-red jam is hard to resist.
A little natural light goes a long way if you are photographing them. The golden crust, soft interior, and glistening filling tell the whole story beautifully with almost no effort.
Fun Variations to Try Next Time
Once you make the classic version, it is very hard not to start imagining all the possibilities. Here are a few easy ways to change the mood while keeping the same cozy spirit.
- Strawberry Jam Version: Swap the raspberry jam for strawberry for a softer, sweeter fruit flavor.
- Apricot Center: Use apricot jam for a slightly tangy, golden filling that feels especially lovely in spring.
- Citrus Sugar Finish: Add a little finely grated lemon or orange zest to the coating sugar for a brighter finish.
- Vanilla Custard Filling: Replace the jam with thick vanilla custard for a bakery-case style variation.
- Cinnamon Sugar Coating: Mix a little ground cinnamon into the sugar for a warmer, spiced edge.
FAQ’s
1. Can I make the dough by hand?
Yes, absolutely. It takes a little more effort, but hand kneading works very well. Knead until the dough feels smooth, stretchy, and slightly tacky.
2. Can I use active dry yeast instead of instant yeast?
Yes. Dissolve it in the warm milk first and let it sit for about 5 to 10 minutes until foamy before mixing with the other ingredients.
3. Why did my pastries turn out greasy?
This usually happens when the oil is too cool. Keeping the frying temperature around 350°F helps the outside set quickly and prevents excess oil absorption.
4. How do I know they are cooked through?
They should be a rich golden color on both sides and feel light for their size. Frying one test round first is a smart way to check timing.
5. Can I bake these instead of frying?
You can, but the texture will be different. Frying gives the signature crisp shell and classic flavor, while baking makes them softer and more bread-like.
6. What is the best jam to use?
Raspberry is a classic choice because it balances sweetness with a little tartness. Strawberry and apricot also work beautifully.
7. Can I fill them before frying?
It is better to fill them after frying. This keeps the shape more even and makes the process simpler, especially for beginners.
8. How long do they stay fresh?
They are best the same day, but you can enjoy them the next day as well if stored properly in an airtight container.
9. Can I prepare the dough the night before?
Yes, and it works very well. Refrigerate it after kneading, then let it come closer to room temperature before shaping.
10. How can I get an even sugar coating?
Roll them in sugar while they are still warm. That little bit of surface warmth helps the coating stick much more evenly.
Conclusion
Few homemade treats feel as rewarding as these golden, jam-filled pastries. The crisp sugared shell, the airy interior, and that bright spoonful of fruit in the middle all come together in a way that feels both cozy and a little celebratory. This one brings bakery charm right into your kitchen, and once you taste that first warm bite, you will understand exactly why it is so hard to stop at one.
Print
Crunchy Berliner
Description
Golden, sugar-coated Berliners with a lightly crunchy exterior, soft yeast dough inside, and a sweet raspberry jam filling.
Ingredients
- 3 1/2 cups all-purpose flour
- 1/4 cup granulated sugar
- 2 1/4 teaspoons instant yeast
- 1/2 teaspoon salt
- 3/4 cup whole milk, warm
- 1/4 cup unsalted butter, melted and slightly cooled
- 2 large eggs, room temperature
- 1 teaspoon vanilla extract
- 4 cups vegetable oil, for frying
- 3/4 cup raspberry jam
- 1 cup granulated sugar, for coating
Instructions
- Set up a tray lined with parchment paper, a wire rack, and a deep pot or frying pan for frying.
- In a large mixing bowl, whisk together the all-purpose flour, 1/4 cup granulated sugar, instant yeast, and salt.
- Add the warm milk, melted butter, eggs, and vanilla extract, then mix until a soft dough forms.
- Knead the dough for 8 to 10 minutes until smooth and elastic.
- Place the dough in a lightly oiled bowl, cover, and let it rise for 1 to 1 1/2 hours until doubled in size.
- Turn the dough onto a lightly floured surface and roll it to about 1/2 inch thick.
- Cut out rounds using a 3-inch cutter and place them on the prepared tray.
- Cover loosely and let the rounds rise again for 30 minutes until puffy.
- Heat the vegetable oil to 350°F in a deep pot.
- Fry the dough rounds in batches for 1 1/2 to 2 minutes per side until deeply golden.
- Transfer the fried pastries to a wire rack to drain briefly.
- While still warm, roll each one in the 1 cup granulated sugar for coating.
- Once cool enough to handle, use a piping bag to fill each pastry with raspberry jam.
- Serve slightly warm or at room temperature.
Notes
- Use warm milk, not hot, for the best yeast activity.
- Keep the oil close to 350°F so the pastries cook evenly and do not become greasy.
- Coat the pastries in sugar while they are still warm so it sticks better.
- Do not overfill with jam, a moderate amount keeps the center neat and balanced.