Crunchy Gummy Bear Hack
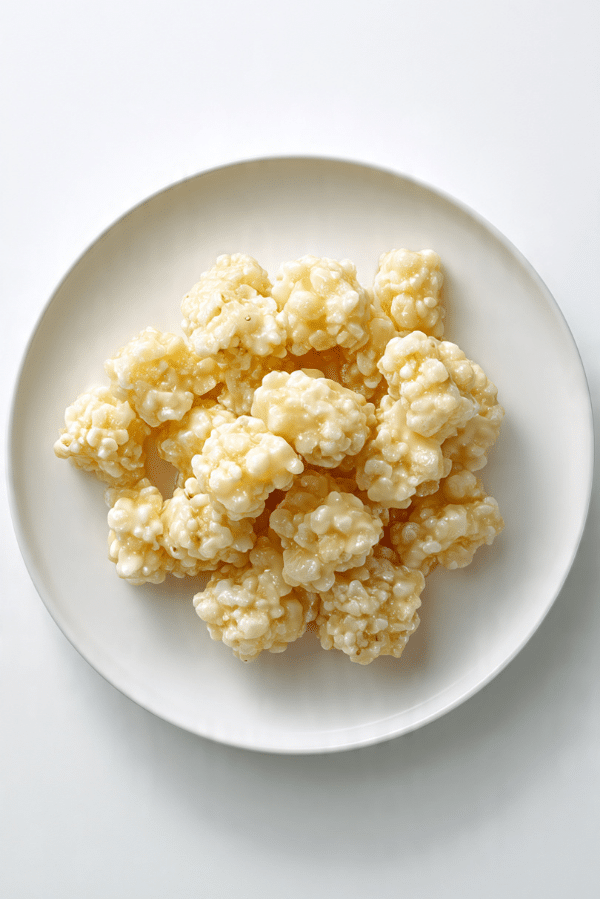
There is something wildly fun about taking a soft, chewy candy and giving it a crisp little shell that crackles when you bite in. That is exactly what happens here, and let me tell you, it is worth every bite. You get bright fruity chewiness in the middle, a creamy sweet coating around it, and that light crunch on the outside that makes the whole thing feel like a playful snack you will keep reaching for.
Why This Sweet Little Trick Is So Hard to Resist
Some recipes are about comfort, some are about nostalgia, and some are just pure fun. This one lands right in that last category. It takes a familiar candy and transforms it into something that feels fresh, clever, and surprisingly satisfying. Trust me, you’re going to love this, especially when you want a no-fuss treat that looks cute, tastes great, and comes together with barely any effort.
The Fun Story Behind This Candy Makeover
Candy hacks have been around for ages, especially the kind that turn store-bought favorites into party snacks or quick desserts. This style of treat taps into that same playful kitchen energy, where a few pantry staples can totally change texture and make something simple feel brand new. It is the kind of sweet idea that feels perfect for movie nights, sleepovers, lunchbox surprises, or those random afternoons when you want to make something fun without turning the whole kitchen upside down.
What Makes This One a Keeper Every Single Time
This easy candy treat has a lot going for it, and once you make it once, you will see why it is such a repeat-worthy idea.
Versatile: You can serve it as a snack, pack it into little treat bags, or add it to a dessert board for extra color and texture. It works for casual nights in and party tables alike.
Budget-Friendly: The ingredient list is short and simple, which means you can make a batch without spending much at all. That is always a win.
Quick and Easy: There is no complicated prep here, and the steps are super straightforward. This one is a total game-changer when you need something fast.
Customizable: You can switch up the cereal, the chocolate, or even the candy colors to match a holiday or party theme. It is easy to make it your own.
Crowd-Pleasing: Sweet, chewy, crisp, and colorful, this combination is hard to resist. Kids love it, and honestly, adults do too.
Make-Ahead Friendly: You can make a batch ahead of time and keep it chilled until you are ready to serve. That makes entertaining so much easier.
Great for Leftovers: If you somehow have extras, they store well and stay snackable. A little cold crunch the next day is actually kind of amazing.
Smart Kitchen Secrets for the Best Crunchy Finish
Before we move into the ingredients, here are a few small tricks that make a big difference.
- Keep the gummy bears cool: If they are too warm, they can get overly sticky and harder to coat neatly.
- Melt the chocolate gently: Low heat helps the coating stay smooth and glossy instead of thick or clumpy.
- Work in small batches: Coat a few pieces at a time so the cereal sticks before the chocolate starts setting.
- Use finely crushed cereal: Smaller crumbs cling better and give you a more even crisp layer.
- Chill just until set: A short chill firms everything up without making the candy too hard.
The Simple Tools That Make This Easier
You really do not need much here, which is part of the charm.
Microwave-safe bowl: This helps you melt the white chocolate chips gently and evenly.
Rubber spatula: A spatula makes stirring smooth and helps coat the candy without smashing it.
Mixing bowl: You will need this for the crushed rice cereal so the coated pieces can be rolled easily.
Parchment-lined tray or plate: This keeps the coated candies from sticking while they chill.
Rolling pin or food bag: Handy for crushing the cereal into fine crumbs without making a mess.
Everything You Need to Make This Sweet Crunchy Bite
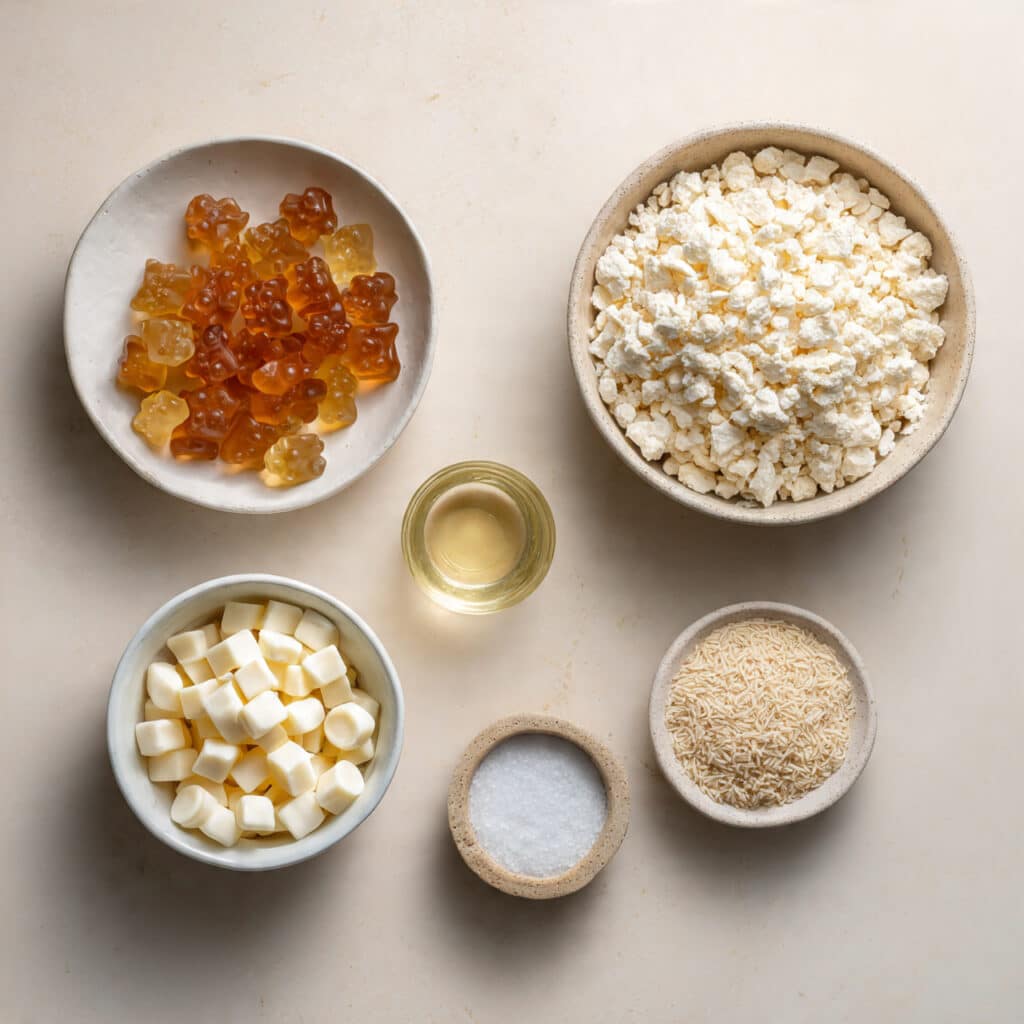
Now that the setup is out of the way, let’s dive into the ingredients that make this snack so playful and satisfying. Each one has a simple job, and together they create that chewy-crispy contrast that makes the whole thing so memorable.
- Gummy bears: 2 cups, these are the chewy, fruity center of the treat and bring all the color and candy-shop charm.
- White chocolate chips: 1 cup, melted, these create the sweet outer layer that helps the crunch stick to every piece.
- Neutral oil: 1 teaspoon, this loosens the melted chocolate just enough to make coating easier and smoother.
- Rice cereal: 1 1/2 cups, finely crushed, this adds the signature crispy finish and gives the candy its crunchy twist.
- Sea salt: 1 pinch, optional, this tiny touch helps balance the sweetness and makes the flavor pop.
Easy Swaps That Still Work Beautifully
Even simple recipes leave room to play a little, which is part of what makes them fun.
White chocolate chips: Use melted vanilla candy melts for an even smoother coating.
Rice cereal: Try crushed cornflakes if you want a slightly heartier crunch.
Neutral oil: Use refined coconut oil for a similar silky texture in the melted coating.
Sea salt: Skip it entirely if you want the flavor extra sweet and candy-like.
The Ingredients That Really Steal the Show
A couple of ingredients do most of the magic here, and they are absolutely worth noticing.
Gummy bears: Their chewiness is what makes this snack interesting. Once coated, they keep that soft center, which contrasts beautifully with the crisp shell.
Rice cereal: This is where the crunch comes from. It is light, delicate, and crisp enough to add texture without overpowering the candy underneath.
Let’s Make These Crunchy Little Treats
Now comes the fun part, and honestly, this is where the whole recipe starts feeling like a little kitchen adventure. Here are the steps you’re going to follow.
- Preheat Your Equipment: There is no oven needed for this recipe, but get your parchment-lined tray or plate ready and clear a little space in the fridge for chilling.
- Combine Ingredients: Place the white chocolate chips and neutral oil in a microwave-safe bowl. Microwave in 20-second bursts, stirring between each one, until the mixture is smooth. Put the finely crushed rice cereal in a separate bowl.
- Prepare Your Cooking Vessel: Line a tray or large plate with parchment paper so the coated candies can set without sticking.
- Assemble the Dish: Add the gummy bears to the melted white chocolate and gently stir until coated. Using a fork or spoon, lift out a few at a time and roll them in the crushed rice cereal until lightly covered on all sides.
- Cook to Perfection: There is no actual cooking here, but the setting step matters. Place the coated gummy bears on the lined tray and chill them in the refrigerator for 15 minutes, or until the coating is firm.
- Finishing Touches: Sprinkle with the tiny pinch of sea salt, if using, right before the coating fully sets so it clings nicely.
- Serve and Enjoy: Serve chilled or at cool room temperature for the best mix of chewy center and crisp outer shell.
The Texture Magic That Makes Every Bite So Good
What makes this treat so fun is the contrast. First, you get that delicate crisp snap from the cereal coating. Then the white chocolate softens on your tongue, and finally the gummy center comes through with that familiar fruity chew. The sweetness feels layered rather than flat, and that little optional pinch of salt helps keep everything balanced. It is playful, a little nostalgic, and surprisingly satisfying for something this easy.
Handy Tips for a Better Batch
A few tiny adjustments can make your results even better.
- Crush the rice cereal finely so it coats more evenly and sticks better.
- Let the melted coating cool for a minute if it feels too thin and runny.
- Chill the gummy bears for 10 minutes before coating if your kitchen is warm.
- Use a fork to lift the candies out of the chocolate so excess coating drips off first.
Common Slip-Ups and How to Avoid Them
Even easy recipes have a few spots where things can go sideways, but nothing dramatic here.
- If the coating is too thick, stir in a tiny bit more oil, about 1/4 teaspoon at a time.
- If the cereal is falling off, coat the candies while the chocolate is still fresh and tacky.
- If the gummy bears clump together, work in smaller batches instead of tossing them all at once.
- If the treats turn too hard, reduce the chilling time and serve them slightly closer to room temperature.
A Quick Look at the Nutrition
Servings: 6
Calories per serving: 210
Note: These are approximate values.
Time Breakdown at a Glance
Prep Time: 10 minutes
Cook Time: 0 minutes
Total Time: 25 minutes
Make-Ahead and Storage Tips That Actually Help
One of the nicest things about this treat is how easy it is to prep ahead. You can make the whole batch a day in advance and keep it in an airtight container in the fridge. If you want to store layers, place a sheet of parchment between them so they do not stick together. Freezing is possible too, though the texture is best from the fridge. For reheating, there is nothing to warm up here, just let them sit out for a few minutes if you want the gummy center slightly softer.
Fun Ways to Serve Them
These crunchy little bites are easy to dress up. Pile them into a small candy bowl for parties, tuck them into treat bags, or scatter them across a dessert board with cookies and fruit. They are also adorable spooned over a scoop of vanilla ice cream right before serving, where the cold creamy base plays really nicely with the chewy candy.
Clever Ideas for Leftovers
If you have extra pieces, do not just leave them sitting in the fridge forgotten.
You can chop them roughly and sprinkle them over frozen yogurt for a playful topping. You can also fold a few into popcorn mix for a sweet movie-night snack. Another fun idea is to pack them into small jars with other candies for a homemade treat mix that looks festive and colorful.
Extra Tips That Make the Whole Process Smoother
A little planning goes a long way with quick recipes like this. Measure everything before melting the chocolate so you can move fast once the coating is ready. Keep your tray close by, and try not to over-handle the coated pieces. The less fuss, the prettier they stay, and the easier the whole thing feels.
How to Make Them Look Party-Ready
Presentation is half the fun with a recipe like this. Use a white plate or parchment-lined tray to make the colors pop. Group the pieces loosely instead of stacking them too high, so you can see all that texture. For parties, tiny paper candy cups make them look extra polished with almost no effort.
Fun Variations to Try Next Time
Once you try the base version, it is hard not to start thinking of new twists.
Chocolate Crunch Version: Use milk chocolate instead of white chocolate for a deeper, candy-bar style flavor.
Cereal Mix Version: Swap half the rice cereal with finely crushed cornflakes for a more layered crunch.
Salted Sweet Version: Add a tiny extra sprinkle of flaky salt on top for a sweet-salty contrast.
Holiday Color Version: Use gummy bears in themed colors for birthdays, baby showers, or festive dessert trays.
Mini Cluster Version: Stir several coated pieces together quickly before chilling for little crunchy candy clusters.
FAQ’s
Q1: Can I use other gummy candy shapes?
Yes, absolutely. Just use similar chewy candies that are not overly soft or sugar-coated, so the coating sticks well.
Q2: Do I have to use white chocolate?
No, but it works especially well because it sets nicely and has a mellow sweetness that lets the fruity candy still shine.
Q3: Can I make these without chilling them?
You can, but chilling helps the coating set faster and gives the treats a cleaner finish.
Q4: Will the gummy bears get hard in the fridge?
They firm up a little, but they should still stay pleasantly chewy inside if you do not leave them in too long.
Q5: Can I use candy melts instead of chocolate chips?
Yes, candy melts are a great option and often make coating even easier.
Q6: What is the best way to crush the cereal?
Place it in a zip-top bag and gently crush it with a rolling pin until you get fine crumbs.
Q7: Can I make this dairy free?
You can try a dairy-free white chocolate alternative, though the taste and texture may vary a bit.
Q8: How long do these stay fresh?
They are best within 2 days, stored in an airtight container in the fridge.
Q9: Can I add sprinkles too?
Yes, but use them lightly so the crunch from the cereal still stands out.
Q10: Is this a good party recipe?
Definitely. It is colorful, easy to portion, and fun to eat, which makes it perfect for parties and casual gatherings.
Conclusion
Some treats are fancy, and some are just plain fun, and this one proudly leans into the fun. It takes a handful of simple ingredients and turns them into something crunchy, chewy, sweet, and honestly a little addictive. This one’s a total game-changer when you want something creative without making life complicated. Give it a try, share a batch, and enjoy every crisp, chewy bite.
Print
Crunchy Gummy Bear Hack
Description
A playful no-bake candy treat made with gummy bears coated in melted white chocolate and rolled in finely crushed rice cereal for the perfect chewy and crunchy bite.
Ingredients
- 2 cups gummy bears
- 1 cup white chocolate chips
- 1 teaspoon neutral oil
- 1 1/2 cups rice cereal, finely crushed
- 1 pinch sea salt (optional)
Instructions
- Line a tray or large plate with parchment paper and make room in the refrigerator for chilling.
- Place the white chocolate chips and neutral oil in a microwave-safe bowl. Microwave in 20-second intervals, stirring between each one, until smooth.
- Add the finely crushed rice cereal to a separate bowl.
- Add the gummy bears to the melted white chocolate and gently stir until evenly coated.
- Lift out a few coated gummy bears at a time with a fork or spoon and roll them in the crushed rice cereal until lightly covered on all sides.
- Place the coated pieces on the prepared tray in a single layer.
- Sprinkle with the optional pinch of sea salt.
- Chill for 15 minutes, or until the coating is set, then serve chilled or at cool room temperature.
Notes
- Work in small batches so the cereal sticks before the coating sets.
- Chill the gummy bears for 10 minutes before coating if your kitchen is warm.
- Use finely crushed cereal for the best even crunch.
- Store leftovers in an airtight container in the refrigerator for up to 2 days.