Pistachio Ferrero Rocher
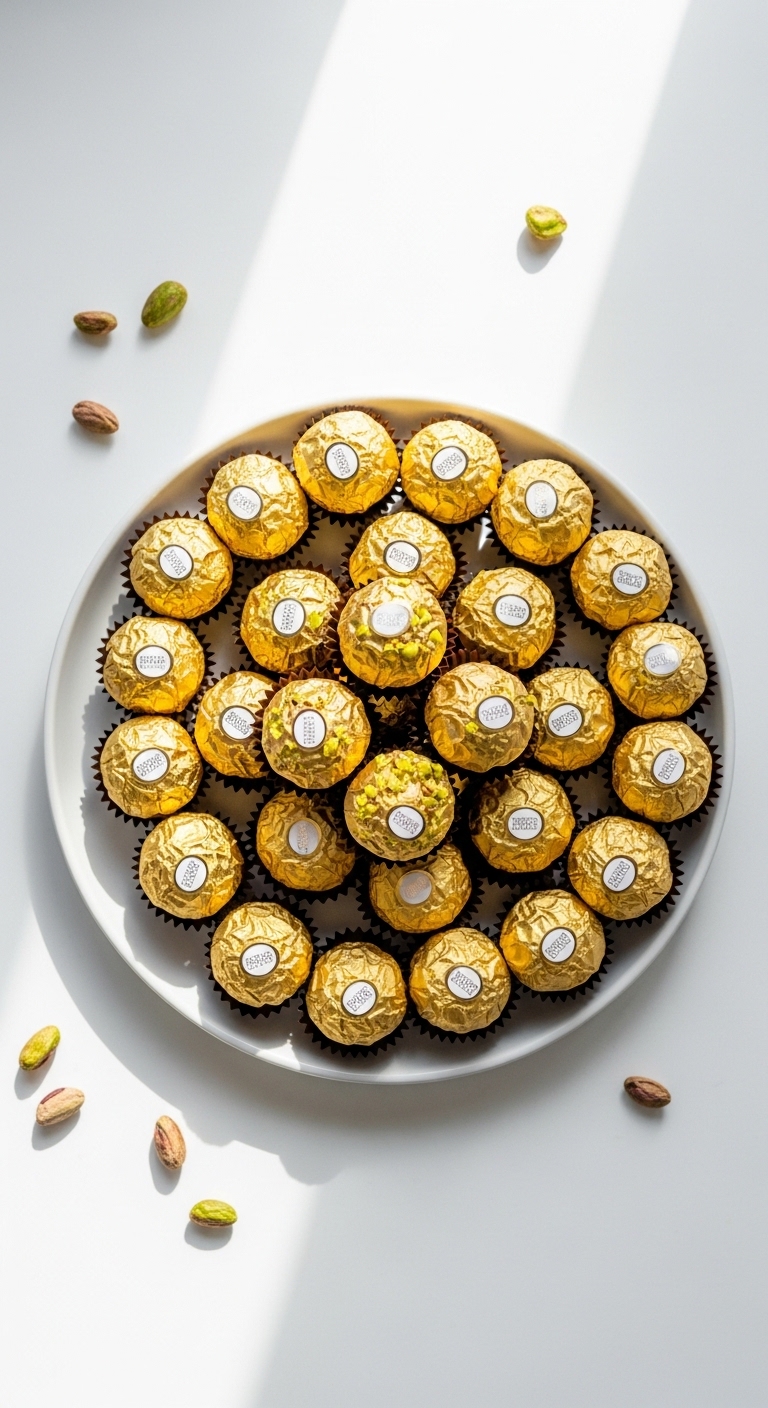
There is something almost magical about biting into a homemade Pistachio Ferrero Rocher. The crisp chocolate shell gives way to a creamy pistachio center, while the crunchy coating adds just the right amount of texture. Every bite feels rich, nutty, and satisfying. If you love elegant desserts that look impressive but are surprisingly simple to make, trust me, you’re going to love this one. The combination of smooth pistachio cream, chocolate, and delicate wafer creates a treat that feels straight out of a luxury chocolate shop.
Why These Pistachio Chocolate Truffles Are Impossible to Resist
Few desserts manage to balance crunch, creaminess, and rich flavor quite like these chocolate truffles. The pistachios bring a naturally buttery flavor, while the chocolate coating adds depth and sweetness. Let me tell you, it’s worth every bite.
Whether you’re making them for holidays, gifting them to friends, or simply treating yourself, these little bites always steal the spotlight.
The Sweet Story Behind This Elegant Treat
Ferrero Rocher chocolates first became famous for their luxurious combination of chocolate, wafer, and hazelnut. Over time, creative dessert lovers began experimenting with different fillings and coatings.
This pistachio-inspired version takes that beloved concept and gives it a Mediterranean twist. Pistachios have been treasured for centuries throughout Italy, Turkey, and the Middle East, making them a perfect ingredient for creating a sophisticated homemade confection.
What Makes This Recipe So Reliable Every Time
This dessert has earned a permanent place in many kitchens for good reason.
Versatile: Perfect for holiday platters, dessert tables, edible gifts, or afternoon treats.
Budget-Friendly: Homemade versions cost far less than premium boxed chocolates.
Quick and Easy: No complicated equipment or advanced baking skills are required.
Customizable: You can adjust the chocolate type or coating to suit your taste.
Crowd-Pleasing: Chocolate and pistachio are a combination that rarely disappoints.
Make-Ahead Friendly: These chocolates can be prepared several days in advance.
Great for Leftovers: They stay delicious for days when stored properly.
Expert Secrets for Perfect Results
Making beautiful homemade chocolates becomes much easier when you know a few tricks.
- Finely chop the pistachios for an even coating.
- Chill the filling mixture before shaping.
- Use high-quality chocolate for smoother melting.
- Freeze the shaped balls briefly before dipping.
- Work in small batches while coating.
Kitchen Essentials You’ll Want Nearby
Before we begin, gather a few simple tools.
Mixing Bowl: For combining the filling ingredients.
Food Processor: Helps create smooth pistachio crumbs.
Baking Sheet: Useful for chilling the shaped truffles.
Microwave-Safe Bowl: For melting chocolate.
Fork or Dipping Tool: Makes coating easier and cleaner.
The Ingredients That Make Every Bite Special
The beauty of this dessert comes from the way each ingredient contributes to the final flavor and texture.
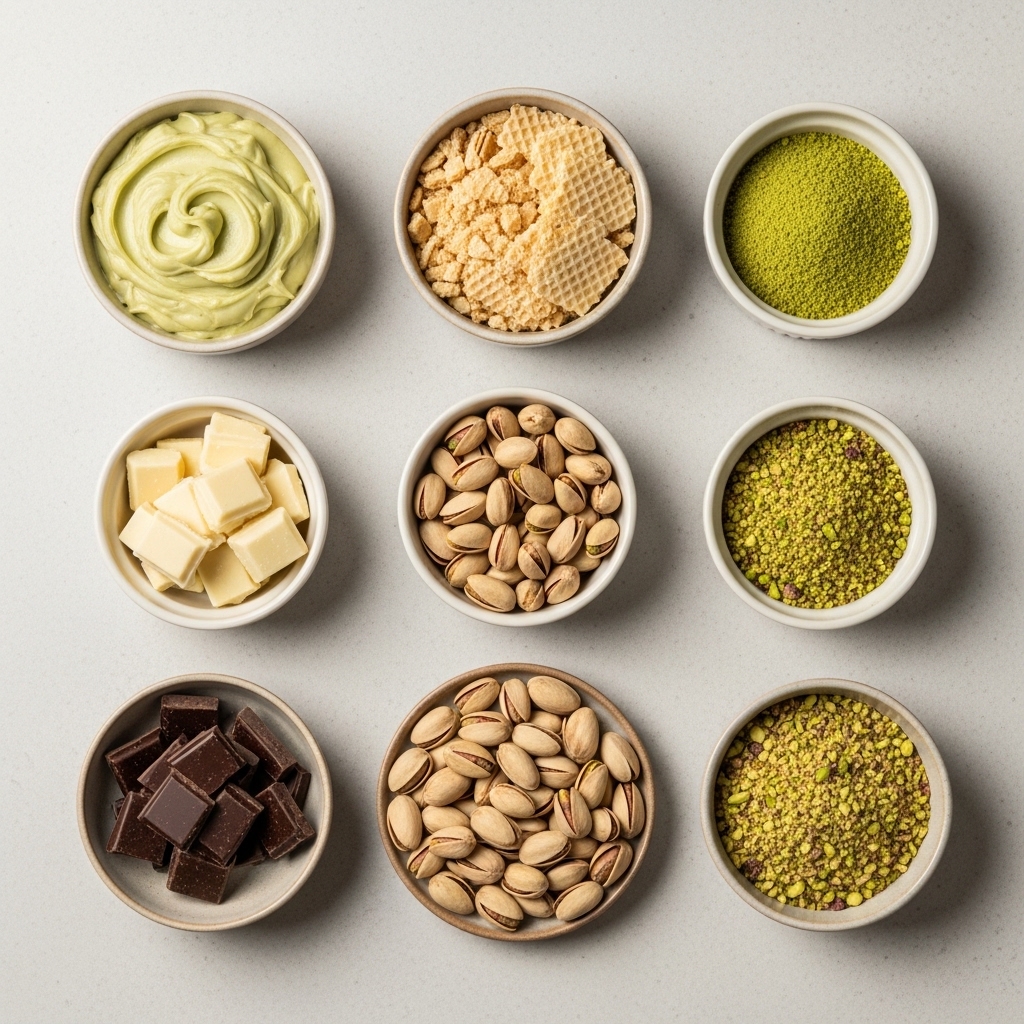
- Pistachio Cream: 1 cup, creates the rich nutty center.
- Crushed Wafer Cookies: 1 cup, provides signature crunch.
- Finely Ground Pistachios: 1 cup, adds flavor and texture.
- White Chocolate: 8 ounces, melted for binding the filling.
- Dark Chocolate: 12 ounces, melted for the outer coating.
- Whole Pistachios: 18 pieces, one hidden inside each truffle.
- Crushed Pistachios: 1 cup, used for the exterior coating.
Simple Ingredient Swaps That Work Beautifully
Sometimes flexibility makes a recipe even better.
White Chocolate: Milk chocolate can be substituted.
Dark Chocolate: Semi-sweet chocolate works wonderfully.
Wafer Cookies: Vanilla wafers are a great alternative.
Pistachio Cream: Pistachio butter may be used.
Spotlight on the Star Ingredients
The success of these truffles comes down to a couple of standout ingredients.
Pistachios: Their naturally buttery flavor creates depth and elegance.
Dark Chocolate: Provides a rich contrast to the sweet filling.
Let’s Create These Beautiful Chocolates Together
Now comes the fun part. The process is simple, relaxing, and incredibly rewarding.
1. Preheat Your Equipment:
No oven is required. Line a baking sheet or tray with parchment paper.
2. Combine Ingredients:
Mix pistachio cream, crushed wafer cookies, ground pistachios, and melted white chocolate until fully combined.
3. Prepare Your Cooking Vessel:
Place the mixture in the refrigerator for 30 minutes to firm up.
4. Assemble the Dish:
Scoop portions of the mixture, place a whole pistachio in the center of each, and roll into 18 balls.
5. Cook to Perfection:
Freeze the balls for 15 minutes. Dip each into melted dark chocolate and coat completely.
6. Finishing Touches:
Immediately roll the coated chocolates in crushed pistachios.
7. Serve and Enjoy:
Allow the coating to set completely before serving.
The Texture and Flavor Experience
The first thing you’ll notice is the crisp chocolate shell. Then comes the creamy pistachio center, followed by the crunch of wafer cookies and chopped nuts. The combination creates layers of texture that make each bite more satisfying than the last.
The flavor develops gradually, starting with rich chocolate and finishing with the lingering buttery sweetness of pistachios.
Helpful Tricks for Even Better Results
A few small adjustments can make a big difference.
- Chill the mixture thoroughly before shaping.
- Use freshly crushed pistachios for the brightest flavor.
- Melt chocolate slowly to avoid overheating.
- Store finished chocolates in a cool environment.
Common Mistakes and How to Avoid Them
Even simple recipes can have a few challenges.
- Avoid warm filling, which can make shaping difficult.
- Do not overheat chocolate during melting.
- Skip large pistachio pieces in the coating for a smoother finish.
- Avoid storing in direct sunlight or warm kitchens.
Nutritional Snapshot
Servings: 18 truffles
Calories per serving: 180
Note: These are approximate values.
Time You’ll Need
Prep Time: 30 minutes
Cook Time: 15 minutes
Total Time: 45 minutes
Make-Ahead and Storage Guide
These chocolates are excellent for planning ahead. You can prepare them several days before serving and store them in an airtight container in the refrigerator.
For longer storage, freeze them for up to two months. Allow them to thaw gradually in the refrigerator before serving. This helps preserve both texture and flavor.
Delicious Ways to Serve Them
Serve these chocolates alongside coffee, espresso, or tea for a sophisticated dessert experience.
They also look stunning arranged on holiday dessert trays, packaged in gift boxes, or paired with fresh berries.
Transforming Leftovers Into Something New
If you happen to have extras, there are plenty of creative possibilities.
- Chop them and sprinkle over ice cream.
- Add pieces to brownie batter.
- Use as a topping for cheesecakes.
- Mix into dessert parfaits.
Extra Tips for Success
Fresh pistachios provide the best flavor and color.
Allow the chocolates to sit at room temperature for a few minutes before serving for the ideal texture.
Store in airtight containers to maintain freshness.
Turning Your Dessert Into a Showpiece
Presentation makes these chocolates even more impressive.
Arrange them in neat rows on a white platter and garnish with a few whole pistachios in small bowls nearby. A dusting of finely ground pistachios around the serving dish creates an elegant look.
Fun Variations Worth Trying
White Chocolate Pistachio Version
Replace dark chocolate coating with white chocolate.
Salted Pistachio Edition
Add a small pinch of sea salt to the filling.
Extra Crunch Version
Mix chopped roasted pistachios into the center.
Chocolate Lovers Version
Use chocolate wafer cookies instead of vanilla.
Mini Truffles
Make smaller bite-sized versions for parties.
FAQ’s
Q1: Can I make these ahead of time?
Yes. They store beautifully for several days.
Q2: Can I freeze them?
Absolutely. Freeze for up to two months.
Q3: Can I use milk chocolate?
Yes, if you prefer a sweeter finish.
Q4: Do I need a food processor?
It helps, but finely chopping by hand also works.
Q5: How do I keep the coating smooth?
Use properly melted chocolate and chilled centers.
Q6: Can I use pistachio butter?
Yes, it works well as a substitute for pistachio cream.
Q7: Why are my truffles soft?
The filling likely needs additional chilling time.
Q8: Can I make them gluten-free?
Yes, simply use gluten-free wafer cookies.
Q9: How long do they last in the refrigerator?
About one week in an airtight container.
Q10: Can children help make them?
Yes. Rolling and coating are fun family-friendly tasks.
Conclusion
Pistachio Ferrero Rocher combines rich chocolate, creamy pistachio filling, and irresistible crunch in every bite. It looks luxurious, tastes incredible, and comes together with surprisingly simple ingredients. This one’s a total game-changer for anyone who loves elegant homemade treats. Once you make a batch, you’ll understand exactly why these little chocolates disappear so quickly.
Print
Pistachio Ferrero Rocher
Description
Luxurious homemade Pistachio Ferrero Rocher truffles featuring a creamy pistachio center, crunchy wafer pieces, rich dark chocolate coating, and a crisp pistachio exterior.
Ingredients
- 1 cup pistachio cream
- 1 cup crushed wafer cookies
- 1 cup finely ground pistachios
- 8 ounces white chocolate, melted
- 12 ounces dark chocolate, melted
- 18 whole pistachios
- 1 cup crushed pistachios
Instructions
- Line a tray with parchment paper.
- Mix pistachio cream, crushed wafer cookies, ground pistachios, and melted white chocolate until combined.
- Refrigerate the mixture for 30 minutes.
- Shape into 18 balls and place one whole pistachio inside each ball.
- Freeze for 15 minutes.
- Dip each ball into melted dark chocolate.
- Roll immediately in crushed pistachios.
- Allow coating to set completely before serving.
Notes
- Use high-quality chocolate for the best flavor.
- Chill the filling thoroughly before shaping.
- Store in an airtight container in the refrigerator.
- Freeze for up to 2 months if needed.